
If you’ve ever wanted to create a warm, glowing atmosphere with copper LED string lights, wiring them together might seem tricky. But what if you could do it yourself, quickly and safely, to light up your space exactly how you want?
In this guide, you’ll discover simple steps to wire your copper LED string lights together like a pro. By the end, you’ll have the confidence and know-how to brighten up your home, party, or special event with ease. Ready to transform your lighting setup?
Let’s get started!
Tools And Materials Needed
Before wiring copper LED string lights together, gather all necessary tools and materials. Proper preparation makes the process smooth and safe. Using the right items also ensures a neat and lasting connection.
Essential Tools
Start with basic tools like wire cutters and strippers. These help trim and prepare the copper wires without damage. A soldering iron provides a strong, stable connection between wires. Heat shrink tubing or electrical tape protects the joints from moisture and wear. A multimeter checks the electrical continuity and voltage. Needle-nose pliers assist in bending and holding small wires. Safety gloves and goggles protect your hands and eyes during work.
Choosing The Right Copper Led String Lights
Select LED string lights with copper wires for easy wiring. Look for flexible, thin copper wiring that handles bending well. Choose lights with low voltage to reduce electrical risks. Check the length and number of LEDs to fit your project needs. Make sure the lights come with clear polarity markings for correct wiring. Waterproof or weather-resistant options suit outdoor use.
Additional Supplies
Extra copper wire helps extend or connect multiple strings. Wire connectors or terminal blocks offer alternative joining methods. Solder and flux improve electrical contact quality when soldering. Cable ties keep wires organized and secure. A small ruler or tape measure ensures accurate wire lengths. A clean cloth removes dirt from wires before soldering.

Credit: www.amazon.com
Preparing The Copper Led String Lights
Preparing copper LED string lights is the first step for safe wiring. This step ensures the lights work well together. Proper preparation helps avoid issues later. Follow each step carefully for best results.
This section covers inspecting the lights, stripping wire ends, and organizing the strings. These actions make the wiring process smoother and safer.
Inspecting The Lights
Start by checking each string for damage. Look for broken bulbs or frayed wires. Make sure all bulbs are firmly attached. Test the lights by plugging them in briefly. Replace any faulty bulbs or wires before proceeding.
Stripping The Wire Ends
Use a wire stripper to remove about half an inch of insulation. Be gentle to avoid cutting the copper wire inside. Expose the copper wire on both ends of each string. This step allows the wires to connect easily. Keep the exposed wire clean and free of debris.
Organizing The Strings
Lay out all the strings on a flat surface. Arrange them in the order you want to connect. Make sure the ends are close to each other. Avoid tangles and twists in the wires. Organizing helps you connect the lights quickly and safely.
Wiring Basics For Led Strings
Wiring copper LED string lights is simple once you know the basics. Understanding how to connect wires correctly keeps your lights bright and safe. It also helps your LED strings last longer. This section explains the key points about wiring LED strings.
Understanding Wire Polarity
LEDs need the right polarity to work. This means you must connect positive wires to positive terminals and negative wires to negative terminals. Mixing these up will stop the lights from working. Copper wire usually has a color code. Use red or copper for positive and black or green for negative. This helps avoid mistakes.
Series Vs Parallel Wiring
There are two ways to wire LED strings: series and parallel. In series wiring, LEDs connect one after another. The same current flows through all lights. If one LED breaks, the whole string goes out. In parallel wiring, each LED has its own path. If one LED breaks, others keep working. Parallel wiring is safer and more common for copper LED strings.
Safety Precautions
Safety is key when wiring LED strings. Always turn off power before starting work. Use insulated tools to avoid shocks. Check wires for damage and replace any that look worn. Keep wires away from water and heat sources. Follow the manufacturer’s instructions for voltage and current limits. This prevents fire and electrical hazards.
Step-by-step Wiring Process
Wiring copper LED string lights together requires careful steps. Follow this process to ensure a safe and functional connection. The steps are simple and clear. Each step builds on the last. This guide helps you connect wires properly and test the setup before use.
Connecting The First Wire Ends
Start by stripping the insulation from the wire ends. Use wire strippers to expose about half an inch of copper. Twist the exposed copper wires tightly to avoid fraying. Match the positive and negative wires by color or markings. Connect the wires by twisting them together firmly. This ensures a strong electrical connection.
Securing The Connections
Cover the twisted wire ends with electrical tape. Wrap the tape tightly to prevent wires from touching each other. Use wire nuts or heat shrink tubing for extra security. These materials protect the connection from moisture and damage. Make sure no bare wire is visible after securing.
Testing The Connection
Plug in the lights to check if they work. Look for any flickering or dim bulbs as signs of loose connections. If a problem appears, unplug and recheck the wire twists. Ensure the tape or tubing is not too tight or loose. Once the lights shine evenly, your wiring is complete.
Common Wiring Mistakes To Avoid
Wiring copper LED string lights may seem simple. Yet, many beginners make common mistakes that cause problems. Avoiding these errors helps keep your lights safe and bright. Understanding what to watch out for saves time and effort.
Overloading The Circuit
Do not connect too many LED strings to one outlet. Overloading causes the circuit to trip or wires to heat. Check the total wattage of your lights. Keep it below the maximum load of your power source. Use multiple outlets if needed to share the load.
Poor Connection Techniques
Loose or weak connections cause flickering or lights to fail. Make sure wires are stripped correctly before joining. Use wire nuts or proper connectors for a solid link. Avoid twisting wires without securing them. Test connections before finalizing the setup.
Ignoring Voltage Limits
Each LED string has a voltage rating. Do not exceed this limit by connecting too many in series. Excess voltage can burn out the LEDs quickly. Use a multimeter to check voltage across your setup. Follow manufacturer guidelines to match voltage and string length.
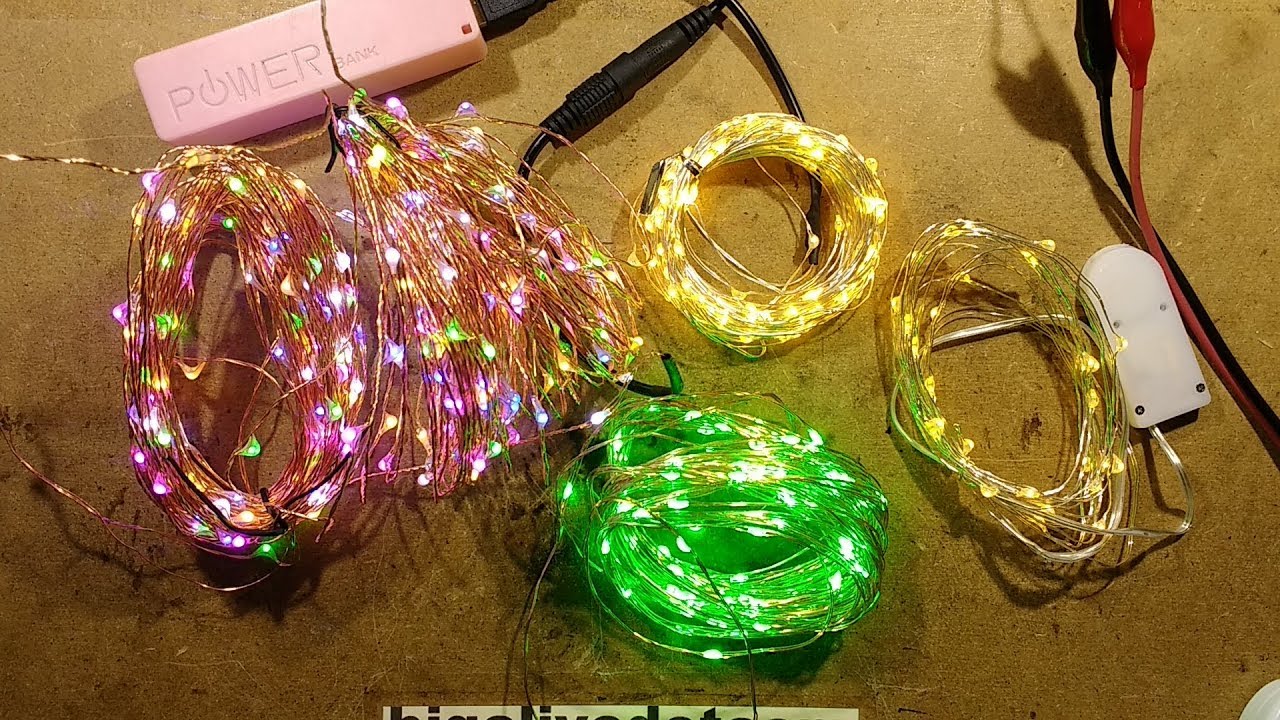
Credit: www.youtube.com
Tips For Extending And Customizing
Extending and customizing copper LED string lights can brighten up any space. Proper wiring ensures safety and a clean look. This section shares simple tips to help you add length and fit your needs.
Adding More Led Strings
Start by checking the power rating of your lights. Avoid exceeding the maximum wattage to prevent overheating. Connect additional strings by matching the positive and negative wires. Use wire nuts or solder for a secure hold. Test each connection before finalizing the setup.
Custom Length Adjustments
Measure the space carefully before cutting wires. Use wire cutters designed for copper to avoid fraying. Strip the ends gently to expose the copper wire. Join wires using electrical tape or connectors to keep them insulated. Keep your cuts neat to maintain the lights’ appearance.
Using Connectors And Adapters
Choose connectors that fit your wire size and type. Snap-on connectors make joining wires easier and safer. Adapters help link different types of string lights together. Always use outdoor-rated connectors for exterior setups. Check all connections for tightness and secure fit.
Maintenance And Troubleshooting
Proper maintenance and troubleshooting keep your copper LED string lights working well. Small issues can stop lights from shining bright. Regular checks help spot problems early. Fixing problems quickly saves time and money.
Identifying Faulty Connections
Look for lights that do not turn on. Check each bulb and its socket carefully. Loose wires cause many connection problems. Wiggle the wires gently to find weak spots. Look for corrosion or broken wires on the copper string. Use a multimeter to test electrical flow. Faulty connections often show no voltage or irregular current. Fixing these spots restores light to the whole string.
Replacing Damaged Sections
Cut out any damaged part of the copper wire carefully. Use wire strippers to remove insulation without harming the wire. Replace the section with a new copper wire piece of the same gauge. Use solder or wire connectors to join wires tightly. Make sure connections are secure and insulated with electrical tape. Test the string before finalizing the repair. Replacing damaged parts ensures safe and bright lights.
Cleaning And Storage
Keep your copper LED string lights clean. Dirt and dust block light and cause overheating. Use a soft cloth to wipe the wires and bulbs. Avoid harsh chemicals that can damage copper or LEDs. Store lights in a dry, cool place after use. Coil the string gently to avoid kinks or breaks. Proper cleaning and storage extend the life of your lights.
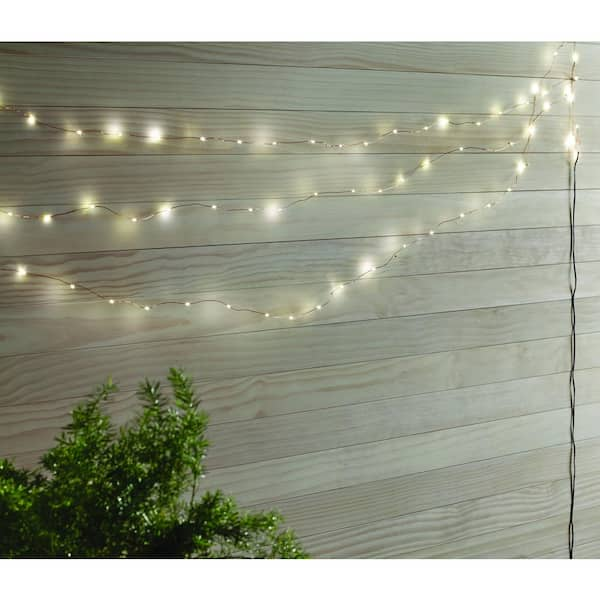
Credit: www.homedepot.com
Frequently Asked Questions
How Do I Connect Copper Led String Lights Safely?
Use insulated copper wire and connect positive to positive, negative to negative. Secure connections with electrical tape or wire connectors for safety.
Can I Wire Multiple Copper Led Strings Together?
Yes, but ensure the total voltage does not exceed the power supply limit to prevent overheating and damage.
What Tools Do I Need To Wire Copper Led String Lights?
You need wire cutters, wire strippers, electrical tape, and optionally soldering tools for secure and lasting connections.
How Do I Prevent Copper Led Lights From Short-circuiting?
Keep wires insulated, avoid exposed copper touching, and use proper connectors to prevent short circuits and ensure safe operation.
Conclusion
Wiring copper LED string lights is simple with the right steps. Always check connections to keep lights bright and safe. Use tools carefully and follow safety tips. Test your lights before hanging them. Enjoy the warm glow from your neatly wired strings.
This project saves money and adds charm to any space. Keep practicing to improve your wiring skills. Small effort brings big light results.