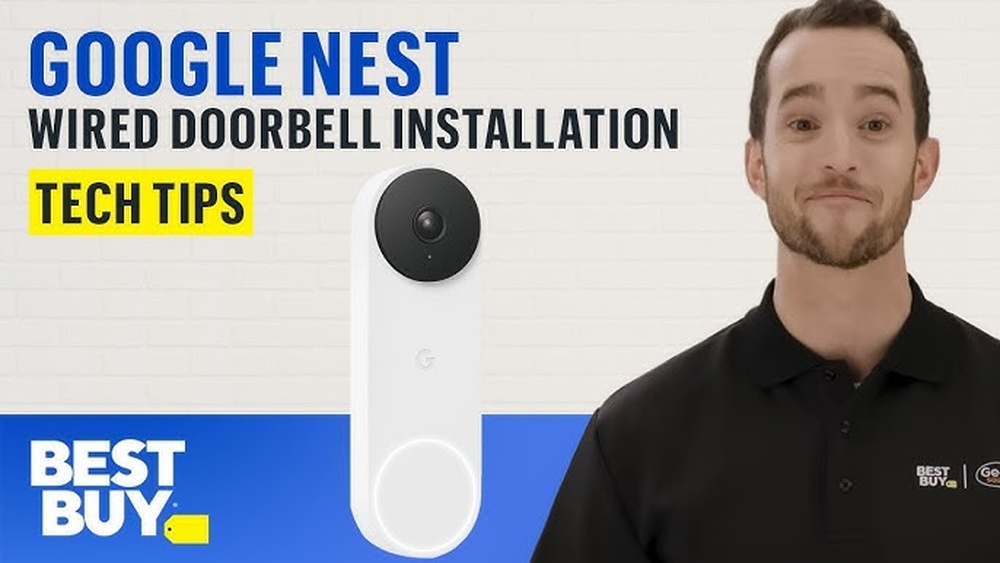

Are you ready to boost your home security with the Google Nest Video Doorbell? Installing this smart device might seem tricky, but it’s easier than you think.
In this guide, you’ll find simple, step-by-step instructions that anyone can follow. By the end, you’ll have a clear view of your doorstep right from your phone. Keep reading to discover how to set up your Nest Doorbell quickly and start enjoying peace of mind today.
Prepare For Installation
Preparing for your Google Nest Video Doorbell installation is important. This step helps the process go smoothly and saves time. Before starting, gather all necessary tools, check safety rules, and confirm your Wi-Fi works with the device. These actions make the setup easier and safer.
Check Required Tools
Gather the tools before installation starts. You will need a drill, screwdriver, and a level. Have a pencil ready to mark spots on the wall. Also, keep the Nest Video Doorbell and its mounting kit nearby. Having everything at hand speeds up the work.
Review Safety Precautions
Safety comes first during installation. Turn off the power to the doorbell wiring at the breaker box. Use a voltage tester to confirm no electricity flows. Wear safety glasses to protect your eyes. Follow all safety instructions in the Nest manual to avoid accidents.
Verify Wi-fi Compatibility
Check your Wi-Fi speed and signal strength at the doorbell spot. The Nest Doorbell needs a strong 2.4 GHz or 5 GHz connection. Use your phone to test signal strength near the door. A weak signal can cause video lag or connection loss. Ensure your network supports the device for best results.
Unbox And Inspect
Starting your Google Nest Video Doorbell setup begins with unboxing and inspection. This step ensures you have all parts ready for installation. It helps avoid delays and surprises later.
Careful inspection protects your device from damage during shipping. Check each component for any visible issues. Confirm nothing is missing before moving forward.
Identify Components
Open the box carefully. Inside, you will find the doorbell, mounting plate, screws, and anchors. Also included are a charging cable and quick start guide.
Check the doorbell for scratches or cracks. Verify the mounting plate has no bends or damage. Confirm all screws and anchors are present.
Review the quick start guide. It helps with the installation process. Keep it nearby for reference.
Charge The Doorbell Battery
The doorbell battery may have low power when new. Connect the charging cable to the doorbell. Plug the other end into a USB power source.
Charge the battery fully before installation. It usually takes a few hours. A full charge ensures the doorbell works without interruptions.
Watch the LED indicator light. It shows the charging status. When the light turns solid, the battery is ready.
Choose Installation Location
Choosing the right spot for your Google Nest Video Doorbell is important. The correct location helps the doorbell work well and keeps your home safe. Think about where visitors usually stand and how clear the view should be. The doorbell must capture faces and movements clearly. This section guides you on picking the best place to install your video doorbell.
Select Optimal Height
Place the doorbell at eye level. Around 48 inches from the ground works best. This height captures faces clearly and records visitors easily. Avoid placing it too high or too low. Too high can miss faces. Too low might catch feet or other unclear images.
Consider Wi-fi Signal Strength
Check your Wi-Fi signal near the door. Strong signal ensures smooth video streaming. Weak Wi-Fi can cause delays or lost footage. Move closer to your router if needed. Or use a Wi-Fi extender to boost signal. Good signal means better alerts and clearer videos.
Avoid Obstructions
Keep the doorbell clear of plants, decorations, or walls. Obstructions can block the camera view. Avoid placing it behind poles or corners. Make sure nothing covers the lens or motion sensors. Clear view helps the doorbell detect visitors fast and record well.

Credit: www.arloren.com
Remove Existing Doorbell
Removing your old doorbell is the first step to install the Google Nest Video Doorbell. It prepares your door for the new device. Handle this task carefully to avoid electrical issues. Follow clear steps to make the process safe and smooth.
Turn Off Power
Start by turning off the power to your doorbell at the circuit breaker. This stops electricity from flowing to the wires. Use a tester to check that power is off before touching anything. Safety first to prevent shocks.
Detach Old Doorbell
Remove the doorbell cover by unscrewing it. Gently pull the doorbell away from the wall. Be careful not to damage the wires behind it. Keep the screws in a safe place for later use or disposal.
Label Wires
Look at the wires connected to your old doorbell. Use small pieces of tape to mark each wire with a letter or number. This helps identify the wires during the new doorbell installation. Clear labels save time and avoid confusion.
Install Nest Doorbell
Installing your Google Nest Video Doorbell is simple and quick. Follow these steps carefully to ensure your doorbell works perfectly. Start by preparing your tools and turning off power to the doorbell wires for safety. Each step builds on the last, so pay attention to details.
Connect Wires
First, connect the doorbell wires to the Nest Doorbell. Match the wires to the screws on the back of the device. Tighten the screws to hold the wires firmly. Make sure no bare wire is showing. Double-check the connection for a secure fit.
Mount The Doorbell
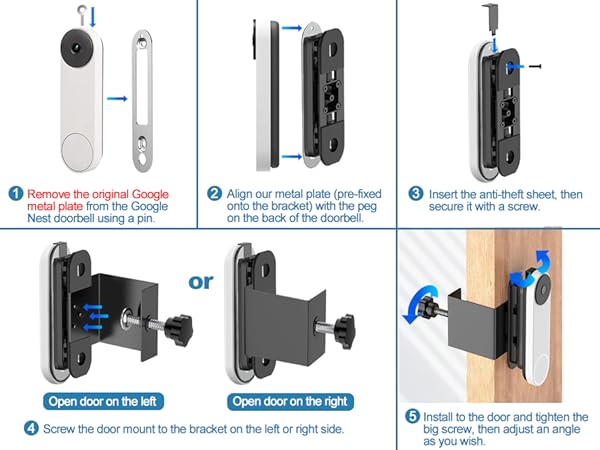
Next, place the mounting bracket on your wall or door frame. Use a level to keep it straight. Mark the screw holes with a pencil. If your wall is brick or concrete, use the included anchors. Drill holes where you marked, then attach the bracket using screws.
Secure With Screws
Finally, attach the Nest Doorbell to the mounting bracket. Press the doorbell firmly until it clicks in place. Secure it by tightening the small screws at the bottom. These screws prevent the doorbell from falling or being stolen. Your doorbell is now ready for setup and use.
Credit: www.amazon.com
Set Up In Google Home App
Setting up your Google Nest Video Doorbell in the Google Home app is simple. This step lets your doorbell connect to your home network and work with other smart devices. Follow these easy steps to get started.
Create Or Log In To Account
Open the Google Home app on your phone. You need a Google account to use the app. If you do not have one, create a new account. If you already have an account, just log in with your email and password. This step keeps your device secure and lets you control it from anywhere.
Add New Device
In the app, tap the plus (+) icon. Choose “Set up device” from the menu. Then select “New device” to begin adding your doorbell. The app will search for nearby devices. When it finds your Nest Video Doorbell, select it to start the setup. Follow on-screen instructions carefully to avoid errors.
Connect To Wi-fi
Your doorbell needs Wi-Fi to work properly. The app will ask you to pick your home Wi-Fi network. Enter your Wi-Fi password to connect. Make sure your phone is near the doorbell during this step. A strong Wi-Fi signal helps your doorbell work without interruptions.
Test Functionality
Testing the Google Nest Video Doorbell is an important step. It ensures your device works correctly and keeps your home secure. This process checks the video, doorbell button, and notifications. Follow these simple steps to confirm everything functions well.
Check Video Feed
Open the Nest app on your phone. Look at the live video feed from your doorbell. The image should be clear and real-time. Move around in front of the doorbell to see if it catches motion quickly. Ensure the video quality matches your expectations.
Test Doorbell Button
Press the doorbell button. Listen for the chime sound inside your home. Check if the doorbell light activates. The button should feel responsive and easy to press. Make sure the sound is loud enough to hear from different rooms.
Verify Notifications
Check your phone for notifications after pressing the doorbell. You should get an alert instantly. Test motion alerts by walking near the doorbell. Notifications must arrive without delay. This helps you stay informed about visitors or activity.
Troubleshoot Common Issues
Troubleshooting is key to a smooth Google Nest Video Doorbell setup. Some problems may block the installation or reduce its performance. This section helps solve common issues fast. Clear steps and simple checks keep your doorbell working well.
Wi-fi Connectivity Problems
The doorbell needs a strong Wi-Fi signal. Place it close to your router for the best connection. Restart your router if the doorbell does not connect. Check your network password carefully. Avoid networks with many devices. Use 2.4 GHz Wi-Fi, not 5 GHz. This band works better with Nest devices.
Power Supply Issues
Power problems cause the doorbell to fail or stop working. Ensure the doorbell is wired correctly. Use the recommended transformer to avoid low power. Check if the wires are loose or damaged. If the doorbell has a battery, charge it fully. A stable power source keeps your device running all day.
App Setup Errors
App setup errors can block the doorbell activation. Update the Google Home app to the latest version. Clear app cache if it freezes or crashes. Confirm your Google account is active and logged in. Follow the app instructions step-by-step. Restart your phone if the app doesn’t respond. These tips help complete the setup without errors.
Maintain Your Doorbell
Maintaining your Google Nest Video Doorbell keeps it working well for a long time. Regular care helps the device stay clean, powered, and updated. This section guides you on simple steps to maintain your doorbell easily. Follow these tips to enjoy clear videos and reliable alerts every day.
Regular Cleaning Tips
Clean the doorbell surface gently using a soft cloth. Avoid harsh chemicals that can damage the camera lens. Wipe away dust, dirt, and spider webs regularly. Keep the sensor and microphone clear for better performance. Clean the doorbell at least once a month for best results.
Battery Replacement
Check your doorbell battery level through the app often. Replace the battery when the charge gets low. Use the recommended battery type to avoid damage. Remove the doorbell from its mount carefully before replacing the battery. Charge the new battery fully before installing it back.
Software Updates
Keep your doorbell software up to date for security and features. The app usually notifies you when updates are ready. Connect your doorbell to Wi-Fi for a smooth update process. Install updates promptly to fix bugs and improve performance. Regular updates keep your device safe and efficient.

Credit: kdfoundation.org
Frequently Asked Questions
How Do I Install Google Nest Video Doorbell?
To install, turn off power, remove old doorbell, connect wires to Nest, mount it, and restore power. Follow the app setup to complete installation.
What Tools Are Needed To Install Nest Video Doorbell?
You need a screwdriver, drill, level, and voltage tester. These tools help safely mount and wire the doorbell for optimal performance.
Can I Install Nest Doorbell Without Professional Help?
Yes, the Nest Doorbell is designed for easy DIY installation. Follow the step-by-step guide and app instructions to install it safely and correctly.
How Long Does Nest Doorbell Installation Take?
Installation typically takes 20-30 minutes. Time varies based on your doorbell wiring and mounting surface complexity.
Conclusion
Installing the Google Nest Video Doorbell is simple and quick. Follow each step carefully to avoid mistakes. Double-check connections to ensure the device works well. Test the doorbell before finishing to confirm it records and alerts properly. This smart doorbell helps keep your home safe and connected.
Enjoy peace of mind with every visitor you see. Stay secure with technology that fits your needs. Your new doorbell will make your home smarter today.