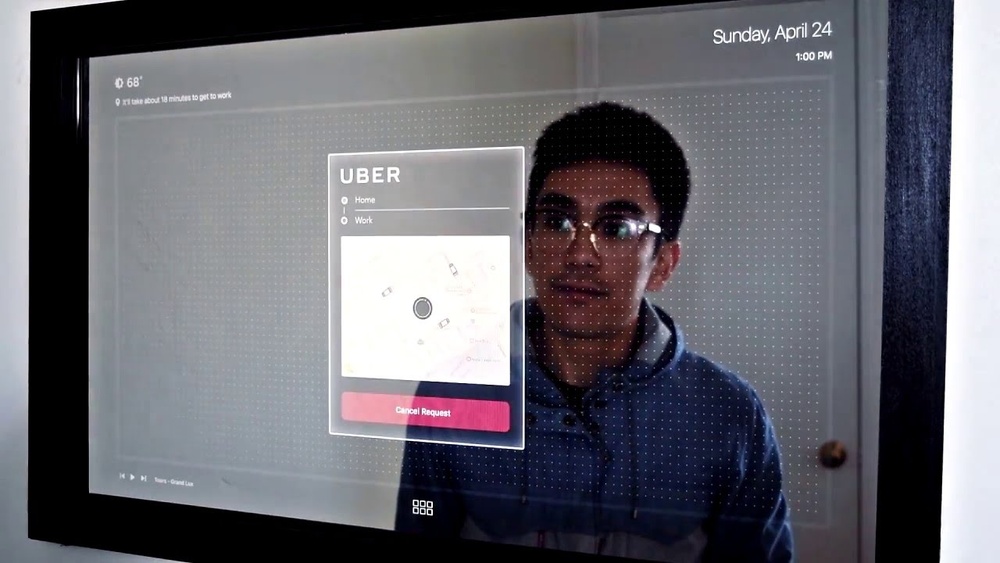

Imagine looking into your mirror and not just seeing your reflection but also checking the weather, reading your messages, or controlling your smart home—all with a simple touch. Building a smart mirror touch screen might sound complicated, but what if you could create one yourself, step by step?
In this guide, you’ll discover how to turn an ordinary mirror into a powerful, interactive device that fits perfectly into your daily routine. Ready to impress yourself and your guests with a smart mirror that’s both stylish and functional? Let’s dive in and make it happen together.

Credit: community.home-assistant.io
Materials Needed
Building a smart mirror with a touch screen needs specific materials. Gathering the right parts helps the project go smoothly. This list shows the main items you will need. Prepare each component before starting the assembly.
Smart Mirror Components
Start with a two-way mirror. It lets the display shine through but looks like glass. Choose a size that fits your space.
Next, get a monitor or screen. It will show information behind the mirror. Pick one that matches the mirror size.
A computer or small board like a Raspberry Pi is essential. It runs the software and controls the display.
Touch Screen Hardware
A touch frame or overlay turns the mirror into a touch screen. It fits over the monitor and detects your finger taps.
Make sure the touch hardware matches the screen size. USB cables connect it to the computer.
Calibration tools help align the touch input with the display correctly.
Tools And Accessories
You will need screwdrivers and a drill for assembly. A hot glue gun or double-sided tape helps secure parts.
Use cable ties to keep wires neat and safe. A frame or box holds the mirror and electronics together.
Power strips and adapters supply electricity to all devices. A keyboard and mouse help with setup and software use.
Choosing The Right Mirror
Choosing the right mirror is key for making a smart mirror touch screen. The mirror must show your reflection clearly and also let the screen behind shine through. This balance depends on the type of mirror and its size and thickness. Picking the correct mirror helps your smart mirror work well and look great.
Types Of Two-way Mirrors
Two-way mirrors are special mirrors that let light pass through from one side. They reflect some light and let other light show through. This makes them perfect for smart mirrors.
The most common types are acrylic and glass two-way mirrors. Acrylic mirrors are lighter and less likely to break. Glass mirrors are heavier but give clearer reflections. Choose the type based on your needs and where you will use the smart mirror.
Size And Thickness Considerations
The size of the mirror should match the screen size behind it. A mirror too big or too small will not look right. Measure the screen carefully before buying the mirror.
Thickness affects how well the mirror shows your reflection and the screen. Thin mirrors let more light pass but may break easily. Thicker mirrors are stronger but might reduce screen brightness. Pick thickness that balances durability and display clarity.
Setting Up The Display
Setting up the display is a key step in making a smart mirror touch screen. The display shows your apps, weather, time, and more. You need a clear, bright, and responsive screen. This part guides you through picking the right screen and connecting it to your device.
Follow these steps carefully to ensure your smart mirror works well and looks great.
Selecting A Screen
Choose a screen size that fits your mirror frame. A 15 to 24-inch screen works well for most mirrors. Pick an LCD or LED screen for good brightness and color. Touchscreen capability is important for interaction. You can use a screen with built-in touch or add a touch frame. Check the screen’s resolution; higher resolution means sharper images. A 1080p screen is a good standard choice.
Make sure the screen is slim and easy to mount. Avoid very old or damaged screens. They may not work well with touch sensors or software.
Connecting The Display To A Pc Or Raspberry Pi
Most smart mirrors use a Raspberry Pi or a small PC. Connect the screen to the device using HDMI or DisplayPort cables. Raspberry Pi supports HDMI, so pick a screen with HDMI input. For touch control, connect the touchscreen USB cable to the device. This allows the device to detect your touch commands.
Ensure the device powers the screen properly. Use a separate power supply if needed. Test the screen after connection to check display and touch function. Adjust screen settings for brightness and orientation in the device’s software. Proper connection is crucial for smooth operation and good user experience.
Credit: www.reddit.com
Integrating Touch Screen Technology
Integrating touch screen technology is a key step in building a smart mirror. It allows users to interact directly with the mirror’s display. This transforms a simple reflective surface into a useful, interactive device. Choosing the right touch technology and proper installation ensures a smooth user experience. Let’s explore the main types of touch screens and how to install them on your smart mirror.
Capacitive Vs Infrared Touch
Capacitive touch screens use the electrical properties of the human body. They detect touch by sensing changes in the screen’s electrostatic field. These screens are highly responsive and support multi-touch gestures. They work well with bare fingers but not with gloves or styluses.
Infrared touch screens use light beams arranged around the screen edges. Touch breaks these beams and the system detects the location. Infrared screens work with any object, including gloves or a stylus. They are less sensitive to moisture and dirt but may have lower accuracy than capacitive screens.
Choose capacitive for smooth, fast touch response. Pick infrared for flexibility in touch objects and durability.
Installing The Touch Frame
The touch frame fits around your smart mirror’s display. It captures touch inputs and sends signals to the computer. Start by measuring your mirror’s size accurately. Select a touch frame that matches these dimensions.
Attach the frame carefully around the mirror’s edges. Ensure it fits tightly without gaps. Connect the touch frame to your smart mirror’s computer via USB or other interfaces. Test the touch response before final assembly. Adjust settings for accuracy and sensitivity as needed.
Building The Frame And Enclosure
Building the frame and enclosure is a key step in making a smart mirror touch screen. This part holds all pieces together. It protects the screen and mirror. It also gives the mirror a clean, finished look. A well-built frame makes your smart mirror sturdy and easy to use.
Designing The Frame
Start by choosing the right materials. Wood and plastic work well for frames. Measure the size of your mirror and screen carefully. Leave some space for wiring and ventilation. Plan the frame thickness to support the screen weight. Use simple shapes for easy assembly. Smooth edges and corners improve safety and style. Paint or finish the frame to match your room decor.
Mounting The Mirror And Screen
Place the screen first inside the frame. Secure it with brackets or strong tape. Make sure it fits tightly to avoid movement. Next, add the two-way mirror on top. Use double-sided tape or clips to hold it. Check that the mirror covers the screen fully. Leave space behind for cables and the computer board. Test the touch screen function before closing the frame. Proper mounting ensures good touch response and clear display.
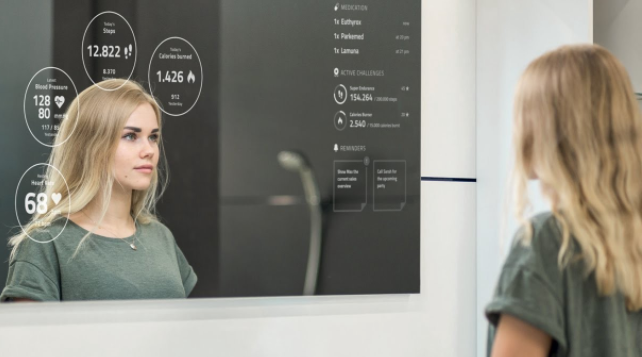
Credit: www.risinglcd.com
Configuring The Software
Configuring the software is a key step in making a smart mirror touch screen. This step brings your hardware to life. It sets the stage for how your mirror will look and work. Proper software setup ensures smooth performance and user-friendly interaction.
Operating System Setup
Choose an operating system that fits your project needs. Many smart mirrors run on lightweight Linux versions, such as Raspbian. Install the OS on your device’s storage. After installation, update the system to get the latest features and security patches.
Enable necessary services like SSH for remote access. This helps you manage the mirror without a keyboard or monitor. Adjust display settings to match your screen resolution. This step ensures the interface looks sharp and clear.
Smart Mirror Interfaces And Modules
Select a smart mirror interface that suits your style. Popular options include MagicMirror², an open-source platform with many modules. Modules add functions like weather, news, calendar, and clock.
Install modules by following the interface’s documentation. Customize each module to show the information you want. Test each module to confirm it works correctly. Keep the interface simple for easy navigation and quick updates.
Adding Voice And Gesture Controls
Adding voice and gesture controls makes your smart mirror more interactive. These controls let you use the mirror hands-free. You can speak commands or use simple hand movements. This improves user experience and adds modern technology to your project.
Microphone Integration
Start by choosing a good microphone. USB microphones or small digital mics work well. Place the microphone near the mirror frame to capture clear sound. Connect the mic to your smart mirror’s computer or microcontroller. Use voice recognition software like Google Assistant or Amazon Alexa. These tools help your mirror understand and respond to your voice commands.
Gesture Recognition Options
Gesture control uses a camera or sensor to detect hand movements. Infrared sensors or depth cameras like Kinect are common choices. Set up the sensor to face the user for accurate detection. Use software like OpenCV to interpret gestures. Simple gestures like swipes or waves can control the mirror. This feature allows users to navigate menus or change settings easily.
Power And Cable Management
Power and cable management are key parts of building a smart mirror touch screen. Good planning keeps your setup neat and safe. It also helps your mirror work smoothly without interruptions.
Power Supply Choices
Choose a power supply that fits your mirror size and screen. Most smart mirrors use a low-voltage adapter for safety. Check the voltage and current needs of your screen. Using the right power supply avoids damage and overheating. Some prefer USB power for small screens. Others use an AC adapter for bigger displays. Pick a reliable brand to avoid power issues.
Hiding Wires Efficiently
Keeping wires out of sight improves the mirror’s look. Use cable clips or adhesive mounts to guide wires along edges. Hide cables behind the mirror frame or inside a wall if possible. Cable sleeves or tubing bundle wires neatly. Avoid tight bends or pinching to protect cables. Label wires to make future fixes easier. A clean cable setup reduces risks and keeps your mirror tidy.
Testing And Troubleshooting
Testing and troubleshooting are key steps in building a smart mirror touch screen. These steps ensure the device works correctly and feels smooth to use. Testing helps find errors early. Troubleshooting fixes these errors fast. Both improve your mirror’s performance and user experience.
Careful testing checks if the touch screen reacts to your finger. It also tests if the mirror shows the right image and responds to commands. Troubleshooting solves issues like lag, wrong touch points, or no response. Follow these guides to keep your smart mirror working well.
Calibrating The Touch Screen
Calibrating sets the touch screen to read your touches accurately. Start by opening the calibration software on your device. Follow the instructions to tap specific points on the screen. This process aligns the touch input with the display.
Calibration may need repeating if the touch feels off. Do it after installing new hardware or software updates. A well-calibrated screen improves touch accuracy and user control.
Common Issues And Fixes
Some common problems include no touch response, wrong touch location, or screen lag. First, check all cables and connections. Loose wires can cause touch failures.
Restart the smart mirror to clear temporary bugs. Update the touch screen drivers to fix software issues. If the screen shows wrong touches, recalibrate it.
For lag, reduce background apps running on your device. Use a clean and dry finger to avoid false touches. These simple fixes help maintain a smooth touch screen experience.
Customization And Enhancements
Customizing your smart mirror touch screen makes it truly yours. It lets you tailor the look and feel to suit your style and needs. Enhancements add useful functions that improve daily use. These changes help the mirror fit perfectly into your life and home.
Personalizing The Interface
Change colors and themes to match your room decor. Choose fonts that are easy to read at a glance. Arrange widgets like weather, calendar, and news in your preferred order. Add shortcuts for apps you use daily. A simple interface keeps things clear and quick to use.
Adding Smart Home Integration
Connect your smart mirror to other smart devices in your home. Control lights, thermostats, and security cameras right from the mirror. Use voice commands or touch controls for ease. This creates a central hub for managing your smart home. It saves time and makes your home more connected.
Frequently Asked Questions
What Materials Are Needed To Build A Smart Mirror Touch Screen?
You need a two-way mirror, an LCD screen, a Raspberry Pi, a touch frame, and cables. These components create the display, touch functionality, and software interface for your smart mirror.
How Do You Integrate Touch Functionality Into A Smart Mirror?
Attach a touch frame over the LCD screen behind the two-way mirror. Connect the touch frame to the Raspberry Pi via USB to enable touch input.
Can I Use A Regular Mirror For A Smart Mirror Project?
No, a regular mirror blocks the display. Use a two-way mirror that allows the screen to be visible behind the reflective surface.
What Software Is Best For Smart Mirror Touch Screen Projects?
MagicMirror² is a popular open-source platform. It supports customizable modules and touch input, perfect for smart mirror interfaces.
Conclusion
Building a smart mirror touch screen is easier than it seems. You only need some basic parts and clear steps. This project saves money and adds tech to your home. Experiment with features to fit your needs. Enjoy the process and learn as you go.
Soon, you will have a cool, useful device. Start today and see how fun it can be.