Are you staring at that ceramic towel rack on your tiled wall, wondering how to get it off without damaging your beautiful tiles? Removing a ceramic towel rack might seem tricky, but with the right steps, you can do it safely and easily.
Imagine saving time, avoiding costly repairs, and having your wall ready for a fresh look in no time. Keep reading, and you’ll discover simple tips and tricks that anyone can follow to remove your towel rack cleanly and confidently. Your tiles deserve the best care, and you’re just a few steps away from mastering this quick home fix.

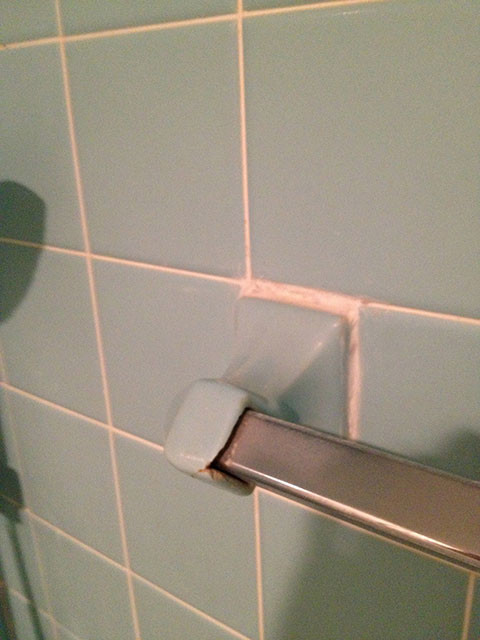
Credit: diy.stackexchange.com
Tools Needed
Removing a ceramic towel rack from tile requires the right tools. Having proper tools makes the task easier and safer. You avoid damage to the tile and finish the job faster.
Here is a list of essential tools needed. Each plays a specific role in the removal process. Prepare them before starting to save time.
Utility Knife
A utility knife helps cut through caulk or silicone around the rack. This loosens the edges and prevents tile damage. Use a sharp blade for clean cuts.
Putty Knife
The putty knife gently pries the rack away from the tile. It slides under the base without scratching the surface. A flexible, thin blade works best.
Socket Wrench Or Screwdriver
Many ceramic towel racks attach with screws or bolts. Use a screwdriver or socket wrench to remove them. Check the rack’s fasteners before starting.
Heat Gun Or Hair Dryer
Heat softens old adhesive or caulk. A heat gun or hair dryer can warm the area around the rack. This makes pulling the rack easier and safer.
Soft Cloth And Cleaning Solution
After removal, clean the tile surface with a soft cloth. Use a mild cleaning solution to remove adhesive residue. This prepares the tile for any new installation.
Prepare The Area
Clear the area around the towel rack to avoid damage or mess. Lay down a cloth or plastic sheet to catch debris and protect tiles. Gather all necessary tools nearby for easy access.
Clear The Surrounding Space
Start by removing all items near the towel rack. Clear shelves, counters, and the floor below. This prevents damage and gives you room to work safely. A tidy area helps you see the rack clearly and avoid accidents.
Protect The Tile Surface
Place a soft cloth or towel under the rack area. This protects tiles from scratches or chips. Use painter’s tape around the rack edges to shield grout lines. Careful protection keeps your tiles looking new after removal.
Gather Necessary Tools
Collect all tools before you begin. You may need a screwdriver, putty knife, and adhesive remover. Having tools ready avoids interruptions and speeds up the process. Check for safety gear like gloves to protect your hands.
Turn Off Water And Electricity
Ensure no water pipes or electrical wires run behind the rack. Turn off water valves if needed. Switch off power to nearby outlets or lights for safety. This step reduces risk of injury during removal.
Turn Off Water Supply
Turning off the water supply is the first step before removing a ceramic towel rack from tile. It prevents water leaks and damage. This step is important for safety and to avoid extra work later.
Water lines often run behind the wall near towel racks. Shutting off the water stops pressure in pipes. This makes the removal process clean and safe.
Locate The Main Water Valve
Find the main water valve for your home. It is usually near the water meter or where the main pipe enters the house. Turn the valve clockwise to close it. This stops water flow throughout your home.
Turn Off The Local Shut-off Valve
Some towel racks connect to a local shut-off valve behind the wall. Look under sinks or near the rack for a small valve. Turn it clockwise to close. This stops water only to that area.
Test For Water Flow
Open a faucet near the towel rack. Check if water still flows. If water stops, the supply is off. If water flows, double-check the valve position. Make sure it is fully closed.
Prepare For Water Drips
Keep a towel or bucket nearby. Small drips may occur when disconnecting pipes. Catch water to protect the floor and tiles. Clean spills quickly to avoid stains.

Credit: www.youtube.com
Inspect The Mounting
Before removing a ceramic towel rack from tile, start by inspecting the mounting. This step helps you understand how the rack is fixed to the wall. Knowing the mounting type guides you on the right tools and method to use.
Careful inspection prevents damage to the tile surface. It also makes the removal smoother and safer. Take your time to look closely at the rack’s base and attachment points.
Identify The Mounting Type
Check if the rack uses screws, adhesive, or brackets. Screws usually have visible heads on the mounting plates. Adhesive mounts show no hardware but may have a plastic or metal plate. Brackets hold the rack in place with clips or hooks.
Look For Screw Covers Or Caps
Many ceramic towel racks hide screws under small caps. These caps match the rack’s color and shape. Gently pry them off with a flat tool to reveal screws beneath. This step is key before unscrewing the rack.
Check For Grout Or Caulk Around The Base
Some racks are sealed with grout or caulk to protect the wall. Look around the edges for any sealing material. Use a utility knife to carefully cut through the grout or caulk. This prevents tile damage during removal.
Assess The Condition Of The Mounting Area
Inspect the tile and grout near the rack for cracks or loose spots. Damaged areas need special care to avoid further problems. If the tile looks fragile, remove the rack slowly and gently.
Remove Screws And Anchors
Removing screws and anchors is a key step in taking off a ceramic towel rack from tile. This process frees the rack without damaging the tile surface. Care and the right tools make this task easier.
Start by locating the screws holding the towel rack. These screws usually sit inside the mounting brackets. Removing them allows the rack to come off smoothly.
Gather The Right Tools
Use a screwdriver that fits the screw heads well. A flathead or Phillips screwdriver works depending on the screw type. Avoid using wrong tools to prevent slipping or damage.
Remove The Screws Carefully
Turn the screwdriver slowly to loosen each screw. Keep steady pressure to avoid stripping the heads. If screws are tight, apply a little oil and wait before trying again.
Take Out The Anchors
Anchors hold screws firmly in the tile. Gently pull or pry them out with pliers. If anchors are stuck, push them into the wall cavity carefully to avoid tile cracks.
Credit: www.houzz.com
Handle Adhesive Residue
After removing a ceramic towel rack from tile, sticky adhesive residue often remains. This leftover glue can be tough and unsightly. Handling it carefully avoids damage to your tile surface. Using the right methods helps clear the residue quickly and safely.
Use Warm Soapy Water
Start by soaking a cloth in warm soapy water. Press the cloth on the adhesive for several minutes. This softens the glue and makes it easier to remove. Gently rub the area with the cloth. Repeat until the residue loosens.
Apply Rubbing Alcohol
Rubbing alcohol works well to break down adhesive. Dampen a cotton ball or cloth with alcohol. Rub it over the sticky area in small circles. The glue will start to dissolve. Wipe the tile clean with a dry cloth.
Try Baking Soda Paste
Mix baking soda with water to form a thick paste. Spread this paste on the adhesive residue. Let it sit for 10 minutes. Use a soft brush or cloth to scrub gently. Rinse the tile with clean water afterward.
Use A Plastic Scraper
Carefully scrape the residue with a plastic scraper. Avoid metal tools to protect the tile. Work slowly to lift the glue without scratching. Combine scraping with cleaning solutions for best results.
Apply Commercial Adhesive Remover
Choose a remover safe for tile surfaces. Apply according to package instructions. Let it sit for the recommended time. Wipe away the softened residue with a cloth. Test a small area first to check for damage.
Clean The Tile Surface
Cleaning the tile surface after removing a ceramic towel rack is important. It removes leftover glue, dirt, and damage. A clean surface helps prepare the wall for new fixtures or paint. This step keeps your bathroom looking neat and fresh.
Gather Cleaning Supplies
Start by collecting the right tools. You need a soft cloth, mild cleaner, sponge, and warm water. Avoid harsh chemicals that can damage tiles. These basic supplies make cleaning easier and safer.
Remove Glue And Residue
Use a gentle scraper or your fingernail to lift glue bits. Be careful not to scratch the tiles. Apply a small amount of cleaner on the residue. Let it sit for a few minutes, then wipe it off with a sponge.
Scrub The Tile Surface
Dampen the sponge with warm water and cleaner. Gently scrub the tile surface in small circles. Focus on areas with glue or dirt. Rinse the sponge often to avoid spreading residue.
Dry And Inspect The Tiles
Use a dry cloth to wipe the tiles after cleaning. Check for any leftover glue or stains. Repeat the cleaning if needed. A dry and clean surface shows if the job is complete.
Repair Tile Damage
Removing a ceramic towel rack can sometimes cause damage to the tile. Small chips, cracks, or holes may appear. Fixing these issues quickly keeps your bathroom looking neat. It also prevents water from seeping behind the tile and causing more problems.
Repairing tile damage is simple. You do not need special skills or tools. A few basic steps can restore your tile to its original condition.
Clean The Damaged Area
Start by cleaning the tile and the damaged spot. Use a soft cloth and mild soap. Remove dust, dirt, and any loose pieces. Dry the area well before moving to the next step.
Fill Chips And Holes
Use a tile repair kit or epoxy filler. Apply the filler carefully to the chips or holes. Smooth it out with a putty knife or a small spatula. Let the filler dry completely according to the instructions.
Sand The Surface
After the filler dries, gently sand the area. Use fine-grit sandpaper to make the surface smooth. Sand until the repaired spot blends with the rest of the tile. Wipe away dust with a damp cloth.
Touch Up With Paint
Match the tile color using ceramic paint or nail polish. Apply thin layers over the repaired spot. Allow each layer to dry before adding another. This step helps the repair look natural and less visible.
Tips For Reinstallation
Carefully loosen the towel rack without damaging the tile surface. Use gentle tools like a plastic scraper and warm soapy water. Take your time to avoid cracks and prepare the area for smooth reinstallation.
Prepare The Surface Properly
Clean the tile surface thoroughly before reinstalling the towel rack. Remove all dirt, dust, and old adhesive residue. Use a gentle cleaner and a soft cloth to avoid scratching the tiles. Let the surface dry completely to help the new adhesive stick well.
Use The Right Adhesive
Choose an adhesive made for ceramic and tile surfaces. Silicone-based adhesives work best for bathroom fixtures. Apply the adhesive evenly to avoid lumps. Press the towel rack firmly against the tile to secure it in place.
Align The Towel Rack Carefully
Mark the exact position of the towel rack on the tile before applying adhesive. Use a level tool to ensure the rack is straight. Proper alignment prevents the rack from falling or looking crooked after installation.
Allow Adequate Drying Time
Let the adhesive dry for the recommended time, usually 24 hours. Avoid using the towel rack during this period. This step ensures the rack stays firmly attached to the tile for a long time.
Check For Stability Before Use
Gently test the towel rack to check if it is secure. If it feels loose, add more adhesive and let it dry again. A stable towel rack prevents accidents and keeps towels in place.
Frequently Asked Questions
How Do I Safely Remove A Ceramic Towel Rack?
Use a utility knife to cut sealant around the rack. Then, gently pry it off using a putty knife or flat tool. Avoid excessive force to prevent tile damage.
What Tools Are Needed To Remove A Towel Rack From Tile?
You need a utility knife, putty knife, screwdriver, and possibly a heat gun. These help loosen adhesive and remove screws safely from tiled surfaces.
Can I Remove A Ceramic Towel Rack Without Damaging Tiles?
Yes, by carefully cutting sealant and gently prying the rack off. Work slowly and avoid using excessive force to keep tiles intact.
How To Remove Adhesive Residue After Towel Rack Removal?
Apply adhesive remover or rubbing alcohol to soften residue. Scrape gently with a plastic scraper and wipe clean with a cloth for a smooth tile surface.
Conclusion
Removing a ceramic towel rack from tile takes patience and care. Use gentle tools to avoid damaging the tiles. Take your time to loosen adhesive or screws. Clean the area well after removal to keep tiles looking good. Following these steps helps you finish the job safely and neatly.
You can then install a new rack or leave the space open. Simple actions lead to great results. Ready to update your bathroom with ease?