Are you struggling to hang a towel rack but can’t find a stud to secure it? You’re not alone, and the good news is—you don’t always need a stud to get the job done.
Imagine having a sturdy towel rack that holds up your towels perfectly, without damaging your walls or leaving it wobbly. In this guide, you’ll learn simple, smart tricks to hang your towel rack safely and securely, even when studs are nowhere to be found.
Keep reading, because by the end, you’ll have the confidence and know-how to get it right the first time.

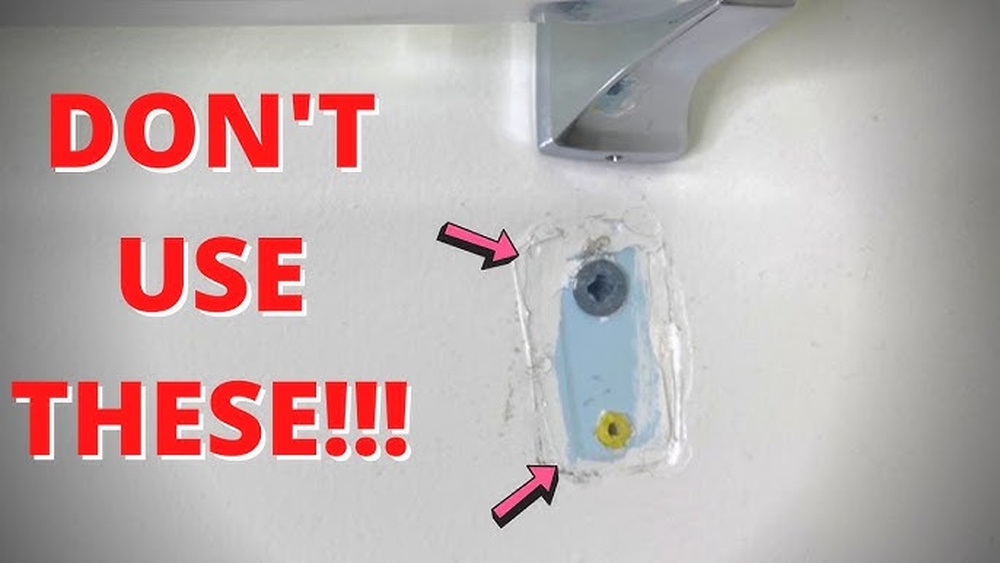
Credit: www.towelsupercenter.com
Choosing The Right Towel Rack
Picking the right towel rack is key for a strong and neat installation without studs.
Not all racks work well without wall studs. The right choice depends on your wall type and towel weight.
Consider the rack’s design and how it holds up over time. This helps avoid damage to your wall.
Types Suitable For Stud-free Installation
Look for towel racks designed for adhesive or suction mounting.
Adhesive racks stick firmly to smooth surfaces like tiles or glass.
Suction cup racks work well on flat, non-porous walls but hold less weight.
Over-the-door racks offer a no-drill option and fit many door sizes.
Freestanding towel racks do not require wall mounting at all.
Materials And Weight Considerations
Lightweight materials reduce stress on the wall without studs.
Plastic and aluminum racks are lighter and easier to support with adhesive.
Heavy metal racks need stronger support and may not hold well without studs.
Check the towel rack’s weight limit before buying it.
Choose a rack that fits your towel size and daily use.
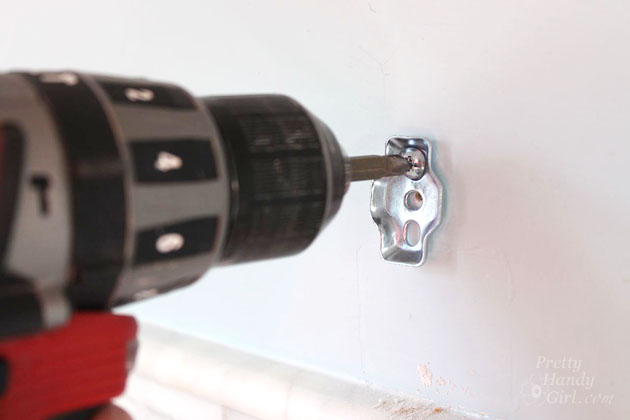
Credit: prettyhandygirl.com
Tools And Supplies Needed
Hanging a towel rack without studs requires the right tools and supplies. Choosing the correct items ensures the rack stays secure and looks good. Prepare all necessary tools before starting the project. It saves time and avoids mistakes.
Adhesive Options
Strong adhesives can hold towel racks without drilling. Look for heavy-duty mounting tapes or construction glues. These adhesives stick well to tiles, drywall, and smooth surfaces. Make sure the surface is clean and dry before applying. Adhesives offer a no-drill, damage-free solution.
Mounting Hardware
Special mounting hardware helps when no studs are available. Use wall anchors designed for drywall or hollow walls. Plastic or metal anchors expand inside the wall for a secure hold. Screws must fit the anchors and towel rack brackets properly. Choose hardware that matches rack weight and wall type.
Measuring And Marking Tools
Accurate measurements ensure the towel rack fits perfectly. Use a tape measure to find the right height and width. A pencil or marker helps mark drill or adhesive spots. A level checks the rack stays straight on the wall. These tools help avoid crooked or uneven placement.
Preparing The Wall Surface
Preparing the wall surface is the first step to hang a towel rack without studs. It ensures the rack stays secure and lasts longer. A clean, dry, and compatible wall helps adhesives or anchors hold better. This step prevents damage and keeps the rack stable.
Cleaning And Drying
Start by removing dust, dirt, and grease from the wall. Use a mild soap and water solution or rubbing alcohol for cleaning. Wipe the area with a clean cloth to remove all residue. Let the wall dry completely before attaching the rack. Moisture can weaken the adhesive or anchors.
Surface Compatibility
Check if your wall surface suits the towel rack installation method. Smooth surfaces like tile, glass, or painted drywall work best with adhesive hooks or strips. Rough or porous surfaces like brick or textured walls may need special anchors. Knowing your wall type helps choose the right tools and materials.
Marking The Placement
Marking the placement is the first step to hang a towel rack without studs. It helps ensure the rack fits well and looks straight on the wall. Careful marking prevents mistakes and keeps the rack stable.
Take your time to plan the exact spots for screws or anchors. This makes the installation easier and more secure.
Measuring Height And Spacing
Start by deciding the best height for your towel rack. Usually, 48 inches from the floor works well. It keeps towels easy to reach for most people.
Measure the space between where the rack brackets will go. Check the rack’s instructions for the correct distance. Use a tape measure and mark these points lightly on the wall with a pencil.
Leveling The Rack Position
Use a level tool to make sure the marks are even. Hold the level against the wall and adjust marks until they line up perfectly.
A level rack looks neat and keeps towels from sliding off. Double-check the marks before drilling any holes. This step saves time and avoids fixing errors later.
Installing With Adhesive Strips
Installing a towel rack without studs can be simple using adhesive strips. These strips hold the rack firmly without drilling holes. They protect your wall from damage and keep the rack stable. This method suits renters or anyone avoiding wall damage.
Selecting Strong Adhesive Strips
Choose adhesive strips designed for heavy weights. Look for options labeled as “heavy-duty” or “extra strong.” Check the weight limit on the package. Make sure it can hold your towel rack and wet towels. Some strips work better on smooth surfaces like tile or glass. Avoid strips that lose strength with moisture.
Step-by-step Application Process
Clean the wall surface with rubbing alcohol. Let it dry completely before applying strips. Peel off the backing from the adhesive strip. Press the strip firmly on the rack’s mounting area. Attach the rack to the wall and press hard. Hold for 30 seconds to secure the bond. Wait at least one hour before hanging towels. This wait time helps strips stick well.
Using Suction Cup Mounts
Using suction cup mounts offers a simple way to hang a towel rack without drilling into walls. These mounts use suction to stick firmly to smooth surfaces. They hold the rack in place without damaging walls or tiles.
Suction cup mounts are easy to install and remove. They work well for renters or those who want a temporary setup. They also keep your bathroom looking neat without holes or marks.
Best Surfaces For Suction Cups
Choose smooth, non-porous surfaces for the best suction. Glass, tiles, and polished metal work very well. Avoid rough or textured walls like painted drywall or wallpaper. These surfaces do not allow a strong hold.
Clean the surface before attaching the suction cups. Dirt, dust, or moisture can weaken the grip. Make sure the surface is dry and smooth for a secure hold.
Installation Tips For Secure Hold
Press the suction cups firmly against the surface. Push out all air bubbles to create a tight seal. Test the rack’s weight by gently pulling on it after installation.
Reapply the suction cups if you feel any looseness. Clean both the suction cups and the surface regularly. This keeps the suction strong and prevents slipping.
Applying Damage-free Hooks
Applying damage-free hooks is a smart way to hang a towel rack without studs. These hooks hold the rack securely without drilling holes. They protect your walls from damage and make removal easy. This method suits renters and anyone avoiding permanent marks.
Choosing the right hooks and attaching them properly ensures the towel rack stays stable. Follow these tips to get a neat and safe setup.
Choosing The Right Hook Style
Select hooks made for wall use and strong enough for towels. Adhesive hooks work well on smooth surfaces like tile or painted drywall. Look for hooks with a weight rating that matches your towel rack. Avoid hooks that peel paint or fall off easily. Clear or white hooks blend well with most walls. Consider hooks with a wide base for better grip and less risk of falling.
Proper Attachment Techniques
Start by cleaning the wall area with rubbing alcohol. This removes dust and oils for better stickiness. Press the hook firmly against the wall for 30 seconds. Let the adhesive cure for at least an hour before hanging the rack. Avoid placing the rack in humid spots to keep hooks secure longer. Check the hook’s instructions for specific drying times. Test the hook by gently pulling before hanging heavy towels.
:max_bytes(150000):strip_icc()/how-to-remove-towel-bar-5221017-03-4873175f190548228b867ee5a3dec733.jpg)
Credit: neurocin.com.br
Testing Stability And Weight Limits
Testing the stability and weight limits of a towel rack is important. It ensures the rack holds towels safely without falling. This step helps avoid damage to walls and injury.
Check the rack’s grip and support after installation. Apply gentle pressure first. Gradually increase the weight to confirm the rack stays secure. Use towels of different sizes to test real use.
Ensuring Safety And Durability
Safety is the top priority. Make sure the rack does not wobble or shift. Use a level to check alignment. Tighten screws or anchors if needed. Choose anchors designed for drywall without studs. These provide strong hold and reduce risk of falling.
Durability means the rack stays firm over time. Avoid overloading the rack beyond its weight limit. Regularly inspect the rack for loosening or damage. Replace anchors if they weaken.
Adjusting For Optimal Support
Adjust the rack placement if it feels unstable. Move it slightly higher or lower on the wall. This can improve anchor grip. Use a stud finder to double-check for hidden studs. Anchors work best in solid drywall sections.
Spread the weight evenly across the rack. Use multiple hooks or bars for heavy towels. Balance the load to prevent stress on one point. This helps maintain support and extends rack life.
Tips For Maintenance And Removal
Proper care helps your towel rack last longer and keeps your walls safe. Regular cleaning stops dirt build-up and keeps the rack looking new. Removing the rack carefully avoids damage to your walls. Follow these tips to maintain and remove your towel rack with ease.
Cleaning Around The Rack
Use a soft cloth to wipe the rack weekly. Avoid harsh cleaners that can damage the finish. Mild soap and water work well for most racks. Clean the wall area gently to prevent paint peeling. Dry the rack and wall after cleaning to stop moisture damage.
Removing Without Wall Damage
Loosen the rack slowly to avoid pulling paint or drywall. Use a putty knife to help lift adhesive or screws. Heat adhesive spots with a hairdryer to soften glue. Pull the rack straight off to reduce wall stress. Fill small holes with spackle and smooth it out before painting.
Frequently Asked Questions
How Do I Hang A Towel Rack Without Studs?
Use strong wall anchors like toggle bolts or molly bolts. Mark the rack position, drill holes, insert anchors, then screw the rack securely. These anchors hold well in drywall without studs.
What Tools Are Needed To Install Towel Racks Without Studs?
You’ll need a drill, screwdriver, wall anchors, screws, a level, pencil, tape measure, and a stud finder. These tools help ensure a secure and level installation.
Can Adhesive Strips Hold A Towel Rack Without Studs?
Heavy-duty adhesive strips can hold lightweight towel racks temporarily. However, for durability and heavier racks, use wall anchors or toggle bolts instead.
Are Toggle Bolts Best For Drywall Towel Rack Installation?
Yes, toggle bolts provide strong support in drywall without studs. They spread the load behind the wall, preventing damage and ensuring the rack stays secure.
Conclusion
Hanging a towel rack without studs is easier than it seems. Use strong wall anchors for a secure hold. Measure carefully and mark your spots before drilling. Take your time to ensure the rack stays level. This method works well for most walls.
Enjoy having your towels organized without damaging your walls. Small steps can make a big difference. Try this simple solution and see how neat your bathroom looks.