Imagine stepping out of a warm shower and wrapping yourself in a cozy, heated towel. Sounds amazing, right?
You don’t have to spend a fortune buying one. You can build your own heated towel rack, tailored exactly to your needs. In this guide, you’ll discover simple steps that anyone can follow, even if you’re not a DIY expert.
Ready to add a touch of luxury and comfort to your bathroom? Keep reading, and you’ll learn how to make it happen quickly and easily.
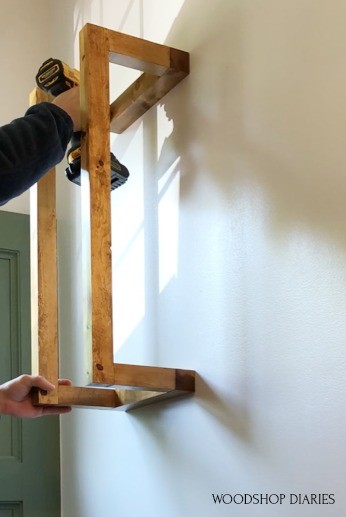
Credit: www.woodshopdiaries.com
Benefits Of A Heated Towel Rack
Heated towel racks offer more than just a warm towel after a shower. They add comfort, save energy, and improve the look of your bathroom. Installing one can change your daily routine and bathroom feel. Below are some key benefits that make heated towel racks a smart choice for any home.
Improved Comfort And Warmth
A heated towel rack keeps towels dry and warm. Wrapping yourself in a cozy towel feels relaxing. It helps prevent chills after a shower or bath. Warm towels can also reduce skin irritation. They provide a small but welcome comfort every day.
Energy Efficiency
Heated towel racks use less energy than clothes dryers. They dry towels quickly, reducing mildew and odors. This means fewer washes, saving water and electricity. Many models have timers or thermostats to control use. This helps keep energy bills low and the environment happy.
Bathroom Aesthetics
Heated towel racks come in many styles and finishes. They add a modern, sleek look to any bathroom. Mounted on the wall, they save space and reduce clutter. A stylish rack can make the bathroom feel more inviting. It’s a simple upgrade that looks great and works well.

Credit: fundacioninbursa.org
Materials And Tools Needed
Building a heated towel rack requires the right materials and tools. Choosing quality parts ensures safety and durability. Gathering everything before starting saves time and effort. Below is a detailed list of what you need for this project.
Selecting Heating Elements
Pick heating elements made for towel racks or small spaces. Electric heating strips or rods work best. Make sure they have proper insulation to avoid accidents. Check the power rating to match your room size. Safe and reliable heating parts prevent overheating and damage.
Choosing Rack Materials
Metal is a popular choice for racks. Stainless steel resists rust and looks good. Aluminum is light and heats quickly. Avoid wood or plastic since they can burn or melt. Choose materials that conduct heat well and last long.
Essential Tools For Assembly
You need a drill with metal bits for holes. Screwdrivers help attach parts securely. Wire cutters and strippers prepare electrical connections. A soldering iron makes strong wire joints. Use a multimeter to test electrical safety before use.
Planning Your Towel Rack Design
Planning your heated towel rack design is the first step for a smooth build. It sets the foundation for a useful and safe towel rack. Thoughtful planning saves time and avoids costly mistakes later.
Focus on size, placement, electrical needs, and safety rules. Each part matters to create a towel rack that fits your space and works well.
Determining Size And Placement
Measure the wall space where you want to install the towel rack. Choose a size that fits the area without crowding it. Consider how many towels you want to heat at once.
Place the rack near your shower or sink for easy reach. Avoid spots near water splashes or where it blocks movement. A good spot ensures comfort and quick drying.
Electrical Considerations
Check if your electrical system can support a heated towel rack. Look for a nearby power outlet or plan new wiring. Use a power source that matches the rack’s voltage and wattage needs.
Hire a licensed electrician for new wiring or complex setups. Proper wiring prevents electrical problems and improves safety. Use waterproof or bathroom-rated fixtures for extra protection.
Safety Measures
Keep safety at the top of your list during planning. Use materials that resist heat and moisture. Avoid placing the rack too close to flammable items.
Install a ground fault circuit interrupter (GFCI) for electrical safety. This device stops power flow if water causes a short circuit. Regularly inspect your towel rack for damage or wear.
Step-by-step Assembly Guide
Building a heated towel rack is easier than it looks. This step-by-step guide will help you assemble it quickly. Follow each step carefully for the best results. Let’s start with the frame and end with mounting the rack on the wall.
Preparing The Frame
First, gather all frame parts. Check for any damages or missing pieces. Lay them on a clean surface. Use screws or bolts to join parts as shown in the instructions. Make sure the frame is stable and square. Tighten all connections well. The frame must hold the heating parts safely.
Installing Heating Components
Place the heating tubes or cables inside the frame. Secure them with clips or brackets. Avoid bending the heating elements sharply. Keep them evenly spaced to spread heat well. Attach the temperature sensor if your model has one. Double-check that all heating parts fit properly.
Wiring And Electrical Setup
Turn off power before starting electrical work. Connect wires according to the wiring diagram. Use wire nuts or connectors for a safe join. Ensure ground wires are attached properly. Cover all connections with electrical tape. Test the wiring with a voltage tester. Only proceed if everything is secure and correct.
Mounting The Rack
Choose a dry, accessible wall near a power outlet. Mark drill points using the rack holes as a guide. Drill holes and insert wall plugs. Use strong screws to fix the rack firmly. Check the rack is level before tightening screws fully. Connect the rack to power and test heating function. Your heated towel rack is ready to use.
Testing And Troubleshooting
Testing and troubleshooting are key steps in building a heated towel rack. They ensure the rack works safely and heats properly. Skipping these steps can cause issues or even damage. Spend time checking every part and fix problems early. This saves effort and keeps your towel rack efficient.
Ensuring Proper Heating
Turn on the power and watch for warm bars. Heat should spread evenly across the rack. Use a thermometer or touch carefully to check heat levels. Allow a few minutes to reach full warmth. If some bars stay cold, check wiring connections. Make sure the thermostat controls respond well. Proper heating means your towels dry fast and feel cozy.
Common Issues And Fixes
Cold spots often mean loose wires or bad connections. Tighten screws and inspect cables for damage. If the rack does not turn on, test the power source. Replace blown fuses or reset circuit breakers. A thermostat that won’t adjust heat might need replacement. Strange noises can come from loose parts; tighten all bolts. Regular checks keep your towel rack safe and working well.
Maintenance Tips For Longevity
Keeping your heated towel rack in good shape helps it last longer. Regular care stops damage and keeps it working well. A few simple steps can protect your investment and keep towels warm and dry.
Cleaning The Rack
Dust and dirt can build up on the rack. Wipe it with a soft, damp cloth every week. Avoid using harsh chemicals or abrasive materials. These can scratch or damage the finish. Dry the rack completely to prevent rust or corrosion.
For stubborn spots, use mild soap mixed with water. Rinse with a clean cloth and dry well. Cleaning regularly keeps the rack looking new and prevents dirt from blocking heat.
Inspecting Electrical Parts
Check the power cord and plug for damage. Look for cracks, frays, or loose connections. Unplug the rack before inspecting to stay safe. If you find any damage, do not use the rack until it is fixed.
Make sure the rack is securely mounted on the wall. Loose parts can cause electrical hazards. Test the heating function regularly to ensure it works properly. Early checks help avoid bigger problems later.
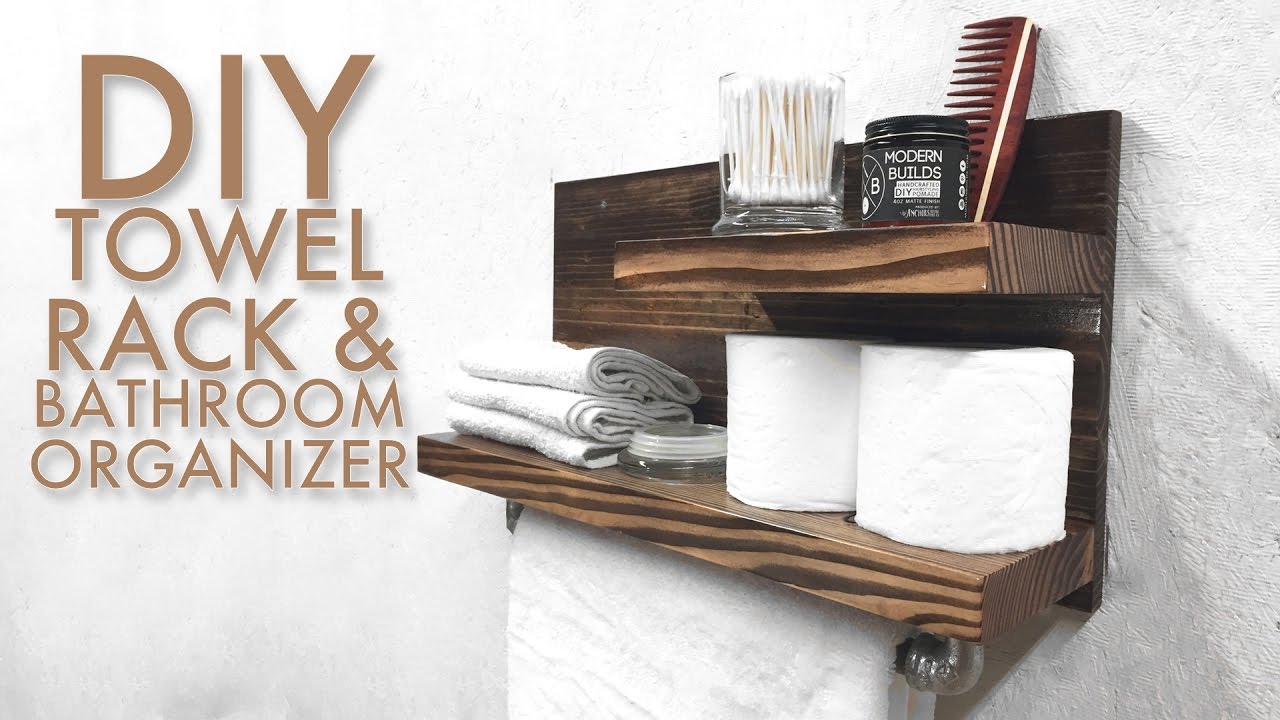
Credit: www.youtube.com
Frequently Asked Questions
What Materials Are Needed To Build A Heated Towel Rack?
You need metal pipes, heating element, power supply, mounting brackets, and wiring tools. Choose rust-resistant materials for durability and safety.
How Do I Safely Install A Heated Towel Rack?
Turn off the power before installation. Follow electrical codes and use insulated wiring. Securely mount the rack to the wall for stability.
Can I Build A Heated Towel Rack Without Electrical Skills?
Basic electrical knowledge helps, but you can hire a professional for wiring. Focus on assembling and mounting the rack yourself.
How Long Does It Take To Build A Heated Towel Rack?
Building and installing a heated towel rack usually takes 2 to 4 hours, depending on your experience and tools.
Conclusion
Building a heated towel rack is easier than it seems. You just need basic tools and clear steps. This project saves money and adds comfort to your bathroom. Warm towels after a shower feel great. Plus, it helps towels dry faster.
Take your time and follow safety rules. Soon, you will enjoy cozy, dry towels every day. Give it a try and see the difference yourself. Simple projects like this make home life better.