
Is your old towel rack stuck to the wall, making you wonder how to remove it without damaging the paint or tiles? You’re not alone.
Getting rid of an old towel rack can feel tricky, especially if you want a clean, smooth surface afterward. But don’t worry—this guide will walk you through simple, clear steps to safely take down your old towel rack. By the end, you’ll know exactly what to do, saving you time, effort, and frustration.
Keep reading, and you’ll have that wall ready for a fresh new look in no time.
Tools Needed
Removing an old towel rack needs the right tools. Having the correct tools makes the job easier and safer. Gather all items before starting. It saves time and effort.
Basic Tools List
- Screwdriver (Phillips and flathead) to remove screws
- Utility knife to cut paint or caulk around the rack
- Pliers to grip and pull out stubborn screws or nails
- Putty knife for prying the rack gently off the wall
- Stud finder to check for wall studs behind the rack
- Measuring tape to measure space and placement
Optional Supplies For Stubborn Racks
- Heat gun or hair dryer to soften any adhesive
- WD-40 or lubricant spray to loosen rusty screws
- Small hammer to tap around the rack edges
- Safety gloves to protect your hands from sharp edges
- Drop cloth to protect the floor from dust and debris
Credit: www.reddit.com
Preparation Before Removal
Preparing the area before removing an old towel rack is essential. It makes the process safer and smoother. Proper preparation also protects your walls and nearby items from damage.
Clear The Area
Remove all towels and items from the rack. Clear the space around the rack to avoid accidents. This gives you room to work freely. Keep pets and children away from the area. It helps to avoid distractions and mishaps.
Protect Surrounding Surfaces
Cover nearby surfaces with drop cloths or old sheets. Use painter’s tape to protect edges and corners. This prevents scratches and paint damage. Lay down a cloth on the floor to catch falling debris. Proper protection saves you cleaning time later.
Removing Screws And Fasteners
Removing screws and fasteners is the key step to take down an old towel rack. The screws hold the rack firmly against the wall. Taking them out carefully helps avoid damage. This step needs patience and the right tools. It makes sure the wall stays clean and ready for a new rack or repair.
Locate And Unscrew
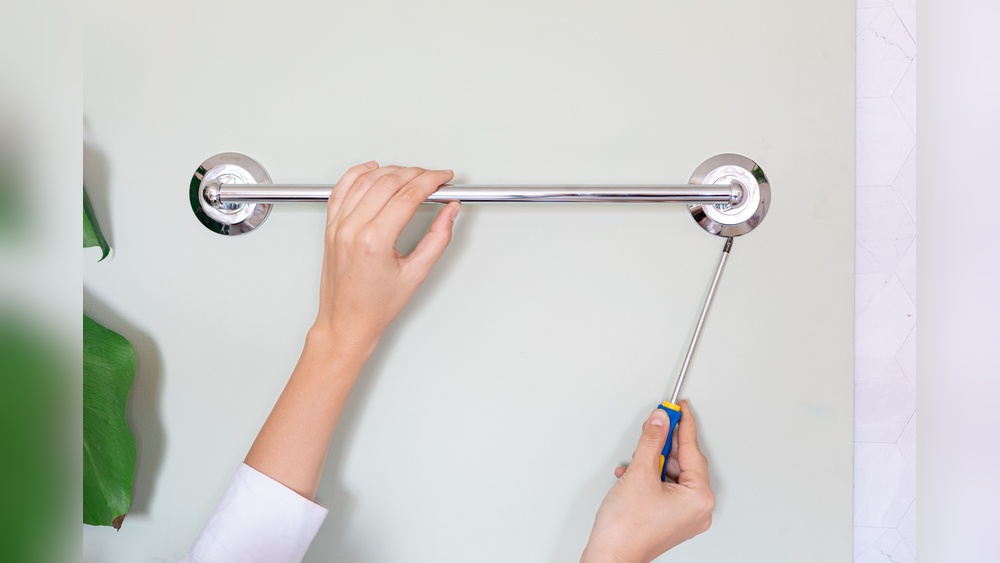
First, find all the screws holding the towel rack. Check behind the rack for hidden screws. Use a flashlight if needed. Choose a screwdriver that fits the screw heads. Turn the screwdriver counterclockwise to loosen each screw. Keep gentle pressure to avoid slipping. Place screws safely aside for reuse or disposal.
Handling Stripped Or Stuck Screws
Sometimes screws strip or get stuck in the wall. Stripped screws have damaged heads and are hard to turn. Try using a rubber band between the screwdriver and screw head for grip. For stuck screws, apply a small amount of oil to loosen them. Wait a few minutes, then try turning again. Use pliers for extra grip if needed, but be careful not to break the screw.
Dealing With Adhesive Or Caulk
Removing an old towel rack can be tricky, especially when adhesive or caulk holds it tight. Adhesive or caulk keeps the rack stuck to the wall, so pulling it off carelessly can damage the paint or drywall. The key is to soften the glue and gently scrape it away. This process takes time and patience but protects your wall from harm. Below are easy steps to handle adhesive or caulk safely.
Softening Adhesive
Heat helps soften most adhesives and caulk. Use a hairdryer on low heat and aim it at the glued area. Move the dryer slowly for about one to two minutes. The warmth loosens the glue, making it easier to remove. Avoid using too much heat to prevent wall damage. For stubborn glue, repeat heating a few times. Soft adhesive peels away more cleanly and reduces wall marks.
Careful Scraping Techniques
Use a plastic scraper or putty knife for scraping. Metal tools might scratch the wall surface. Start scraping at the edge of the rack or caulk. Work slowly and gently to lift the softened glue. Do not rush or force it, or the wall might chip. Keep the scraper flat against the wall to avoid gouges. Clean the area with a damp cloth after scraping for a smooth finish.
Removing Anchors And Wall Plugs
Removing old towel racks often leaves behind anchors and wall plugs. These small pieces keep the rack secure but can be tricky to remove. Proper removal helps avoid wall damage and prepares the surface for new fixtures. This section explains how to take out anchors and wall plugs safely.
Safe Extraction Methods
Start by testing the anchor’s hold with gentle pressure. Use pliers to grip the anchor firmly. Pull slowly straight out. Twisting slightly can help loosen tight anchors. If the anchor does not come out, push it inside the wall cavity carefully.
For plastic wall plugs, try using a screwdriver to pry them out gently. Avoid using excessive force to prevent wall damage. If the plug breaks, remove the pieces with needle-nose pliers. Be patient to keep the wall intact.
When To Patch Holes
After removing anchors and plugs, holes usually remain. Small holes may not need patching if hidden by a new rack. Large holes require filling to keep the wall smooth. Use spackling paste or wall filler to cover holes.
Apply the filler with a putty knife and smooth it flat. Let it dry completely before sanding lightly. A clean, even surface helps paint or wallpaper look better. Patching holes ensures the wall stays strong and neat.
Fixing Wall Damage
Removing an old towel rack often leaves holes and marks on the wall. Fixing this damage is key for a smooth, clean look. Take your time to repair the wall well. The better the fix, the better the final result.
Filling Holes
Start by cleaning the holes and removing loose debris. Use a putty knife to apply spackling or wall filler. Press the filler firmly into the holes. Smooth the surface by scraping off excess filler. Let it dry fully according to product instructions. Dry filler provides a strong base for sanding.
Sanding And Smoothing
After the filler dries, gently sand the patched area. Use fine-grit sandpaper for a smooth finish. Sand until the surface feels even with the rest of the wall. Wipe away dust with a damp cloth. Smooth walls help paint or wallpaper stick better. Proper sanding ensures the repair is nearly invisible.
Cleaning Up After Removal
Cleaning up after removing an old towel rack is an important step. It ensures the wall looks neat and ready for the next fixture. Proper cleanup helps avoid damage and keeps the space tidy. This part of the process is simple but must be done carefully.
Removing Dust And Debris
Start by brushing off any loose dust and debris from the wall. Use a soft brush or cloth to avoid scratching the surface. Vacuum the area to pick up small particles hidden in holes or cracks. Wipe the wall with a damp cloth to remove leftover dust. Allow the wall to dry fully before the next step.
Preparing Wall For New Fixtures
Fill any holes or gaps with spackle or wall filler. Smooth the surface with a putty knife to make it even. Let the filler dry completely, then sand it lightly for a smooth finish. Clean the wall again to remove dust from sanding. This preparation ensures the new towel rack sticks well and looks great.
:max_bytes(150000):strip_icc()/how-to-remove-towel-bar-5221017-03-4873175f190548228b867ee5a3dec733.jpg)
Credit: www.thespruce.com

Credit: www.wikihow.com
Frequently Asked Questions
How Do I Remove An Old Towel Rack Without Damaging The Wall?
Start by unscrewing the rack’s mounting screws using a screwdriver. If stuck, apply penetrating oil. Gently pry off any anchors with a putty knife. Repair holes with spackle and sand smooth before repainting.
What Tools Are Needed To Take Down A Towel Rack?
You typically need a screwdriver, putty knife, and possibly pliers. A drill may help with stubborn screws. Have spackle and sandpaper ready for wall repair after removal.
Can I Reuse The Old Towel Rack After Removal?
Yes, if the rack is undamaged and clean, you can reuse it. Carefully remove screws and anchors to avoid bending or breaking parts. Clean the rack before reinstalling.
How Do I Fill Holes After Removing A Towel Rack?
Use spackle or wall filler to fill holes. Apply with a putty knife, smooth it out, and let it dry. Sand the area for a seamless finish before repainting.
Conclusion
Removing an old towel rack from your wall is simple and quick. Use the right tools and take your time. Avoid damaging the wall by loosening screws carefully. Clean the area after removal to prepare for a new rack or paint.
A little patience makes the job easier and safer. Now, your wall is ready for a fresh look or a new towel rack. Small tasks like this help keep your home neat and updated.