Are your miniature LED string lights flickering or not turning on at all? It’s frustrating when your favorite decorations stop working, especially when you don’t want to buy new ones.
The good news is, you can often fix them yourself with just a few simple steps. In this guide, you’ll discover easy and effective ways to repair your LED string lights quickly. By the end, you’ll save money, avoid hassle, and bring back the warm glow you love.
Keep reading—you’re closer to lighting up your space than you think!

Credit: electronics.stackexchange.com
Common Issues With Mini Led String Lights
Mini LED string lights brighten many spaces. They create cozy and festive moods. Yet, these lights sometimes stop working. Knowing common problems helps fix them fast. This guide covers frequent issues with mini LED string lights.
Burnt Out Bulbs
Burnt out bulbs are a common problem. Each bulb carries small electric current. If one bulb burns out, others might stop too. Check bulbs carefully for dark spots or broken filaments. Replace burnt out bulbs with the exact type needed.
Broken Wires
Wires can break from bending or pulling. Broken wires stop electricity flow. Look for cuts or frayed spots on the wire. Use tape or wire connectors to fix small breaks. Replace the wire if damage is severe.
Faulty Fuses
Mini LED strings often have small fuses. A blown fuse stops the entire string from lighting. Check the fuse in the plug or battery box. Replace a blown fuse with one of the same size and rating.
Power Supply Problems
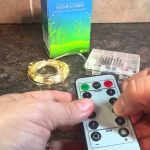
Power issues are common in LED string lights. Check batteries or plug connections. Weak batteries cause dim or no light. Ensure the plug fits tightly in the socket. Test the power source with a different device to confirm it works.

Credit: www.youtube.com
Tools Needed For Repairs
Repairing miniature LED string lights needs the right tools. Having these tools ready makes the process easier and safer. This guide covers the basic tools needed to fix your lights quickly.
Basic Electrical Tools
A small screwdriver set helps open light covers and panels. Wire cutters trim damaged wires cleanly. Needle-nose pliers grip tiny parts and bend wires. A multimeter checks if wires carry electricity. Electrical tape insulates exposed wires to prevent shorts.
Replacement Parts
Spare bulbs match your LED string light model. Extra wires fix broken or frayed sections. Connectors link wires securely without loose ends. Fuse replacements protect lights from power surges. Always keep some parts on hand for quick fixes.
Safety Gear
Use insulated gloves to protect from electric shock. Safety goggles guard eyes from sparks or debris. Work in a dry, well-lit area to avoid accidents. Keep a fire extinguisher nearby for emergencies. Safety first ensures smooth and safe repairs.
Step-by-step Bulb Replacement
Replacing bulbs in miniature LED string lights is easy and saves money. Follow simple steps to fix your lights quickly. This guide helps you find the broken bulb and replace it safely. You do not need special tools or skills. Just follow each step carefully for the best results.
Identifying The Faulty Bulb
Look for bulbs that are dark or broken. Check if some parts of the string do not light up. The faulty bulb often causes this. Gently touch each bulb to find the one that feels hot or cold. A cold bulb may be dead. Use natural light to see cracks or damage.
Removing And Replacing Bulbs
Unplug the lights before starting. Hold the bulb base and pull it out carefully. Do not pull the wires. Match the new bulb with the old one in size and color. Insert the new bulb firmly into the socket. Make sure it fits well and does not wiggle.
Testing After Replacement
Plug the lights back in. Watch if the new bulb lights up. Check the whole string to ensure all bulbs work. If the string still has dark spots, repeat the process for other bulbs. Proper testing avoids repeated replacements and saves time.
Fixing Broken Wires
Fixing broken wires is a key step in repairing miniature LED string lights. Broken wires stop the flow of electricity. This makes the lights stop working. Fixing these wires restores power and brings the lights back to life. The process is simple and saves money compared to buying new lights.
Locating Wire Damage
First, find where the wire is broken. Look for cuts, bends, or worn spots. Gently wiggle the wire and watch for flickering lights. Use a flashlight to see small cracks. Sometimes, the wire inside the plastic cover is broken but not visible outside. Test sections of the wire with a multimeter. This tool shows where electricity stops.
Stripping And Soldering Wires
Next, strip the wire ends carefully. Use a wire stripper or a sharp knife. Remove about half an inch of the plastic cover. Avoid cutting the wire strands. Twist the exposed wire strands to keep them tight. Touch the two wire ends together. Heat a soldering iron and melt solder onto the wires. This joins them firmly. Wait for the solder to cool before moving the wire.
Using Electrical Tape And Heat Shrink
After soldering, protect the repaired wire. Wrap it with electrical tape. This stops short circuits and keeps the wire safe. For a stronger seal, use heat shrink tubing. Slide the tubing over the repair before soldering. After soldering, move tubing over the joint. Use a heat gun or lighter carefully to shrink it. The tubing seals the wire tightly and prevents damage.
Replacing Blown Fuses
Replacing blown fuses is a common fix for miniature LED string lights. A fuse stops the flow of electricity when there is a problem. This protects the lights and prevents damage. Knowing how to find and change the fuse saves time and money.
Finding The Fuse Holder
The fuse holder is a small part on the plug or control box. It often looks like a small door or cap. Check the plug carefully for a sliding or removable cover. The fuse is inside this holder. Sometimes, it may be near the plug’s base or inside the battery compartment.
Selecting The Correct Fuse
Use the same type and size of fuse as the original. The fuse rating is usually printed on it or in the light set’s manual. Common ratings are 3 amps or 5 amps. Using the wrong fuse can cause the lights to fail or create safety risks.
Safe Fuse Replacement
Unplug the lights before opening the fuse holder. Remove the blown fuse gently. Insert the new fuse in the same direction as the old one. Close the fuse holder securely. Plug the lights back in and test if they work. Always handle fuses with dry hands and avoid forcing parts.
Troubleshooting Power Supply Issues
Miniature LED string lights often stop working due to power supply issues. These problems can be simple to fix with basic checks and tools. Start by understanding the power source and how it affects your lights. This section guides you through easy steps to find and solve power problems.
Checking Power Source
First, ensure the power source is connected properly. For plug-in lights, confirm the outlet works by plugging in another device. For battery-powered lights, check if the batteries are inserted the right way. Look for loose wires or damaged plugs that can stop power flow.
Testing Voltage Output
Use a multimeter to test the voltage output of the power source. Set the meter to the correct voltage range. Touch the probes to the power terminals carefully. Compare the reading to the required voltage for your LED string lights. Low or no voltage means the power source might be faulty.
Replacing Adapters Or Batteries
Replace the power adapter if voltage is too low or inconsistent. Buy one with the same voltage and current rating. For battery-powered lights, swap old batteries with fresh ones. Use high-quality batteries for longer light life. Proper power ensures your LED string lights work well again.
Preventive Maintenance Tips
Keeping your miniature LED string lights working well takes simple care steps. Preventive maintenance helps avoid common problems. You can enjoy bright, long-lasting lights by taking small actions regularly. These tips save time and money on repairs.
Proper Storage
Store LED string lights in a dry, cool place. Avoid areas with moisture or extreme heat. Coil the lights loosely to stop wires from bending or breaking. Use a container or box to protect them from dust and damage. Good storage keeps your lights safe for future use.
Regular Inspections
Check the lights before each use. Look for broken bulbs, frayed wires, or loose connections. Replace damaged parts immediately to prevent short circuits. Regular checks catch problems early. This keeps the lights working and reduces repair needs.
Avoiding Overloading
Do not connect too many light strings together. Overloading causes overheating and damages the wires. Follow the manufacturer’s instructions on how many strings to link. Use proper power sources that match the lights’ voltage. Avoiding overload keeps your lights safe and bright.

Credit: www.balsamhill.com
Frequently Asked Questions
How Do I Test Miniature Led String Lights?
Use a multimeter to check continuity and voltage along the string. Test each bulb individually to find faults.
What Causes Miniature Led String Lights To Stop Working?
Common causes include broken wires, burnt-out bulbs, or faulty connectors in the string.
Can I Replace Individual Bulbs In Led String Lights?
Yes, many LED strings allow bulb replacement. Match the voltage and size for safe replacement.
How Do I Fix A Broken Wire In Led String Lights?
Carefully strip the wire, twist the ends together, and insulate with electrical tape or heat shrink tubing.
Conclusion
Fixing miniature LED string lights can save money and reduce waste. Check each bulb and wire carefully for damage. Replace broken parts with new ones that fit well. Keep the lights dry and handle them gently to avoid future problems.
Small repairs often bring the lights back to life quickly. Enjoy your bright, glowing decorations once again without buying new strings. Simple steps make the process easy and satisfying. Your patience and care make a big difference.