

Imagine waking up every morning and seeing your schedule, weather, news, and more, all displayed right on your mirror. Sounds like something from the future, right?
But you can actually build this smart mirror yourself using a Raspberry Pi. It’s easier than you think, and once it’s done, your daily routine will become smoother and more connected. In this guide, you’ll discover simple steps to turn a regular mirror into a powerful smart device.
Ready to impress yourself and everyone who sees it? Let’s dive in and make your mirror smarter today.
Choosing The Right Raspberry Pi
Choosing the right Raspberry Pi is key to building a smart mirror that works well. The choice affects speed, size, and power use. This helps you decide what fits your needs and budget best. Understanding the options makes your project easier and more fun.
Comparing Raspberry Pi Models
Raspberry Pi comes in many models. The most popular are Pi 3, Pi 4, and Pi Zero. Pi 4 has the fastest processor and most memory. It handles tasks quickly and supports high-resolution displays. Pi 3 is good for basic projects and uses less power. Pi Zero is very small and cheap, but slower. Pick a model that matches your smart mirror’s features and budget.
Required Accessories And Components
You need more than just the Raspberry Pi board. A microSD card stores the system and apps. A power supply keeps the Pi running steadily. A display screen shows the mirror interface. A two-way mirror film or glass creates the mirror effect. Optional parts include a camera, microphone, or sensors for extra features. Make sure all parts work well together for best results.
Gathering Materials
Starting a smart mirror project with Raspberry Pi means gathering the right materials first. The quality of your mirror and screen affects the final look. The hardware you choose decides how well the mirror will work. Let’s explore what you need for a smooth build process.
Mirror Types And Screens
The main part is the mirror. Two-way glass is perfect. It lets light pass through while reflecting. This allows the screen behind to show clearly. Acrylic mirrors are lighter and cheaper but may scratch easily. Choose one based on your budget and need.
For the screen, an LCD monitor or tablet screen works best. Size matters. A 15 to 24 inch screen fits most mirrors. Make sure the screen has HDMI input for easy connection to Raspberry Pi. The screen’s brightness should be good enough for clear visibility.
Additional Hardware Essentials
Beyond mirror and screen, several hardware parts are needed. Raspberry Pi 4 is a popular choice for its speed and ports. A microSD card stores the operating system and apps. Power supply for Raspberry Pi must be reliable.
Also, get a frame or casing to hold the mirror and screen firmly. You need cables like HDMI and USB for connections. A USB microphone or camera can add voice control or face recognition. Cooling fans help prevent overheating during use.
Setting Up The Raspberry Pi
Setting up the Raspberry Pi is the first step to build your smart mirror. This process prepares the device to run the smart mirror software smoothly. It involves installing the right operating system and configuring basic settings. These actions ensure your Raspberry Pi works well with your hardware and network.
Installing The Operating System
Start by downloading the Raspberry Pi OS from the official website. Use a tool like Raspberry Pi Imager or Balena Etcher to write the OS image to your microSD card. Insert the microSD card into your Raspberry Pi.
Connect a monitor, keyboard, and mouse to the Pi. Power on the device. The OS will boot and guide you through setup steps. Follow the prompts to select language, time zone, and keyboard layout. This process readies your Pi for running the smart mirror software.
Configuring Network And Settings
Next, set up the network connection for your Raspberry Pi. Connect to Wi-Fi or use an Ethernet cable. Enter your network password if needed. Confirm the Pi connects to the internet. Reliable internet access helps with software updates and online features.
Adjust important settings like hostname and password. Change the default password to keep your device secure. Enable SSH to control the Pi remotely. These configurations improve your setup and make managing the smart mirror easier.
Installing Smart Mirror Software
Installing the smart mirror software is a key step in building your Raspberry Pi smart mirror. This software controls what appears on your mirror screen. It displays useful information like time, weather, news, and calendar events.
Choosing the right software platform makes the installation easier. Some platforms offer ready-made features. Others allow more customization. The software should work smoothly with your Raspberry Pi and be easy to update.
Popular Smart Mirror Platforms
MagicMirror² is the most popular platform. It is open-source and has many modules. It works well on Raspberry Pi and is easy to customize.
HomeMirror is another option. It focuses on simplicity and user-friendly design. It supports basic smart mirror features with less setup.
SmartMirror by Michael Teeuw offers a good balance of features and flexibility. It is beginner-friendly and has an active community.
Step-by-step Installation Guide
Start by updating your Raspberry Pi system. Open the terminal and enter sudo apt-get update and sudo apt-get upgrade.
Next, install Node.js, a required software for MagicMirror². Use the command curl -sL https://deb.nodesource.com/setup_14.x | sudo -E bash - followed by sudo apt-get install -y nodejs.
Download the MagicMirror² software by cloning its GitHub repository. Run git clone https://github.com/MichMich/MagicMirror.
Navigate to the MagicMirror folder using cd MagicMirror. Then install the required modules with npm install.
Start the smart mirror by running npm start. The interface should appear on your display.
Edit the config.js file to customize your mirror’s modules and settings. Use a text editor like nano or VS Code.
Customizing The Display
Customizing the display of your smart mirror is a key step. It lets you see the information you want in a style you like. A well-customized display makes your mirror useful and fun to use. You can change what shows up and how it looks. This helps you fit the mirror to your daily needs and space.
Adding Widgets And Modules
Widgets and modules show different types of information on your mirror. You can add weather updates, news headlines, and calendar events. Each widget has a specific function to keep you informed. Choose the ones that matter most to you. Most smart mirror software lets you install these easily. You can find free and simple modules online. Adding them improves the mirror’s usefulness every day.
Adjusting Layout And Themes
The layout controls where each widget sits on the screen. You can move them around to fit your style. Some layouts put the clock at the top, others on the side. Themes change the colors and fonts on the display. Pick light or dark themes to match your room. Adjusting these settings helps reduce glare and improves readability. A clean layout keeps your mirror looking neat and easy to read.

Credit: www.edn.com
Building The Mirror Frame
Building the mirror frame is a key step in creating your smart mirror with a Raspberry Pi. The frame holds the mirror and screen firmly. It also gives your project a clean, finished look. A good frame protects the electronics and makes the mirror easy to hang on a wall.
The right frame helps keep everything in place. It also improves the mirror’s overall style. This section covers how to pick materials and assemble the parts.
Selecting Frame Materials
Choose materials that are strong and light. Wood is a popular choice because it is easy to cut and shape. You can also use plastic or metal for a modern look. Make sure the material fits your room’s style and size.
Use a frame wide enough to hide wires and the screen edges. Thickness matters too. A thicker frame can hold the screen better but may look bulky. Measure your screen and mirror carefully to get the right size.
Assembling The Mirror And Screen
Place the two-way mirror in the frame first. This mirror lets light through from the screen behind it. Secure it with clips or glue that won’t damage the glass.
Next, fit the screen behind the mirror. The screen should sit flat and close to the mirror surface. Attach it using screws or brackets to keep it steady. Make sure no light leaks around the edges.
Check that the screen shows clearly through the mirror. Test the setup by turning on the Raspberry Pi and adjusting brightness. The frame should hold everything tight without gaps or wobbling.
Connecting Hardware Components
Connecting the hardware components is the first step to build your smart mirror. This step brings together the Raspberry Pi, screen, sensors, and other parts. Proper connections ensure your smart mirror works smoothly and safely.
Careful wiring prevents damage and makes the setup stable. Follow clear instructions and double-check every connection. Small mistakes can cause big problems later.
Wiring The Raspberry Pi
Start by placing your Raspberry Pi on a safe surface. Connect the HDMI cable to the Pi and the back of the monitor. This sends the display signal to your mirror screen.
Plug in the USB keyboard and mouse. These help during setup and testing. Attach any sensors, like a motion sensor or temperature sensor, to the GPIO pins. Use a pinout diagram to connect wires correctly.
Secure all wires to avoid loose connections. Loose wires can cause errors or damage. Use cable ties or tape to keep wires tidy and safe.
Power Management Tips
Use a good power supply that matches the Raspberry Pi’s needs. Too little power causes resets or failure. Too much power risks damaging the board.
Connect the power adapter directly to the Pi’s power port. Avoid powering through USB hubs or other devices. This ensures stable and clean power delivery.
Keep the power cable away from heat sources. Heat can degrade the cable and cause shorts. Use surge protectors to guard against power spikes.
Check for any signs of overheating on your Raspberry Pi. Add a small fan or heatsink if needed. Proper cooling helps your smart mirror run longer without issues.
Testing And Troubleshooting
Testing and troubleshooting are key steps in building a smart mirror with Raspberry Pi. These steps help ensure the mirror works smoothly and shows the right information. Careful testing finds problems early. Troubleshooting fixes those problems quickly. This keeps your project running well and saves time.
Try each feature of the smart mirror separately. Check the display, sensors, and internet connection. Testing small parts first helps find errors fast. Use simple commands to test Raspberry Pi functions. Watch for error messages or unusual behavior. Note any problems to fix later.
Common Issues And Fixes
One common issue is the screen not turning on. Check power connections and cables first. Sometimes the Raspberry Pi may not boot. Confirm the SD card has the right software installed. Another problem is slow response or freezing. Restart the Pi and close extra programs to fix this.
Wi-Fi connection failures happen often. Re-enter Wi-Fi settings or move closer to the router. If the mirror shows wrong or no data, check the API keys or data sources. Update software regularly to avoid bugs. Simple fixes save a lot of frustration.
Optimizing Performance
Speed up your smart mirror by limiting background tasks. Use lightweight software and remove unnecessary apps. Adjust screen brightness to save power and reduce heat. Keep the Raspberry Pi cool with a fan or heat sink.
Clear cache and temporary files regularly. This frees up memory and improves speed. Use a wired Ethernet connection for more stable internet. Small changes can make your smart mirror fast and reliable.
Enhancing With Voice Control
Adding voice control to your smart mirror makes it easier to use. You can talk to it and get information without touching the screen. Voice control creates a hands-free experience that fits well with daily routines.
This feature lets you ask for weather updates, news, or reminders while getting ready. It also makes your smart mirror feel more modern and interactive. Let’s explore how to add voice control using popular voice assistants and set up simple commands.
Integrating Voice Assistants
Choose a voice assistant that works well with Raspberry Pi. Google Assistant and Amazon Alexa are popular options. Both have guides and tools for easy integration.
Start by installing the necessary software on your Raspberry Pi. You may need to create an account with the voice assistant service. Follow the step-by-step instructions to link your device.
Test the assistant by speaking basic commands. Make sure your microphone and speakers work correctly. Proper setup ensures smooth voice interaction on your smart mirror.
Setting Up Voice Commands
Decide what commands your smart mirror should understand. Common commands include asking for weather, news, time, or calendar events. Keep commands simple and clear.
Use the voice assistant’s developer tools to create custom commands. These tools help your mirror respond to specific requests. Test each command to ensure it works properly.
Organize commands so they are easy to remember. This makes your smart mirror more user-friendly. Voice control will then feel natural and helpful every day.

Credit: www.youtube.com
Expanding Features
Expanding the features of your smart mirror with Raspberry Pi makes it more useful and fun. You can customize it to fit your needs and daily routine. Adding new components and planning future upgrades keeps your project fresh and exciting.
Adding Sensors And Cameras
Sensors help your smart mirror react to the environment. Motion sensors can turn the display on or off automatically. Light sensors adjust brightness based on room lighting. Cameras add face recognition or gesture controls. These features make the mirror more interactive and smart.
Connecting sensors and cameras to Raspberry Pi is simple. Use GPIO pins for sensors and USB or camera modules for cameras. You can find many tutorials online for setting up each device. Start small and add more devices as you learn.
Future Upgrade Ideas
Think about voice control for hands-free use. Integrate smart home devices to control lights or temperature. Add weather updates, news, or calendar reminders. Use AI to improve voice or face recognition. Try different display styles or wallpapers for a fresh look.
Plan upgrades that match your skills and interests. Testing new ideas keeps your project interesting. Your smart mirror can grow with you, becoming smarter and more helpful over time.
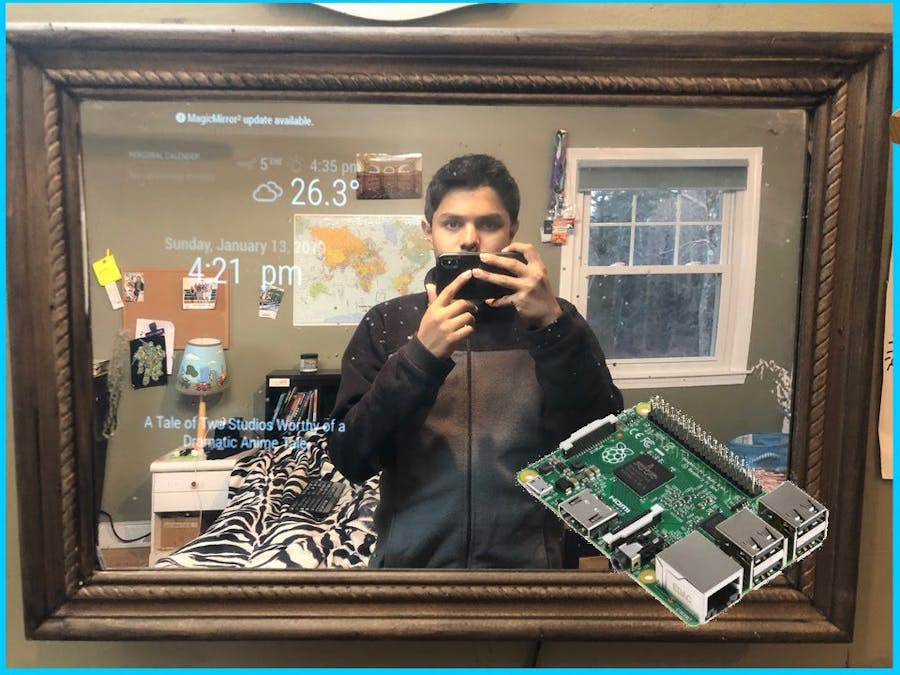
Credit: www.hackster.io
Frequently Asked Questions
What Components Are Needed For A Raspberry Pi Smart Mirror?
You need a Raspberry Pi, a two-way mirror, a monitor, and a frame. Also, include power supplies, cables, and optional sensors for enhanced features.
How Do I Install The Smart Mirror Software On Raspberry Pi?
Download and install MagicMirror² software on your Raspberry Pi. Follow setup instructions for configuration and customize modules as per your preference.
Can I Add Voice Control To My Raspberry Pi Smart Mirror?
Yes, integrate voice assistants like Google Assistant or Amazon Alexa. Use compatible microphones and configure the software for voice commands.
What Display Works Best For A Raspberry Pi Smart Mirror?
A monitor with HDMI input and at least 1080p resolution works best. Size depends on your mirror frame and viewing distance.
Conclusion
Building a smart mirror with Raspberry Pi is fun and rewarding. You control what shows on your mirror. The steps are simple and clear to follow. This project helps you learn about technology and coding. Try adding your favorite apps or widgets.
Keep experimenting to make it just right. A smart mirror adds style and function to your space. Start today and see what you can create!


