Are you ready to boost your home security with the Netvue Video Doorbell? Installing this smart device might seem tricky, but with the right steps, you can do it yourself quickly and easily.
Imagine being able to see who’s at your door anytime, right from your phone. In this guide, you’ll discover simple, clear instructions that make the whole process smooth and stress-free. Keep reading, and you’ll have your Netvue Video Doorbell up and running before you know it.
Credit: kdfoundation.org
Preparing For Installation
Preparing for the installation of your Netvue Video Doorbell is the first step. This stage ensures a smooth setup process and helps avoid common problems. Taking time to prepare saves effort later.
Checking Package Contents
Open the box carefully. Check for all parts listed in the manual. Confirm the doorbell unit, mounting bracket, screws, anchors, and power adapter are included. Missing items can delay installation. Contact support if anything is absent.
Gathering Required Tools
Collect the tools you need before starting. A drill, screwdriver, level, and pencil are common tools needed. Having tools ready avoids interruption. Keep everything within reach to speed up the work.
Verifying Wi-fi Compatibility
Check your Wi-Fi network speed and signal strength at your door. The Netvue Video Doorbell needs a strong, stable connection. Use a smartphone to test the Wi-Fi signal near your door. Weak signals cause video lag or disconnection. Consider a Wi-Fi extender if the signal is poor.

Credit: kdfoundation.org
Setting Up The Netvue App
Setting up the Netvue app is the first step to using your video doorbell. This app connects your smartphone to the doorbell. It lets you see who is at your door from anywhere. Follow these simple steps to get started.
Downloading The App
Open the App Store or Google Play on your phone. Search for “Netvue” in the search bar. Find the official Netvue app and tap the download button. Wait for the app to install fully before opening it.
Creating An Account
Launch the Netvue app after installation. Tap on “Sign Up” to create a new account. Enter your email address and create a strong password. Verify your email by following the link sent to your inbox. Log in using your new credentials.
Connecting To The Doorbell
Turn on your Netvue video doorbell. In the app, tap “Add Device” to start the setup. Follow the on-screen instructions to connect to your Wi-Fi. Wait for the app to find and link to the doorbell. Once connected, test the live video feed to confirm connection.
Installing The Doorbell Hardware
Installing the Netvue video doorbell hardware is simple. Follow clear steps to place and connect the device properly. This section covers everything about setting up the doorbell hardware. The right installation ensures good video quality and smooth operation.
Choosing The Installation Location
Select a spot near your front door, about 48 inches from the ground. This height captures faces clearly. Avoid direct sunlight or places with heavy shadows. The camera works best with clear lighting. Also, pick a spot near your existing doorbell wiring, if possible.
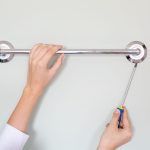
Mounting The Doorbell
Use the provided mounting bracket for secure attachment. Mark the screw holes on the wall. Drill small holes and insert anchors if needed. Attach the bracket using screws tightly. Then, snap the doorbell onto the bracket until it clicks. Make sure it is steady and flush against the wall.
Connecting The Wiring
Turn off power from the breaker before wiring. Connect the doorbell wires to your home’s existing doorbell wires. Usually, it does not matter which wire goes where. Secure the connections with wire nuts. Tuck the wires neatly behind the mounting bracket. Restore power to test the doorbell’s function.
Configuring Device Settings
Configuring your Netvue Video Doorbell ensures it works just right for your home. Adjusting the settings lets you control how the device reacts to visitors and alerts. Proper setup helps keep your home safe and gives you peace of mind.
Adjusting Motion Detection
Open the Netvue app on your phone. Find the motion detection option in the settings menu. Adjust the sensitivity to avoid false alarms from small animals or cars. Set the detection zones to focus on your doorstep or driveway. This helps the doorbell alert you only when needed.
Setting Up Notifications
Enable push notifications in the app to get alerts instantly. Choose the types of notifications you want, like motion alerts or doorbell rings. Make sure your phone’s notification settings allow alerts from the app. This way, you never miss a visitor or delivery.
Testing Video And Audio
Check the video feed to ensure clear images. Test the audio by speaking through the doorbell and listening on your phone. Adjust the volume if the sound is too low or loud. Regular testing keeps the doorbell ready for real use.
Troubleshooting Common Issues
Installing the Netvue Video Doorbell is simple, but some issues may arise. Troubleshooting helps fix common problems quickly. This saves time and keeps your doorbell working well.
Wi-fi Connectivity Problems
Check your Wi-Fi signal near the doorbell. A weak signal may stop the device from connecting. Move your router closer or use a Wi-Fi extender if needed.
Make sure your network uses 2.4 GHz. The Netvue doorbell does not support 5 GHz Wi-Fi. Enter the correct Wi-Fi password during setup.
Restart your router and doorbell to refresh the connection. This often solves simple network issues.
Doorbell Not Powering On
Confirm the doorbell is properly connected to power. Loose wires can cause the device to stay off. Check the wiring and tighten any loose parts.
Use the correct power source as instructed in the manual. Wrong voltage may damage the doorbell or prevent it from working.
If your model has a battery, ensure it is charged. Replace the battery if it no longer holds power.
App Syncing Errors
Open the Netvue app and ensure it is updated to the latest version. Older versions may cause syncing issues.
Log out and log back into the app. This resets your session and may fix syncing errors.
Check your internet connection on the phone. A poor connection can stop the app from syncing with the doorbell.

Credit: www.youtube.com
Maintaining Your Netvue Doorbell
Maintaining your Netvue Video Doorbell helps keep it working well. Regular care ensures clear video and reliable alerts. Simple steps help your doorbell last longer and stay efficient.
Regular Firmware Updates
Check for firmware updates often. These updates fix bugs and improve features. Use the Netvue app to download and install updates. Updated firmware keeps your doorbell secure and smooth.
Cleaning And Care Tips
Clean the doorbell lens and body gently. Use a soft cloth to remove dust and dirt. Avoid harsh chemicals that can damage the surface. Keep the camera clear for sharp video quality.
Battery Replacement
Watch battery levels in the app regularly. Replace the battery when it runs low. Use the battery type recommended by Netvue. Proper battery care ensures your doorbell stays active without interruption.
Frequently Asked Questions
How Do I Mount The Netvue Video Doorbell?
To mount the Netvue Video Doorbell, first choose a suitable location near your door. Use the provided screws and mounting bracket. Ensure the doorbell is securely attached and positioned for a clear view of your entrance.
What Tools Are Needed For Installation?
You will need a drill, screwdriver, and possibly a level. These tools help secure the mounting bracket and ensure the doorbell is properly aligned.
How Do I Connect The Doorbell To Wi-fi?
After mounting, power on the doorbell and open the Netvue app. Follow the app’s prompts to connect the doorbell to your home Wi-Fi network. Ensure the signal is strong for optimal performance.
Can I Use The Doorbell Without Existing Wiring?
Yes, the Netvue Video Doorbell supports wireless installation using its rechargeable battery. This allows flexible placement without needing existing doorbell wiring.
Conclusion
Installing the Netvue video doorbell is simple and quick. Follow each step carefully to avoid mistakes. Check your Wi-Fi connection for smooth operation. Test the doorbell after installation to ensure it works well. Enjoy better home security with clear video and easy alerts.
Stay safe and connected with this handy device. Your home feels smarter and more secure now.