Imagine giving your pet the freedom to come and go without you having to open the door every time. Installing a pet door into a wall might seem tricky, but with the right steps, you can do it yourself and save money.
In this guide, you’ll discover exactly how to make a safe, efficient pet door that fits your home perfectly. Ready to make life easier for both you and your furry friend? Keep reading, and you’ll be surprised how simple the process can be.
Choosing The Right Pet Door
Choosing the right pet door is key to making your installation successful. The door must fit your pet and your wall perfectly. It should be safe, durable, and easy for your pet to use. This section guides you through the main points to consider before buying a pet door.
Types Of Pet Doors
Pet doors come in various types. There are flap doors, electronic doors, and sliding doors. Flap doors are simple and cost-effective. Electronic doors open only for your pet using a collar key. Sliding doors fit into door tracks and work well for patio doors. Choose a type that matches your pet’s habits and your home setup.
Measuring Your Pet
Measure your pet carefully. Height and width matter most. Measure your pet standing up from the floor to the top of the shoulders. Also, measure the width across the shoulders. The door should be slightly larger than these measurements. This allows your pet to pass comfortably without squeezing.
Selecting The Door Material
Door material affects durability and insulation. Plastic doors are lightweight and affordable. Metal doors are strong and good for larger pets. Look for doors with weatherproof seals to keep out cold and rain. Pick a material that fits your climate and how often your pet will use the door.

Credit: www.petdoors.com
Tools And Materials Needed
Installing a pet door into a wall needs the right tools and materials. These help you make a clean, safe cut and secure the door properly. Preparation is key. Gather everything before starting.
Essential Tools
Start with a drill. It makes holes for screws and the door frame. A jigsaw helps cut the wall precisely. Use a tape measure to mark the door size accurately. A pencil is useful for marking lines. Screwdrivers secure the door frame tightly. A level keeps the door straight.
Safety Equipment
Wear safety glasses to protect your eyes from dust and debris. Use gloves to protect your hands while cutting. A dust mask prevents inhaling wall dust. Hearing protection is important when using loud power tools. Safety should never be ignored.
Additional Supplies
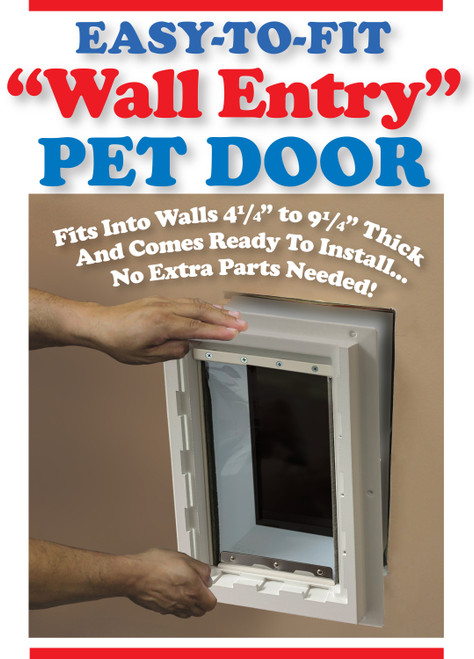
Get the pet door kit that fits your wall thickness. Use caulk or weatherproof sealant to close gaps. Sandpaper smooths rough edges after cutting. Painter’s tape can protect wall surfaces during work. Extra screws and anchors may be needed for secure fitting.
Preparing The Wall
Preparing the wall is a crucial step before installing a pet door. It ensures a smooth and safe installation process. Proper preparation helps avoid damage to your wall and keeps your pet safe.
This stage involves choosing the right spot, checking for hidden obstacles, and marking the area for cutting. Taking time here saves effort later.
Finding The Best Location
Pick a spot that your pet can easily reach. The location should be low enough for your pet to pass through comfortably. Avoid areas with heavy foot traffic to prevent accidents. Consider the height and width of your pet to find the perfect fit.
Checking For Obstacles
Look inside the wall for pipes, wires, or studs. Use a stud finder or wire detector to check. Avoid cutting where obstacles appear. This step protects your home’s structure and prevents electrical hazards.
Marking The Cutout Area
Measure the pet door dimensions carefully. Use a pencil to draw the outline on the wall. Double-check the measurements before cutting. Clear and accurate marks guide a clean cut for the door.
Credit: www.idealpetproducts.com
Cutting The Wall Opening
Cutting the wall opening for a pet door is a key step. It requires care and precision to fit the door perfectly. This step prepares the wall for easy installation and secure fitting. Follow the right process to avoid damage and keep the wall strong.
Drilling Starter Holes
Begin by marking the pet door outline on the wall. Use a drill to make starter holes at each corner. These holes give space to insert the saw blade. Drill straight and deep enough to pass through the wall. Starter holes protect the wall from cracking.
Using The Saw Safely
Use a jigsaw or keyhole saw for cutting along the marked lines. Insert the blade into the starter holes. Cut slowly and steadily to follow the outline exactly. Wear safety goggles and gloves to protect yourself. Keep the saw blade straight for clean cuts.
Smoothing Edges
After cutting, the edges may be rough or uneven. Use sandpaper or a file to smooth all edges carefully. Smooth edges prevent splinters and help the pet door fit well. Check for any sharp spots and remove them completely.
Installing The Pet Door Frame
Installing the pet door frame is a key step in adding a pet door to your wall. This part holds the door in place and makes sure it fits well. A correct fit helps your pet go in and out easily.
Follow simple steps to fit the frame, secure it tightly, and seal the edges. This keeps the door sturdy and prevents air or water from coming inside.
Fitting The Frame
First, place the pet door frame into the cut hole. Check that it fits snugly without gaps. The frame should sit flat against the wall on both sides. Adjust the frame if it feels loose or uneven. A tight fit stops the door from moving or falling.
Securing With Screws
Use screws to hold the frame firmly to the wall. Most pet door kits come with screws for this step. Screw slowly and evenly to avoid cracks in the wall. Tighten the screws until the frame feels solid. Do not over-tighten; this can damage the frame.
Sealing The Edges
Apply sealant around the frame edges to block air and water. Use a weatherproof sealant for best results. Smooth the sealant with your finger or a tool for a clean finish. Sealing helps keep your home warm and dry. Let the sealant dry fully before using the pet door.
Finishing Touches
After installing a pet door into a wall, some final steps remain. These finishing touches help ensure the door works well and lasts long. They also help your pet use the door easily and safely.
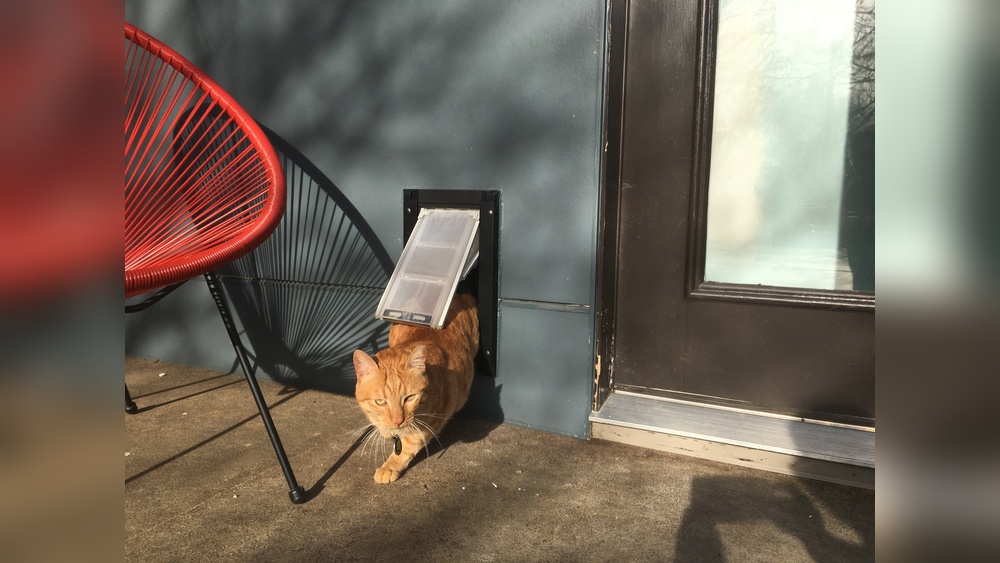
Testing The Door
Check the door for smooth opening and closing. Push the flap gently to see if it swings freely. Make sure the lock works properly. Watch for any gaps where air or bugs could enter. Fix any tight spots or loose parts.
Weatherproofing Tips
Seal edges around the door with weatherproof caulk. This keeps rain and wind outside. Add foam insulation if needed to stop drafts. Use a door flap with a magnetic strip to close tightly. Protect the frame with weather-resistant paint or finish.
Training Your Pet
Show your pet how to use the new door. Use treats to encourage them to go through. Open and close the flap slowly at first. Praise your pet every time they try. Practice a few times each day until they feel comfortable.

Credit: www.idealpetproducts.com
Frequently Asked Questions
How Do I Choose The Right Pet Door Size?
Measure your pet’s height and width accurately. Choose a door slightly bigger than your pet’s dimensions. This ensures easy access and comfort. Always check the manufacturer’s sizing chart before purchasing.
Can I Install A Pet Door In Any Wall?
Most walls can accommodate pet doors, but check for electrical wiring or plumbing first. Avoid load-bearing walls without professional advice. Installation is easier in exterior walls with access to both sides.
What Tools Are Needed To Install A Pet Door?
You will need a drill, saw, measuring tape, level, and screwdriver. Safety gear like gloves and goggles is also essential. Proper tools ensure a clean, secure installation.
How Do I Seal The Pet Door Properly?
Use weatherproof caulk around the edges to prevent drafts and moisture. Apply foam insulation if needed for better sealing. Proper sealing improves energy efficiency and keeps your home comfortable.
Conclusion
Installing a pet door into a wall is simple with the right steps. Measure carefully and choose the best spot for your pet’s safety. Use the proper tools to cut and fit the door securely. Take your time to avoid mistakes.
Your pet will enjoy easy access in and out. Enjoy the freedom and convenience this adds to your home. A well-installed pet door makes life easier for both you and your pet. Try it yourself and see how smooth the process can be.