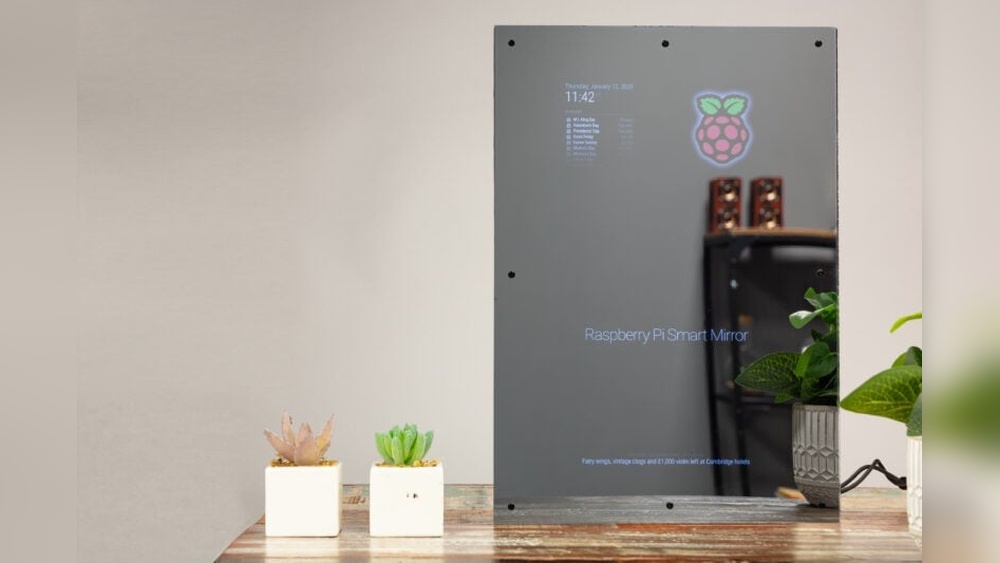

Imagine starting your day with a mirror that doesn’t just reflect your image but also shows the weather, news, and your calendar—all at a glance. What if you could build this smart mirror yourself, tailored exactly to your style and needs?
You’re about to discover how simple it is to create your own DIY smart mirror. By the end of this guide, you’ll have the knowledge to transform an ordinary mirror into a high-tech helper that makes your daily routine smoother and more exciting.
Ready to impress yourself and anyone who walks by? Let’s dive in!

Credit: www.edn.com
Materials And Tools Needed
Building a DIY smart mirror is a fun and rewarding project. The right materials and tools make the process easier. Having everything ready helps avoid delays and mistakes. Below is a list of what you need to start your smart mirror.
Essential Components
A two-way mirror forms the screen’s surface. It shows the reflection and digital display.
A monitor or screen displays the smart features behind the mirror. Choose a size that fits your frame.
A small computer, like a Raspberry Pi, runs the software for your smart mirror.
Power cables and adapters supply electricity to the monitor and computer.
Frame materials such as wood or plastic hold everything together neatly.
Optional sensors include a microphone or motion detector for extra functions.
Recommended Tools
A screwdriver set helps assemble and secure components.
A drill is useful for making holes in the frame or mounting parts.
A utility knife or glass cutter trims the mirror to the right size.
A hot glue gun or strong tape can fix wires and small parts.
A measuring tape ensures accurate dimensions for a clean fit.
A computer or laptop is needed to install and configure the software.
Choosing The Right Mirror
Choosing the right mirror is the first step in building your DIY smart mirror. The mirror affects how well your display shows through. It also impacts the final look of your project.
Pick a mirror that balances clarity and reflection. The right mirror lets you see your smart display clearly. It also works as a regular mirror when the display is off.
Types Of Mirrors
Two main types of mirrors work best for smart mirrors. One is the two-way glass mirror. It allows light to pass through from behind. This makes the smart display visible while keeping the mirror reflective.
The other is a acrylic mirror sheet. It is lighter and easier to cut. Acrylic mirrors are less fragile but might scratch easily. Choose based on your project needs and skills.
Size And Frame Selection
Size matters for your smart mirror. Pick a size that fits your space well. Bigger mirrors show more information but need bigger displays. Smaller mirrors save space but limit display size.
Frames add style and support. Choose a simple frame for a modern look. Make sure the frame can hold the mirror and electronics securely. Consider frames that allow easy access for repairs.
Selecting The Display
Selecting the right display is a key step in building your DIY smart mirror. The display shows your apps, weather, time, and other useful information. Choosing the best screen impacts how clear and bright your mirror looks. It also affects the power use and how easy it is to build.
Screen Options
Many screen types work for smart mirrors. LCD and LED screens are popular choices. They offer good brightness and colors. Tablet screens can also work for smaller mirrors. Some builders use old laptop screens to save money. OLED screens give deep blacks but cost more. Touchscreen displays add extra features but need more setup.
Resolution And Size Considerations
Screen size depends on your mirror frame and space. Larger screens show more info but use more power. Smaller screens fit well in tight spaces but may feel crowded. Aim for at least 720p resolution for clear text and images. Higher resolutions like 1080p or 4K look sharper but cost more. Balance size and resolution for the best view and budget.
Setting Up The Computer
Setting up the computer is a key step in building your DIY smart mirror. It acts as the brain of the mirror, running all apps and displaying useful info. Choosing the right hardware and installing the operating system ensures smooth performance. This part may seem tricky but can be simple with clear steps. Let’s explore the hardware options and how to install the OS.
Hardware Choices
Selecting the right hardware affects speed and reliability. Many builders use a small computer like a Raspberry Pi. It is affordable, compact, and has enough power for a smart mirror. Other options include old laptops or mini PCs if you want more power.
Make sure the device has Wi-Fi or Ethernet for internet access. Check that it supports HDMI to connect to your mirror’s display. A device with USB ports helps add peripherals like a keyboard for setup. Power supply stability is important to avoid crashes.
Installing The Operating System
Most smart mirrors run on Linux-based systems like Raspbian or Ubuntu. These OS options support many smart mirror software projects. Download the OS image file from the official website. Use software like Balena Etcher to flash the image onto an SD card or USB drive.
Insert the SD card or USB into your device and power it on. Follow on-screen instructions to complete initial setup like language and Wi-Fi. Update the system to get the latest security patches. Your computer is now ready to install the smart mirror software.
Installing Smart Mirror Software
Installing smart mirror software is a key step in building your own DIY smart mirror. This software controls what the mirror shows. It can display time, weather, news, and much more. Choosing the right software makes your mirror useful and fun. You will need to install it on a small computer like a Raspberry Pi. The software is often open-source and free to use.
Popular Software Options
Many smart mirror software options exist. MagicMirror² is a popular choice. It is easy to install and has many modules. Another option is Dakboard. It focuses on calendar and photo displays. There is also MirrorMirror, which is simple and lightweight. Each software has unique features and interfaces. Pick one that fits your needs and skill level.
Configuration Tips
After installing, configure the software for your mirror. Start by editing the settings file. Change the modules you want to show. Adjust the layout to fit your screen size. Set your location for accurate weather data. Test the mirror to see if everything works. Keep the setup simple at first. Add more features as you get comfortable.
Credit: www.youtube.com
Building The Frame
Building the frame is a key step in creating your DIY smart mirror. The frame holds all parts together and gives your mirror a neat look. A strong frame keeps the mirror safe and stable. You can choose many designs based on your style and space. Planning the frame carefully makes assembly easier and faster.
Design Ideas
Choose a design that fits your room and taste. Simple rectangular frames work well for most mirrors. Wooden frames bring a warm, classic feel. Metal frames offer a modern and sleek look. Think about colors that match your home. You can also add small shelves or hooks for extra use. Make sure the frame size fits your mirror and screen perfectly. A slim frame keeps the focus on the display.
Assembly Instructions
Start with cutting the frame pieces to size. Use wood or metal, depending on your design. Sand the edges for a smooth finish. Join the pieces using nails or screws for strong hold. Attach corner brackets to keep the frame tight and square. Place the two-way glass or acrylic into the frame carefully. Secure the smart screen behind the glass with brackets or tape. Check the frame for any loose parts. Your frame is now ready for the final smart mirror setup.
Integrating The Display And Mirror
Integrating the display and mirror is a key step in building your DIY smart mirror. This process combines the reflective surface with the digital screen. The goal is to make the display visible through the mirror while keeping the look clean. Proper integration ensures clear visuals and a sleek appearance.
Choosing the right method to mount the display behind the mirror affects the final look. Managing the wiring neatly keeps the setup safe and organized. This section covers mounting techniques and cable management tips.
Mounting Techniques
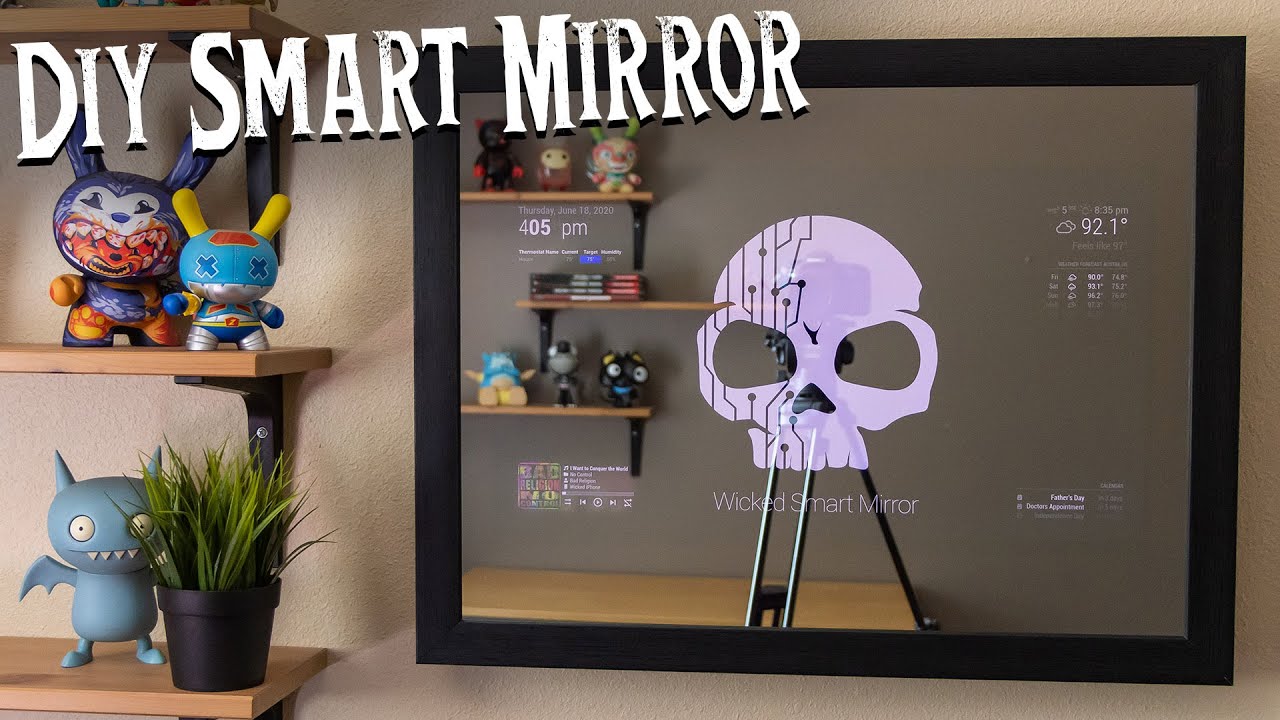
Start by selecting a two-way mirror that fits your display size. The display should sit flush behind the mirror for a smooth finish. Use strong double-sided tape or mounting brackets to fix the screen. Make sure the display does not touch the mirror directly. Leave a small gap for airflow to prevent overheating. Check the alignment carefully to avoid crooked placement. Secure the mirror frame tightly to hold everything in place.
Wiring And Cable Management
Plan your wiring before attaching the display and mirror. Use cable clips or adhesive mounts to keep wires tidy. Route cables along the mirror frame edges to hide them. Avoid tight bends or pulling on wires to prevent damage. Consider using a power strip or extension cord for easier access. Label cables if needed to simplify future maintenance. Good cable management improves safety and looks professional.
Credit: www.youtube.com
Customizing Features
Customizing your DIY smart mirror makes it truly yours. You decide what features suit your daily routine. This section covers easy ways to add smart functions. These upgrades improve convenience and interaction. Simple tools and parts help you build more than a mirror.
Adding Voice Control
Voice control lets you use the mirror hands-free. You can ask for weather, news, or reminders. Use a small microphone and a voice assistant module. Connect it to your mirror’s computer or Raspberry Pi. Program commands that respond to your voice. This feature saves time and feels futuristic.
Incorporating Sensors
Sensors make your mirror smarter and more interactive. Motion sensors can turn the display on or off. Light sensors adjust brightness based on room light. Temperature sensors show current weather or room heat. These sensors help save energy and improve user experience. Adding sensors requires simple wiring and coding.
Testing And Troubleshooting
Testing and troubleshooting your DIY smart mirror is an important step. It ensures your mirror works well and shows accurate information. This phase helps find and fix problems early. It also improves how fast and smooth your mirror runs. Follow these tips to get the best results from your smart mirror project.
Common Issues
One common issue is the mirror not turning on. Check the power supply and connections first. Another problem is the display showing wrong or no data. Verify your software settings and internet connection. Sometimes, the touch or voice control does not respond. Make sure sensors and microphones are properly connected and configured. Screen brightness or contrast may be too low. Adjust these settings in your display menu. Keep an eye on loose cables or hardware faults. These simple checks often solve many problems quickly.
Performance Optimization
Speed up your smart mirror by closing unused apps and services. Clear cache regularly to free up memory. Update your software and firmware to the latest version. Choose lightweight applications for better performance. Adjust screen resolution to match your hardware capacity. Use a cooling system to prevent overheating. Keep your smart mirror clean and dust-free for better hardware function. Regular maintenance helps your device run smoothly and last longer.
Maintenance Tips
Maintaining your DIY smart mirror keeps it working well and looking great. Regular care helps avoid problems and extends its life. Simple steps protect both the mirror surface and the technology inside.
Cleaning The Mirror
Use a soft, lint-free cloth to clean the mirror surface. Avoid harsh chemicals that can damage the glass or screen. Lightly dampen the cloth with water or a gentle glass cleaner. Wipe gently in circular motions to remove dust and smudges. Do not spray liquid directly on the mirror to prevent damage to electronics.
Updating Software
Keep your smart mirror’s software up to date for better performance. Check for updates regularly through the mirror’s settings menu. Updates fix bugs and add new features. Download and install updates as soon as they become available. Restart the mirror after updates to ensure smooth operation.
Frequently Asked Questions
What Materials Are Needed For A Diy Smart Mirror?
You need a two-way mirror, a monitor or tablet, a Raspberry Pi, and frame materials. Additional items include power cables and mounting hardware.
How Do I Install Software For A Smart Mirror?
Use open-source platforms like MagicMirror². Install it on Raspberry Pi with step-by-step instructions available online.
Can I Customize The Display On My Smart Mirror?
Yes, you can add widgets for weather, news, calendar, and more. Customization depends on the software used.
How Much Does It Cost To Build A Diy Smart Mirror?
Costs vary but typically range from $100 to $300. This depends on screen size and hardware choices.
Conclusion
Building your own DIY smart mirror can be fun and rewarding. It lets you add technology to your daily routine. You can customize the mirror to fit your style and needs. The project helps you learn about electronics and coding.
Take your time and follow each step carefully. Soon, you will enjoy a smart mirror that works just for you. Start creating today and see the difference it makes in your home!