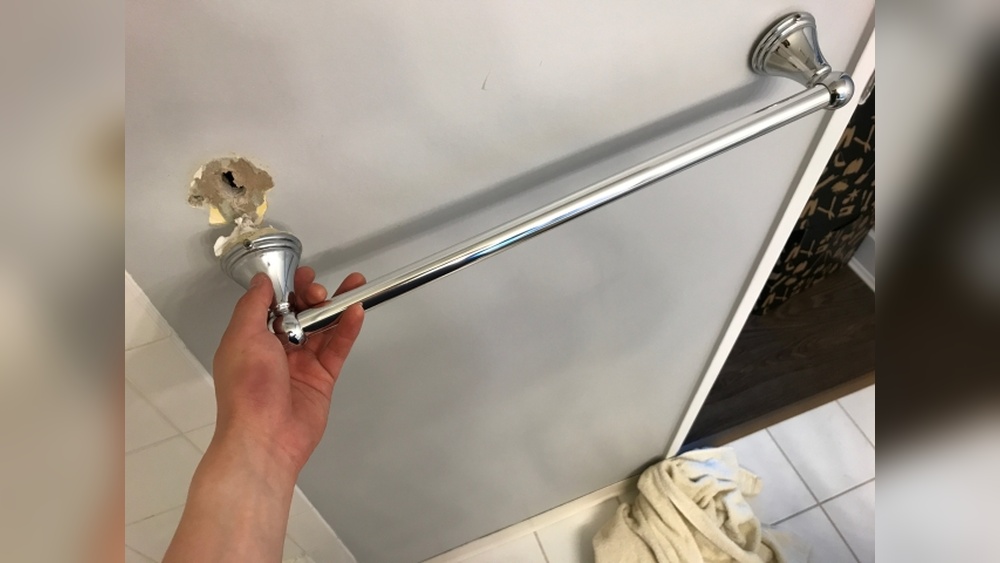

Are you staring at your old bathroom towel rack and wondering how to get it off the wall without making a mess? Removing a towel rack might seem tricky, especially if you want to avoid holes or damage.
But don’t worry—you can do it yourself with the right steps. You’ll learn simple, clear methods to safely take down your towel rack, saving you time and frustration. Keep reading, and soon you’ll have a clean wall ready for your next bathroom upgrade.
Credit: www.reddit.com
Tools Needed
Removing a bathroom towel rack from the wall requires a few simple tools. Having the right equipment makes the job easier and safer. This section lists the tools you need. Some are essential, while others help fix any wall damage.
Essential Equipment
A screwdriver is the main tool to remove screws from the rack. Most racks use Phillips head screws, but a flathead screwdriver might be needed. A drill can speed up screw removal. A putty knife helps to scrape off any leftover adhesive or caulk. A step ladder or sturdy stool is useful if the rack is high on the wall.
Optional Tools For Damage Control
Wall anchors sometimes stay in the wall after removal. Needle-nose pliers help pull them out. Sandpaper smooths rough patches on the wall. Spackle or wall filler repairs any holes left by screws or anchors. A paintbrush or roller lets you touch up the wall after repairs. These tools keep your bathroom wall neat and ready for new fixtures.

Credit: www.visualsp.com
Prepare The Area
Clear the space around the towel rack to work safely. Gather tools like a screwdriver and a cloth before starting. Protect the wall with a drop cloth or tape to avoid damage.
Preparing the area before removing a bathroom towel rack saves time and avoids damage. This step makes the process smoother and safer. Take a few moments to get your space ready.
Clear Surroundings
Remove any items near the towel rack. Take off towels, toiletries, or decorations. Clear the countertop and shelves close to the rack. This creates enough room to work comfortably.
Clearing the area also prevents objects from falling or breaking. It keeps your bathroom clean and safe during the removal.
Protect Walls And Floor
Place a drop cloth or old towel under the rack. This protects the floor from dust and debris. Use painter’s tape around the rack edges to guard the wall.
Protective measures prevent scratches and marks on surfaces. They keep your bathroom looking good throughout the project.
Identify Mounting Type
Before removing a bathroom towel rack, know how it is attached to the wall. Identifying the mounting type helps you avoid damage. It also makes removal faster and easier. Most racks are fixed using screws and anchors or with adhesive or suction mounts. Recognizing these types lets you use the right tools and methods.
Screws And Anchors
Screws and anchors are common for heavy towel racks. Look for visible screw heads on the rack brackets. Sometimes, screws hide under decorative covers. Gently pry these covers off using a flat tool.
Anchors hold screws firmly in drywall or tile. If you see a small round or plastic piece around the screw, it is an anchor. Unscrew carefully to avoid wall damage. Use a screwdriver that fits the screws well. After removing screws, pull the rack gently from the wall.
Adhesive Or Suction Mounts
Some towel racks stick to the wall without screws. Adhesive mounts use strong glue or tape. Check for a smooth, flat back on the rack bracket. You might see a seam where the rack meets the wall.
Suction mounts use suction cups to hold the rack. Press the rack and try to move it slightly. If it moves easily, it might be suction mounted. To remove, peel the adhesive or lift suction tabs slowly. Avoid pulling hard to protect the wall surface.
Remove The Rack
Removing a bathroom towel rack from the wall is easier than it sounds. This process needs care to avoid damage to your wall. Follow simple steps to remove the rack cleanly and safely.
Unscrew Or Detach
Start by finding the screws or fasteners holding the rack. Most racks attach with screws hidden under caps or covers. Use a screwdriver to turn screws counterclockwise. Keep the screws in a safe place for reuse or disposal.
Some racks use adhesive strips instead of screws. Gently pull the rack away from the wall. Avoid force to prevent wall damage. If the rack feels stuck, check for hidden screws or use a plastic scraper to loosen adhesive.
Handle Adhesive Residue
After removing the rack, adhesive residue may remain on the wall. This sticky layer can attract dirt and look messy. Use warm soapy water and a soft cloth to wipe the area first.
If residue stays, apply a small amount of rubbing alcohol or adhesive remover. Test on a small spot to avoid wall damage. Rub gently until the residue dissolves. Finish by cleaning the wall with water and drying it well.
Fix Wall Damage
Removing a bathroom towel rack often leaves holes and marks on the wall. Repairing these damages makes your wall look clean and smooth. Fixing the wall properly prepares it for painting or new decorations.
Follow simple steps to restore the wall to its original state. Focus on filling holes and cracks first, then sanding the surface smooth. These steps are easy and save money on repairs.
Fill Holes And Cracks
Start by cleaning the holes and cracks with a brush or cloth. Remove any loose debris or dust. Use a putty knife to apply spackling paste or wall filler into the holes. Press firmly to fill all gaps completely.
Allow the filler to dry fully as per the instructions on the package. Drying time depends on the size of the holes and the product used. Apply a second layer if needed for deep holes. Wait again for it to dry before moving on.
Sand And Smooth Surface
Once the filler is dry, use fine-grit sandpaper to smooth the area. Sand lightly in circular motions until the surface feels even. Remove any dust with a damp cloth after sanding. The wall should look flat and blend with the rest of the surface.
Proper sanding ensures paint or wallpaper will stick well. It also hides the repair spots from view. Take your time to achieve a smooth finish for the best result.

Credit: www.etsy.com
Clean And Finish
After removing the bathroom towel rack, the wall will need some care. Cleaning and finishing help make the wall look neat again. This step prepares the surface for any repairs or paint touch-ups. A clean wall looks fresh and helps new paint stick better.
Follow simple steps to remove dust and debris. Then, repaint or touch up the wall for a smooth finish. This process ensures the wall looks good as new.
Remove Dust And Debris
Start by wiping the wall with a dry cloth. Remove all dust left from screws or anchors. Use a small brush to clean tight spots. If needed, use mild soap and water to clean the area. Let the wall dry completely before moving on. Clean walls help paint stick and look smooth.
Repaint Or Touch Up
Check the wall for any holes or marks. Fill small holes with spackle or wall filler. Smooth the filler with sandpaper after it dries. Choose paint that matches the existing wall color. Apply the paint with a small brush or roller. Use light coats and let each dry before adding more. This step hides damage and freshens the wall’s look.
Frequently Asked Questions
How Do I Remove A Bathroom Towel Rack Safely?
Start by locating and unscrewing the mounting screws with a screwdriver. Gently pull the rack away from the wall. Use a putty knife to loosen any adhesive or caulk. Be careful to avoid damaging the wall surface during removal.
What Tools Are Needed To Take Down A Towel Rack?
You will need a screwdriver, putty knife, and possibly a drill. A utility knife helps cut through caulk or paint sealing the rack. Having a stud finder is useful to locate screws hidden behind wall anchors.
How To Fix Wall Damage After Removing Towel Rack?
Fill holes with spackling paste or wall filler using a putty knife. Let it dry, then sand the area smooth. Apply primer and paint to match the wall color. This restores the wall’s appearance after rack removal.
Can I Reuse Screws When Removing A Towel Rack?
Yes, if screws are undamaged, you can reuse them for reinstalling. Inspect screws for rust or stripping before reuse. Using the original screws ensures a secure reattachment of the towel rack.
Conclusion
Removing a bathroom towel rack from the wall is simple with the right steps. Take your time and use the correct tools. Be careful to avoid damage to your wall. Clean the area once the rack is off. Now, you can install a new rack or leave it empty.
Small repairs make a big difference in your bathroom. Keep these tips handy for any future projects. Easy and safe—just how it should be.