
Are you looking to remove a hand towel rack from your wall but aren’t sure where to start? You’re not alone.
Taking down a towel rack might seem simple, but if you don’t do it right, you could damage your wall or leave behind stubborn marks. Imagine how satisfying it would be to have a clean, smooth wall ready for your next decoration or project.
In this guide, you’ll find clear, step-by-step instructions that make the process quick and hassle-free. Keep reading—you’ll be amazed at how easy it can be to remove your hand towel rack without stress or mess.

Credit: diy.stackexchange.com
Tools Needed
Removing a hand towel rack from the wall needs the right tools. Using the correct tools makes the task easier and safer. You can avoid damage to your walls and the towel rack parts.
Gather these tools before you start. It saves time and helps the process go smoothly.
Screwdriver
A screwdriver is key. Most towel racks attach with screws. A flathead or Phillips screwdriver fits most screws. Choose the one that matches your rack’s screws.
Drill
A drill speeds up screw removal. It works well if screws are tight or painted over. Use a drill bit that fits the screws to avoid damage.
Putty Knife
A putty knife helps gently pry off the rack. It also lifts any paint or caulk around the edges. Use it carefully to protect the wall surface.
Stud Finder
A stud finder locates wall studs behind the rack. Knowing stud locations helps avoid damage during removal. It also helps when reinstalling a new rack.
Utility Knife
A utility knife cuts through paint or caulk sealing the rack. This step prevents tearing the wall paint. Use a sharp blade and cut carefully along edges.
Wall Patch Kit
A wall patch kit fixes any holes after removal. It includes spackle, sandpaper, and sometimes paint. Repairing holes keeps your wall smooth and clean.

Credit: www.youtube.com
Preparing The Area
Clear the area around the towel rack to avoid damage. Gather tools like a screwdriver and a cloth before starting. Protect the wall by placing a drop cloth underneath.
Clearing The Space
Start by removing items around the hand towel rack. Clear counters and shelves nearby. This gives you room to work safely. It also prevents accidents or damage to your belongings. A tidy space helps you focus on the task. Keep cleaning supplies or tools within reach for easy access.
Protecting The Wall
Place a drop cloth or old towel beneath the rack. This catches dust, debris, and small screws. Use painter’s tape around the rack edges to guard the wall paint. It prevents scratches or marks during removal. Protecting the wall saves time on repairs later. Take care with tools to avoid dents or holes.
Locating The Screws
Locating the screws is the first step to remove a hand towel rack. Screws hold the rack firmly on the wall. Finding them helps in loosening and taking down the rack safely.
Some screws are visible. Others hide under covers or behind parts of the rack. Knowing where to look saves time and effort.
Check For Visible Screws
Look closely at the ends of the towel rack. Screws often appear here. Use a flashlight if the area is dark. If you see screws, you can prepare to unscrew them.
Look For Screw Covers
Some racks hide screws behind small caps. These caps match the rack color and shape. Gently pry them off with a flat tool. Then, the screws underneath become visible.
Inspect The Mounting Brackets
The rack may have mounting brackets attached to the wall. Screws often hold these brackets in place. Check behind or under the rack to find the brackets and screws.
Use A Stud Finder Or Magnet
A stud finder helps locate screws by detecting nails or screws in the wall. A strong magnet can also stick to metal screws. Move it slowly along the rack to find hidden screws.
/how-to-remove-towel-bar-5221017-hero-01-c6a21614aaeb4e9ca8071b79bd398ef6.jpg)
Credit: www.thespruce.com
Removing The Screws
Removing the screws is the first important step in taking off a hand towel rack. Screws hold the rack firmly on the wall. Taking them out carefully prevents damage to the wall and the rack itself. This step needs patience and the right tools.
Gather The Right Tools
Use a screwdriver that matches the screw head. Most towel racks have either Phillips or flathead screws. A wrong screwdriver can strip the screws. Keep a flashlight nearby to see clearly if needed.
Locate All Screws
Check the rack closely to find all screws. Some screws may hide under caps or covers. Gently pry off any covers with a small flat tool. Missing screws means the rack won’t come off easily.
Unscrew Slowly And Steadily
Turn the screwdriver counterclockwise to loosen screws. Apply steady pressure to avoid slipping. Stop if a screw feels stuck. Try a bit of lubricant or tap gently to loosen it.
Keep Screws Safe
Place the screws in a small container or box. Keeping them together prevents losing any. They might be useful if you want to reinstall the rack later.
Detaching The Rack
Detaching the hand towel rack from the wall is a simple task. It requires some basic tools and careful steps. The goal is to remove the rack without damaging the wall. Follow these easy steps to make the process smooth and safe.
Gather Necessary Tools
Start by collecting the right tools. You will need a screwdriver, a drill, and possibly a putty knife. Check the screws holding the rack to see if you need a Phillips or flathead screwdriver. Having the right tools ready makes the job easier.
Locate And Remove Screws
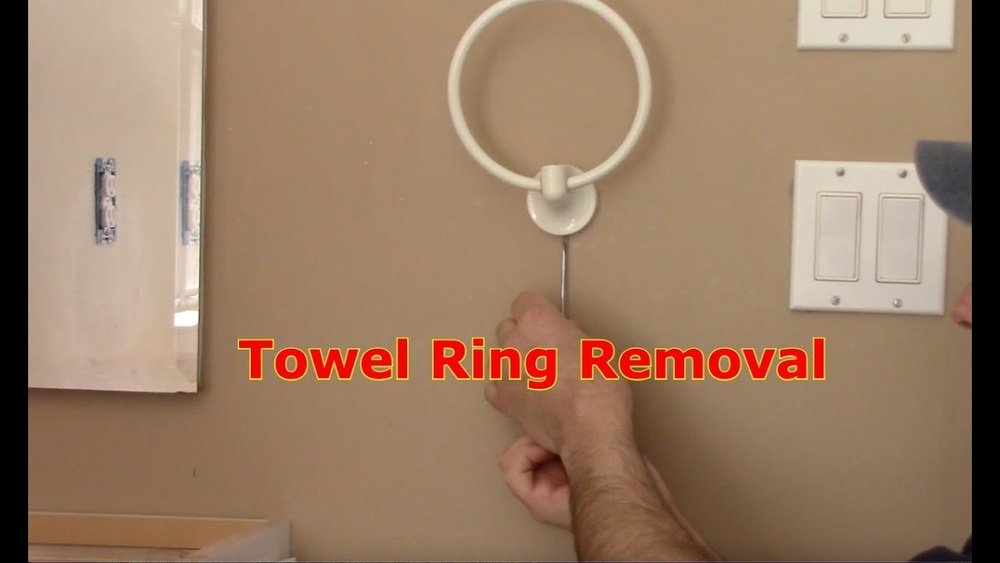
Look closely at the rack for screws or fasteners. Most towel racks have visible screws on the mounting brackets. Use your screwdriver to turn the screws counterclockwise. Keep the screws in a safe place for reuse or disposal. Gently pull the rack away from the wall once screws are removed.
Handle Stubborn Racks
Some racks stick to the wall with adhesive or anchors. Use a putty knife to gently pry around the edges. Work slowly to avoid wall damage. If anchors remain, pull them out carefully or push them inside the wall cavity. Fill holes later with spackle or wall filler for a smooth finish.
Handling Wall Anchors
Start by gently pulling the towel rack from the wall. Wall anchors may stay inside the hole. Use pliers to carefully pull out the anchors without damaging the wall.
Identify The Type Of Wall Anchor
Wall anchors hold the towel rack firmly in place. Different anchors need different removal methods. Plastic anchors push out easily. Metal anchors might twist or pull out. Knowing the type helps avoid wall damage.
Remove Plastic Wall Anchors
Try to pull the plastic anchor out gently with pliers. If it resists, push it deeper into the wall. Use a screwdriver to poke through the center. This lets you patch the hole smoothly afterward.
Handle Metal Wall Anchors Carefully
Metal anchors often require twisting to remove. Use pliers to turn the anchor counterclockwise. Pull it out once it loosens. Avoid forcing it to stop wall damage. If stuck, drill around it gently.
Patch The Wall After Removal
Fill holes with spackle or wall filler. Smooth the surface with a putty knife. Let it dry completely before sanding. Paint over the patch to match the wall color. This keeps your wall looking neat.
Fixing Wall Damage
Removing a hand towel rack often leaves holes and marks on the wall. Fixing these damages is important for a clean, smooth finish. Proper repair helps the wall look like new again. It also prepares the surface for painting or new decorations.
Filling Holes
Start by cleaning the holes and removing loose debris. Use a putty knife to apply spackling paste or wall filler. Press the filler firmly into the holes. Smooth the surface with the knife, removing excess filler. Let it dry completely before moving to the next step.
Sanding And Painting
Once the filler is dry, use fine-grit sandpaper to smooth the area. Sand gently until the wall feels even and flat. Wipe away dust with a damp cloth. Choose paint that matches your wall color. Apply a thin coat of paint with a brush or roller. Let the paint dry, then apply a second coat if needed.
Cleaning Up
Cleaning up after removing a hand towel rack is important. It helps keep your wall neat and ready for the next step. Dust, screws, and marks left behind need attention.
Remove Dust And Debris
Use a soft cloth or brush to clear dust from the wall. Sweep away small debris from the area. This prevents dirt from spreading during further cleaning.
Fill Holes And Cracks
Apply wall filler or putty to cover holes left by screws. Smooth the surface with a putty knife. Let it dry completely before sanding it flat.
Sand The Wall Smooth
Lightly sand the patched areas using fine-grit sandpaper. Sand until the surface feels even and smooth. This step prepares the wall for painting or wallpaper.
Clean The Wall Surface
Wipe the wall with a damp cloth to remove dust from sanding. Allow the wall to dry fully before painting. A clean wall improves paint adhesion and finish.
Frequently Asked Questions
How Do I Safely Remove A Hand Towel Rack?
Start by unscrewing the mounting screws with a screwdriver. Gently pull the rack away from the wall. Use a putty knife to loosen any adhesive or caulk. Take your time to avoid damaging the wall surface.
What Tools Are Needed To Remove A Towel Rack?
You will need a screwdriver, putty knife, and possibly pliers. A drill may be helpful if screws are stuck. Keep a wall patch kit handy for repairs after removal.
How To Fix Wall Holes After Removing Towel Rack?
Fill holes with spackling paste using a putty knife. Let it dry completely, then sand smooth. Paint over the area to match your wall color for a clean finish.
Can I Reuse The Hand Towel Rack After Removal?
Yes, if the rack and mounting hardware are intact. Clean off old adhesive or residue. Store screws and brackets safely for easy reinstallation or relocation.
Conclusion
Removing a hand towel rack from the wall is simple with the right steps. Take your time and work carefully to avoid wall damage. Use basic tools like a screwdriver and putty to fix holes afterward. This small project can refresh your bathroom’s look quickly.
You don’t need special skills to do it well. Just follow the instructions, and you will finish with ease. Try it yourself and enjoy a clean, neat wall ready for something new.