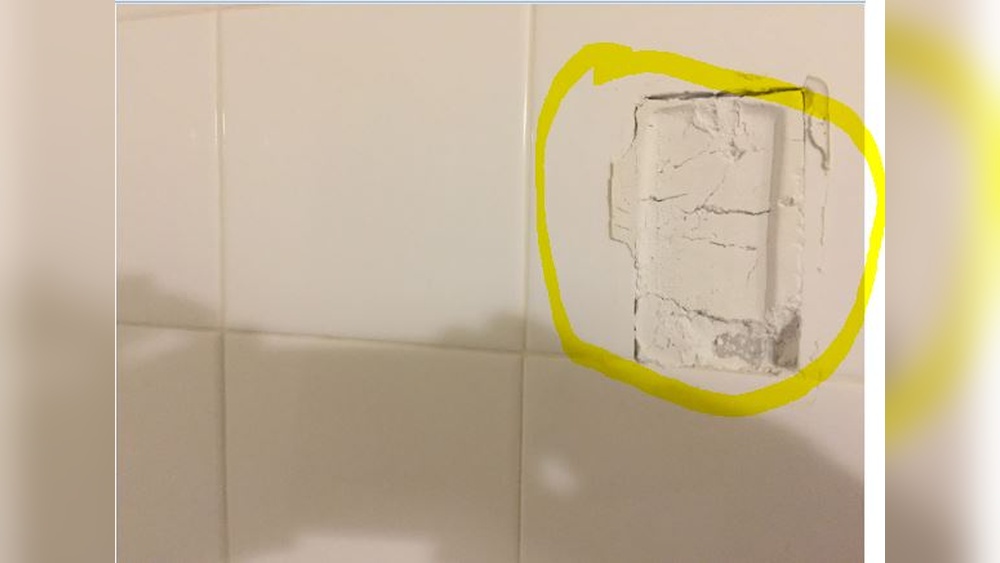

Is your ceramic towel rack loose, cracked, or just not holding up like it used to? You don’t have to replace it or call a costly handyman.
Fixing your ceramic towel rack yourself is easier than you think. In this guide, you’ll learn simple, effective steps to restore your towel rack’s strength and beauty. Keep reading, and soon your bathroom will look neat and sturdy again—without spending a fortune or hours of frustration.
Common Issues With Ceramic Towel Racks
Ceramic towel racks add a stylish touch to bathrooms. They are durable but can face common problems over time. Knowing these issues helps you fix them quickly. This saves money and keeps your bathroom neat.
Cracks And Chips
Cracks and chips are common in ceramic towel racks. They happen from accidental bumps or dropping heavy items. Small cracks may look harmless but can grow bigger. Chips make the rack look old and weak. Fixing these early stops further damage and keeps your rack safe to use.
Loose Mounting
Loose mounting makes the towel rack unstable. The rack may wobble or fall off the wall. This happens when screws or anchors become weak. Wet walls or heavy towels add pressure, causing loosening. Tightening screws or replacing anchors restores stability and prevents accidents.
Broken Brackets
Broken brackets can cause the towel rack to fall. Brackets hold the rack firmly to the wall. Over time, brackets may break from rust or strong force. A broken bracket means the rack cannot hold weight properly. Replacing broken brackets is important for safety and function.

Credit: www.youtube.com
Tools And Materials Needed
Fixing a ceramic towel rack requires the right tools and materials. Having these ready helps the repair go smoothly. You save time and avoid extra trips to the store.
This section lists the key items needed. Each plays an important role in making the towel rack strong and stable again.
Adhesives And Fillers
Choose strong glue made for ceramics. Epoxy resin works well for tight bonds. It dries clear and holds firmly.
Fill cracks or chips with ceramic filler or putty. This restores the surface and prevents further damage. Let it dry fully before sanding smooth.
Cleaning Supplies
Clean the area before gluing or filling. Use rubbing alcohol or a mild detergent. Remove dust, grease, or old glue for better adhesion.
Soft cloths and small brushes help reach tight spots. Clean surfaces ensure a neat and lasting repair.
Mounting Hardware
Check the screws and wall anchors holding the rack. Replace rusty or weak parts with new ones of the same size.
Use a drill, screwdriver, and level to fix the rack securely. Proper mounting stops wobbling and keeps towels safe.
Preparing The Towel Rack For Repair
Preparing your ceramic towel rack for repair is the first step to ensure a lasting fix. Proper preparation helps the repair materials stick well and prevents future damage. Take your time with this process. It makes a big difference in the final result.
Cleaning The Surface
Start by cleaning the towel rack thoroughly. Use warm water and mild soap to remove dirt and grease. Avoid harsh chemicals that could damage the ceramic. Dry the surface completely with a soft cloth. A clean surface helps the repair material bond better.
Removing Loose Pieces
Check for any loose or broken ceramic pieces. Gently remove these parts using your fingers or a soft brush. Clearing away loose bits prevents bumps and weak spots in the repair. Dispose of the debris safely to keep the area tidy.
Sanding And Smoothing
Use fine-grit sandpaper to smooth rough edges and surfaces. Sand lightly to avoid cracking the ceramic further. This step helps create a flat, even surface for repair. Wipe away sanding dust with a damp cloth before moving on.

Credit: www.reddit.com
Fixing Cracks And Chips
Fixing cracks and chips in a ceramic towel rack helps keep it strong and looking good. Small damages can get worse if left alone. Repairing these problems early can save you money and effort later.
This process involves filling the cracks, smoothing the surface, and touching up the paint. Each step is simple and can be done with basic tools. Follow these easy instructions to restore your towel rack.
Applying Ceramic Filler
Start by cleaning the damaged area with a soft cloth. Remove any dust or loose pieces. Use a ceramic filler to fill in cracks and chips. Apply it carefully using a small spatula or toothpick.
Press the filler into the cracks to fill them completely. Smooth the surface as much as possible. Let the filler dry for the time recommended on the package.
Sanding And Shaping
After the filler dries, use fine sandpaper to smooth the surface. Sand gently to avoid damaging the ceramic. Shape the filler to match the towel rack’s original contours. This step ensures the repair looks natural.
Check the surface by running your hand over it. It should feel smooth and even. Remove dust with a dry cloth before moving to painting.
Painting Touch-ups
Choose a paint that matches the towel rack color. Use a small brush for precise application. Apply thin layers of paint over the repaired area. Allow each layer to dry before adding the next.
This step blends the repair with the rest of the rack. The final look should be seamless and neat. Let the paint cure fully to protect the surface.
Reattaching Loose Or Broken Parts
Loose or broken parts on a ceramic towel rack can make it unstable or unusable. Fixing these parts helps bring back strength and function. It requires care and the right materials. This section explains easy ways to reattach parts securely. Follow simple steps to keep your rack safe and neat.
Using Strong Adhesives
Select a glue made for ceramics. Epoxy or super glue works well. Clean the broken surfaces before applying glue. Press parts together firmly for several minutes. Let the adhesive dry completely. This creates a strong bond that holds parts tight. Avoid moving the rack until it sets. This method repairs small breaks and loose pieces.
Securing With Mounting Hardware
Use screws or brackets to hold parts firmly. Find hardware that fits your rack size. Drill small holes carefully if needed. Attach brackets or screws to fix loose areas. Tighten hardware to avoid wobbling. This adds extra support where glue may not be enough. It is useful for racks with heavy use.
Reinforcing For Durability
Add extra support to prevent future breaks. Use metal strips or corner braces inside the rack. Attach these reinforcements with screws or glue. Check all joints and tighten loose spots. Reinforcing helps the rack hold weight longer. It reduces the chance of damage from daily use.
Ensuring Proper Mounting
Ensuring your ceramic towel rack is properly mounted keeps it secure and safe to use. A well-mounted rack holds towels firmly without wobbling or falling. Careful mounting also prevents damage to your wall and the rack itself. Follow these steps to check and improve the mounting of your towel rack.
Checking Wall Anchors
Wall anchors support the weight of the towel rack. Check if the anchors are strong and firmly fixed in the wall. Loose or damaged anchors cause the rack to tilt or fall. Replace old anchors with new ones made for your wall type. For drywall, use plastic or metal anchors. For concrete or brick, use sleeve anchors or masonry screws.
Aligning The Rack
Proper alignment keeps the rack level and functional. Use a spirit level to check if the rack is straight. Mark the drill holes carefully before mounting. Misaligned racks look bad and may cause towels to slide off. Adjust the position slightly if the rack is not even. Take time to align it perfectly for a neat look.
Tightening Screws
Loose screws make the rack unstable. Tighten all screws firmly but avoid over-tightening. Over-tightening can crack the ceramic or strip the screw holes. Use a screwdriver to secure each screw until it feels snug. Check screws regularly to keep the rack steady and safe.
Maintenance Tips For Longevity
Keeping a ceramic towel rack in good shape extends its life and keeps it looking nice. Simple care steps help avoid cracks and breaks. Use these tips to protect your rack and enjoy it longer.
Regular Cleaning
Clean the rack often to stop dirt build-up. Use a soft cloth and mild soap with water. Avoid harsh chemicals that can damage the ceramic finish. Dry the rack after cleaning to prevent water spots.
Avoiding Excess Weight
Do not hang heavy towels or items on the rack. Ceramic can crack under too much weight. Use it only for light towels and clothes. This practice keeps the rack safe and strong.
Periodic Inspections
Check the rack regularly for cracks or loose parts. Early fixes stop small issues from becoming big problems. Tighten screws and clean joints to maintain stability. A quick check every few months is enough.

Credit: www.youtube.com
Frequently Asked Questions
How Do I Repair A Loose Ceramic Towel Rack?
To fix a loose rack, tighten screws or replace wall anchors. Use a drill if needed. Ensure the rack is level and secure for stability.
What Tools Are Needed To Fix Ceramic Towel Racks?
You need a screwdriver, drill, wall anchors, screws, and a level. These tools help secure and align the rack properly on the wall.
Can I Fix A Ceramic Towel Rack Without Drilling?
Yes, use strong adhesive or mounting tape for light towel racks. However, drilling provides a more secure and long-lasting fix for heavier racks.
How To Prevent Ceramic Towel Rack From Falling Again?
Use proper wall anchors and screws for your wall type. Avoid overloading the rack with heavy towels. Regularly check and tighten screws if needed.
Conclusion
Fixing a ceramic towel rack is easier than it seems. Follow the steps carefully and use the right tools. Small cracks or loose parts need quick attention. This helps avoid bigger damage later. Take your time and work safely. A sturdy towel rack adds comfort to your bathroom.
Keep it clean and check it often. Repairing it yourself saves money and feels good. You can do this with patience and care. A little effort brings great results.


