Are you tired of towels slipping off hooks or cluttering your bathroom counter? Installing a towel rack on tile can solve that problem and keep your space neat and organized.
But if you’ve never drilled into tile before, it might feel tricky or even risky. Don’t worry—you can do it yourself with the right tools and simple steps. In this guide, you’ll learn exactly how to install a towel rack on tile without cracking or damaging your walls.
Keep reading, and by the end, you’ll have a sturdy, stylish towel rack ready to use.
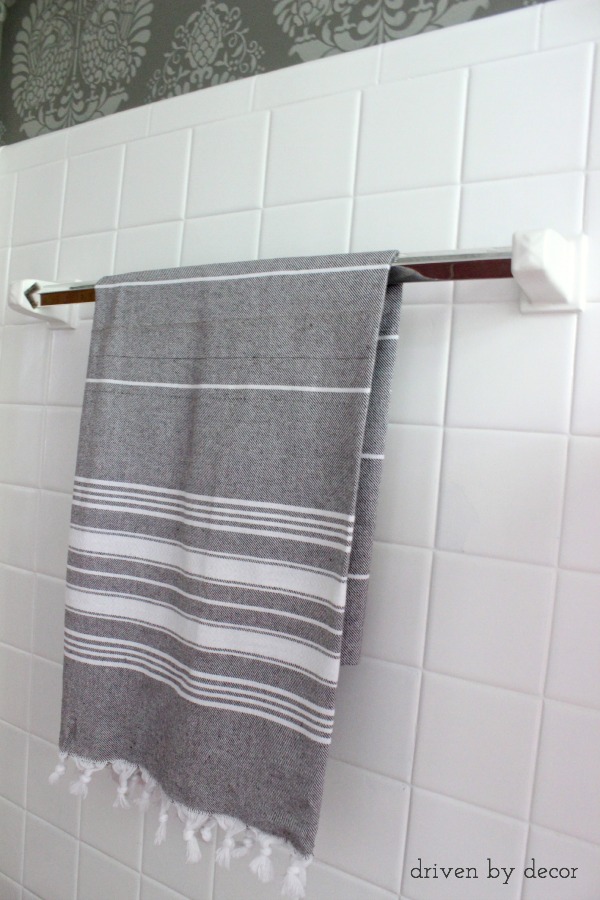
Credit: www.drivenbydecor.com
Tools And Materials Needed
Installing a towel rack on tile needs special tools and materials. Using the right items makes the job easier and safer. Prepare everything before starting. This helps avoid mistakes and saves time.
Essential Tools
You need a drill with a carbide-tipped masonry bit. This bit can drill into hard tile without cracking it. A screwdriver or a drill driver will help fasten screws. Use a tape measure to mark exact spots for mounting. A pencil or marker works for marking the tile. A level is important to keep the rack straight. Also, have wall anchors suitable for tile walls.
Choosing The Right Towel Rack
Select a towel rack that fits your bathroom style and space. Metal racks are durable and resist moisture well. Plastic or acrylic racks are lightweight and affordable. Consider the size and weight capacity. Make sure the rack comes with mounting hardware. Some racks include special anchors for tile walls. This prevents damage and holds the rack firmly.
Safety Gear
Wear safety goggles to protect your eyes from dust and debris. Use gloves to protect your hands during drilling and installation. A dust mask helps avoid inhaling tile dust. Work in a well-ventilated area to stay safe. Keep your workspace clean to prevent slips and falls.
Preparing The Tile Surface
Preparing the tile surface is the first step to install a towel rack safely. Proper preparation helps the rack stay firm and prevents damage to your tiles. It involves cleaning the area, marking where to mount, and checking for studs behind the tile.
Cleaning The Area
Start by cleaning the tile surface where the towel rack will go. Use a mild cleaner and a soft cloth to remove dirt and grease. Clean tiles allow adhesive or screws to hold better. Make sure the area is dry before moving to the next step.
Marking The Mounting Spots
Use a pencil to mark the exact spots for the towel rack screws. Hold the rack against the wall at the desired height. Mark the hole positions carefully to ensure the rack will hang straight. Double-check your marks before drilling.
Checking For Studs
Check if there are studs behind your tile wall. Studs provide strong support for the towel rack. Use a stud finder to locate them. Mark stud locations on the tile. If no studs are found, use proper wall anchors to secure the rack.
Drilling Into Tile
Drilling into tile can seem tricky but it is doable with the right steps. Tiles are hard and can crack easily. Taking care during drilling helps protect your tile and makes the installation smooth.
Selecting The Drill Bit
Use a drill bit made for tiles or glass. Carbide-tipped or diamond-tipped bits work best. These bits cut through tile without cracking it. Avoid regular wood or metal bits. They can damage the tile surface.
Protecting The Tile
Place painter’s tape over the drill spot. This keeps the drill bit from slipping. Mark the hole location on the tape. Keep the tile clean and dry before drilling. Tape also helps reduce tile cracks.
Drilling Techniques
Start drilling slowly with low speed. Hold the drill steady and straight. Do not press hard on the drill. Let the bit do the work. Stop often to clear dust and cool the bit. Use water to keep the bit cool if needed.

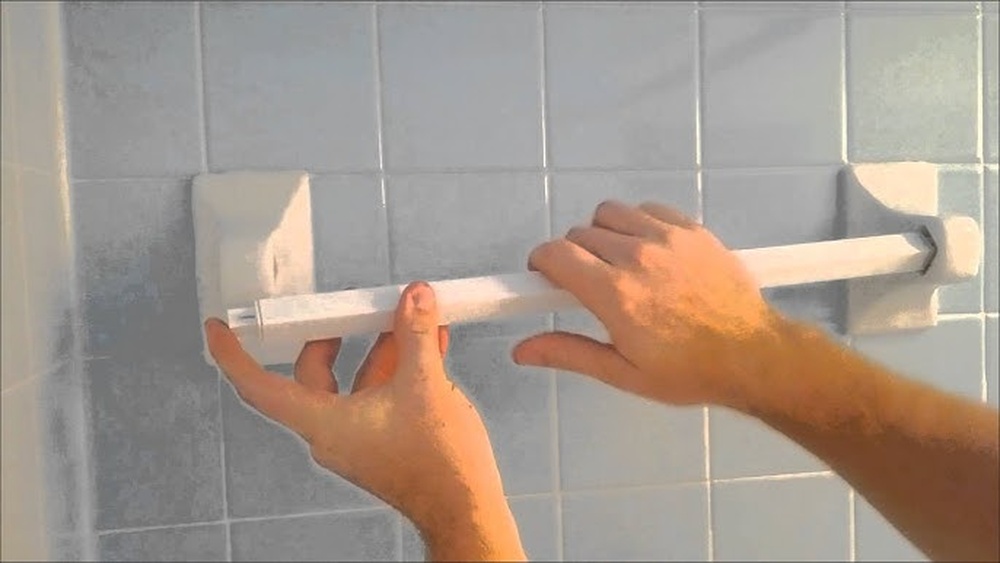
Credit: www.youtube.com
Installing Anchors And Screws
Installing anchors and screws correctly is key to a strong towel rack on tile. This step holds the rack firmly and prevents damage. Tile walls need special care because they can crack easily. Using the right anchors and inserting them properly makes the rack stable.
Choosing The Right Anchors
Select anchors made for tile or masonry. Plastic anchors work for light racks. For heavier racks, use metal or toggle anchors. Check the weight of your towel rack before picking anchors. Using the wrong anchor can cause the rack to fall.
Inserting Anchors Properly
Drill a hole slightly smaller than the anchor size. Use a drill bit made for tile to avoid cracks. Clean dust from the hole before inserting the anchor. Push the anchor gently until it fits flush with the tile surface. Do not force it, or tile may break.
Securing The Screws
Place the towel rack bracket over the anchors. Insert screws into the anchors with a screwdriver. Tighten screws evenly to avoid stress on the tile. Stop tightening once the bracket feels firm. Over-tightening can crack the tile and ruin the install.
Mounting The Towel Rack
Mounting the towel rack on tile requires care and precision. Proper installation keeps the rack secure and prevents tile damage. Follow each step closely to ensure a strong hold.
Aligning The Rack
Place the towel rack against the tile wall. Use a level tool to check if it is straight. Mark the drill holes with a pencil. Make sure the marks match the rack’s mounting points. Double-check the alignment before drilling.
Final Tightening Tips
After inserting the anchors and screws, tighten the screws carefully. Avoid overtightening to prevent cracking the tile. Use a screwdriver for better control. Tighten until the rack feels firm but not stressed.
Checking Stability
Gently pull the towel rack to test stability. It should not move or wobble. If loose, tighten the screws a bit more. Confirm all screws are secure. A stable rack keeps towels safe and walls intact.
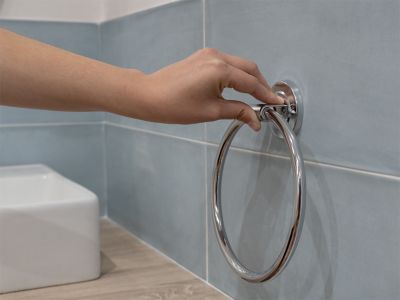
Credit: www.lepage.ca
Tips For Maintaining Your Towel Rack
Maintaining your towel rack keeps it sturdy and looking great. Simple care steps help it last longer. Regular attention prevents common problems. Here are some easy tips for upkeep.
Cleaning And Care
Wipe your towel rack with a soft cloth weekly. Use mild soap and water for dirt or spots. Avoid harsh chemicals that can damage the finish. Dry the rack after cleaning to stop rust or stains.
Preventing Damage
Do not hang heavy items on the rack. Avoid using towel racks as hooks for bags or clothes. Keep sharp objects away to stop scratches. Gently place towels to avoid pulling or bending the rack.
When To Re-tighten
Check the rack screws every few months. Tighten loose screws to keep the rack stable. Loose racks can cause damage to the wall or tiles. Use a screwdriver to gently secure fittings without over-tightening.
Frequently Asked Questions
How Do I Drill Into Tile Without Cracking It?
Use a carbide-tipped masonry bit and a low drill speed. Start with a small pilot hole and apply gentle pressure. Use masking tape over the drilling spot to prevent slipping and reduce tile cracking.
What Tools Are Needed To Install A Towel Rack On Tile?
You need a drill, masonry drill bit, screwdriver, level, measuring tape, pencil, anchors, and screws. These tools ensure precise and secure towel rack installation on tile surfaces.
How Do I Find Studs Behind Tile Walls?
Use a stud finder or tap the wall to hear a solid sound. Mark the stud locations with a pencil. Anchoring into studs provides better support for the towel rack.
Can I Install A Towel Rack Without Drilling Tile?
Yes, use adhesive-backed towel racks or suction cup models. These options avoid drilling but may offer less support compared to screw-mounted racks.
Conclusion
Installing a towel rack on tile can be simple and quick. Use the right tools and take your time to avoid cracks. Mark the spots carefully and drill slowly for best results. Secure the rack tightly so it holds well.
This small project adds function and style to your bathroom. Enjoy your new towel rack every day. You did a great job!

