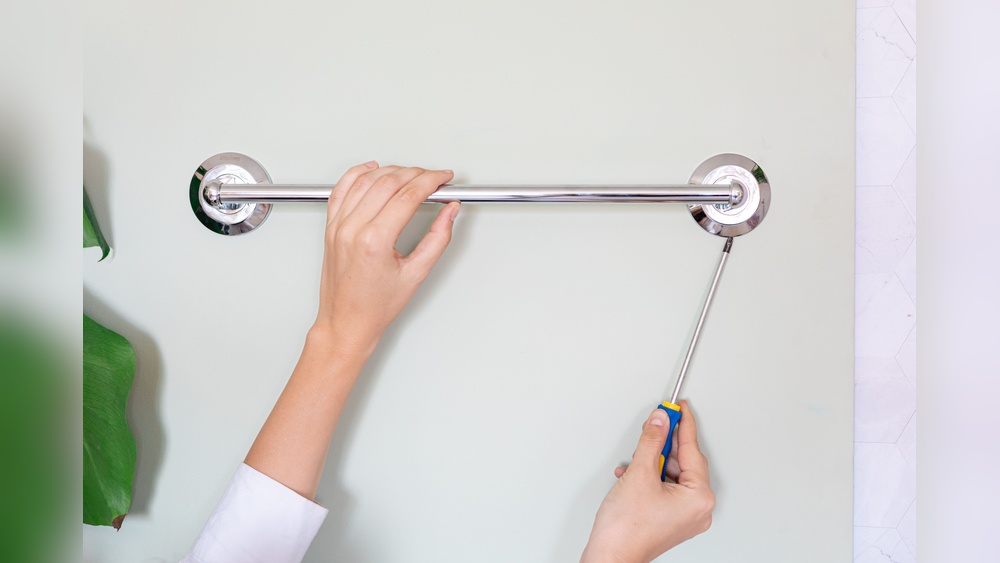

Are you staring at that old towel rack and wondering how to get it off your wall without making a mess? Removing an outdated towel rack might seem tricky, but with the right steps, you can do it yourself quickly and easily.
Imagine how refreshing it will feel to clear the space and make room for a new, stylish rack—or simply enjoy a clean, smooth wall. Keep reading, and you’ll discover simple tips that save you time, avoid damage, and turn a small project into a satisfying win for your home.
Tools Needed
Removing an old towel rack needs the right tools. Having these tools ready makes the job easier and faster. You don’t need many tools, just a few basics and some optional items for convenience.
Basic Tools List
- Screwdriver (Phillips or flathead, depending on screws)
- Drill with screwdriver bits
- Utility knife
- Putty knife or scraper
- Stud finder (optional but helpful)
- Measuring tape
- Safety glasses
Optional Supplies
- Wall anchors (if needed for new rack)
- Spackle or wall filler
- Sandpaper
- Painter’s tape
- Drop cloth to protect floor
- Gloves for hand protection
Prepare The Area
Preparing the area before removing an old towel rack makes the task easier and safer. Taking time to set up the space helps avoid damage and keeps tools handy. Follow simple steps to get ready for removal.
Clear Surrounding Space
Remove items near the towel rack. Clear the countertop, shelves, or floor below. This prevents accidents and gives you room to work comfortably. Keep cleaning supplies and towels away to avoid stains or damage.
Protect Walls And Surfaces
Cover nearby walls with painter’s tape or plastic sheets. Use a drop cloth or old towel on the floor. This protects paint and tiles from scratches or dust. Take care to shield light switches and outlets near the rack.
Turn Off Power
Before removing an old towel rack, always turn off the power. This step prevents electrical shocks and keeps you safe. Some towel racks have built-in lights or heaters that connect to electricity. Turning off power stops any risk of accidents during removal.
Check For Electrical Components
Look closely at the towel rack. See if it has wires or lights attached. These parts need power to work. If you find any electrical components, identify the circuit breaker that controls them. Switch off the breaker to cut power to the rack. Double-check by testing the lights or heater to confirm they are off.
Safety Precautions
Wear insulated gloves for extra protection. Use a voltage tester to ensure no electricity flows. Keep your hands dry and work in a well-lit area. Avoid touching metal parts directly if unsure about power status. Taking these safety steps lowers the chance of electric shock while removing the rack.

Credit: caaap.org.pe
Remove The Old Rack
Removing an old towel rack is an important step before installing a new one. It helps prepare your bathroom wall properly. This process requires care to avoid damage. Follow these simple steps to remove the old rack safely and easily.
Locate Screws And Anchors
First, check the towel rack for screws holding it to the wall. These screws are usually at the ends or behind covers. Look closely for plastic or metal anchors inside the wall. Knowing where screws and anchors are helps remove the rack cleanly.
Unscrew Carefully
Use a screwdriver that fits the screws perfectly. Turn the screws slowly to avoid stripping them. Keep the rack steady as you unscrew. Remove all screws before trying to pull the rack away from the wall.
Handle Stubborn Fixtures
Sometimes, racks stick to the wall due to paint or glue. Gently wiggle the rack back and forth to loosen it. Use a flat tool to pry it softly if needed. Avoid force that can damage your wall or tiles.
Fix Wall Damage
After removing an old towel rack, the wall often has holes and marks. Fixing these wall damages is key to a clean, smooth finish. Proper repair makes painting or adding new fixtures easier and better looking.
Fill Holes And Cracks
Start by cleaning dust and debris from holes and cracks. Use a putty knife to apply spackle or wall filler. Press the filler firmly into each hole and crack. Overfill slightly to allow for sanding later. Let the filler dry fully, following product instructions. This step hides holes and makes the wall even.
Sand And Smooth Surface
Once the filler is dry, use fine-grit sandpaper. Sand the patched areas gently to blend with the wall. Make sure the surface feels smooth to touch. Remove dust with a clean cloth before painting. A smooth wall ensures a neat, professional look for your space.
:max_bytes(150000):strip_icc()/how-to-remove-towel-bar-5221017-hero-01-c6a21614aaeb4e9ca8071b79bd398ef6.jpg)
Credit: www.thespruce.com
Clean The Area
After removing an old towel rack, cleaning the area is very important. Dirt, dust, and old adhesive can stay on the wall. These can stop the new towel rack from sticking well. Cleaning makes the surface smooth and ready for the next step. It also helps the new rack look better and last longer.
Remove Dust And Debris
First, use a soft brush or cloth to clear loose dust and dirt. Check for small pieces of old screws or nails and remove them. Use a vacuum cleaner to pick up all tiny debris from the wall and floor. Wipe the surface with a damp cloth to clean any remaining dust. Let the wall dry completely before moving on.
Prepare For New Installation
Look at the wall for any holes or damage left from the old rack. Fill small holes with wall putty or spackle and smooth it out. Allow the filler to dry fully and then sand it gently. Clean the area again to remove dust from sanding. Make sure the surface is flat and dry to support the new towel rack firmly.
Tips For New Rack Installation
Installing a new towel rack can refresh your bathroom’s look. It also helps keep towels organized and dry. Proper installation ensures the rack stays strong and safe for use. Follow simple tips to pick the right rack and hardware for a smooth setup.
Choose The Right Rack
Measure the space where you want to install the rack. Choose a size that fits well without crowding the area. Pick a style that matches your bathroom decor. Metal racks are sturdy and last long. Plastic racks are light and easy to install. Consider racks with extra features like shelves or hooks for more storage.
Select Proper Mounting Hardware
Use strong anchors or screws suited for your wall type. Drywall needs different hardware than tile or plaster. Check the weight limit of the mounting hardware to support the rack and towels. Use a level to make sure the rack is straight. Tighten screws firmly but avoid over-tightening to prevent damage.
Credit: www.reddit.com
Frequently Asked Questions
How Do I Safely Remove An Old Towel Rack?
Start by unscrewing the mounting brackets with a screwdriver. Use a putty knife to gently pry off any wall anchors. Be careful to avoid damaging the wall surface. Clean the area thoroughly before installing a new rack or painting.
What Tools Are Needed To Remove A Towel Rack?
You will need a screwdriver, putty knife, and possibly pliers. A drill may help if screws are stuck. Have wall patching materials ready for any holes. These tools ensure a smooth and damage-free removal process.
Can I Remove A Towel Rack Without Damaging The Wall?
Yes, by carefully unscrewing and gently prying off anchors, you can avoid damage. Use a putty knife to minimize wall surface impact. Patch small holes with spackle or wall filler for a clean finish.
How Do I Fix Holes After Removing A Towel Rack?
Fill holes with spackle or wall filler using a putty knife. Let it dry completely, then sand smooth. Apply primer and paint to match the wall color. This restores the wall’s appearance neatly.
Conclusion
Removing an old towel rack is easier than it seems. With the right tools and steps, you can finish the job quickly. Take your time to avoid damage to the wall. Clean the area well before installing a new rack or leaving it bare.
This simple task improves your bathroom’s look and feel. Try it yourself and enjoy the fresh, neat space. Small projects like this bring big changes. You will feel proud of your work.