Are you looking to remove that old towel rack but don’t know where to start? Removing a towel rack might seem tricky, but with the right steps, you can do it quickly and safely.
Whether you’re updating your bathroom or fixing a broken rack, this guide will walk you through everything you need to know. Keep reading, and you’ll be able to handle the job like a pro—no stress, no mess. Your bathroom makeover begins here!
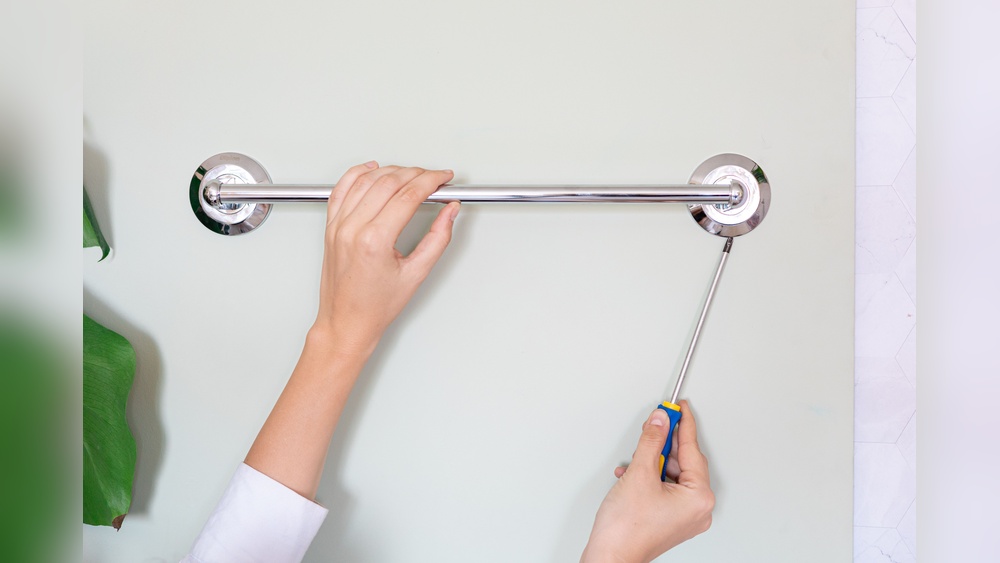
Tools Needed
Removing a towel rack is a simple task with the right tools. Having these tools ready makes the job faster and safer. Each tool plays a specific role in the removal process. Preparing them ahead saves time and effort.
Screwdriver
A screwdriver is essential to remove screws holding the rack. Choose the right type: flathead or Phillips. Use the correct size to avoid stripping screws. This tool loosens fasteners quickly and easily.
Drill
A drill helps if screws are stuck or painted over. Use a drill bit that fits the screw head. It makes unscrewing easier and reduces damage to the wall. A cordless drill adds convenience during the task.
Putty Knife
A putty knife helps to gently pry the rack off the wall. It can also remove any paint or caulk sealing the rack. Use a plastic or metal putty knife depending on wall type. This tool protects the wall surface during removal.
Stud Finder
A stud finder locates the wall studs behind the towel rack. Knowing stud locations helps avoid wall damage. It guides where screws are anchored. This tool is helpful if you plan to reinstall or move the rack.
Utility Knife
A utility knife cuts through caulk or paint around the rack edges. It prevents peeling or tearing the wall surface. Use it carefully to avoid injury or damage. Sharp blades make clean cuts easier.
:max_bytes(150000):strip_icc()/how-to-remove-towel-bar-5221017-hero-01-c6a21614aaeb4e9ca8071b79bd398ef6.jpg)
Credit: www.thespruce.com
Prepare The Area
Preparing the area is the first step to remove a towel rack safely. It helps protect your walls and floors from damage. A clean workspace also makes the job easier and faster.
Clear The Surrounding Space
Remove all towels and items near the rack. Move furniture away from the wall to avoid scratches. This gives you enough room to work comfortably.
Protect The Floor And Walls
Lay down a drop cloth or old sheet on the floor. Cover the wall under the rack with painter’s tape. This prevents scratches and marks during removal.
Gather The Necessary Tools
Prepare a screwdriver, drill, and putty knife. Keep a small container for screws and anchors. Having tools ready saves time and avoids interruptions.
Locate Mounting Hardware
Locating the mounting hardware is the first step in removing a towel rack. This hardware holds the rack firmly on the wall. Finding it helps prevent damage to your wall and makes removal easier.
Most towel racks use screws or brackets hidden under covers. These covers keep the hardware out of sight and give the rack a clean look. Removing these covers reveals the screws or bolts you need to unscrew.
Check For End Caps Or Covers
Look closely at the ends of the towel rack. Many racks have small plastic or metal caps covering the screws. These caps can often be pried off with a flat tool. Take care not to scratch the wall or rack.
Locate Visible Screws Or Fasteners
Some towel racks have screws visible on the mounting plates. These screws hold the rack to the wall anchors. Use a flashlight to see clearly. Make sure you identify all screws before removing the rack.
Use A Screwdriver To Test
Try gently turning any visible screws with a screwdriver. If they turn easily, they hold the rack in place. Unscrew them slowly to avoid stripping. Keep the screws safe for possible reuse.
Find Hidden Mounting Brackets
Some towel racks use hidden brackets behind the bar. Slide the bar sideways or lift it slightly to access the brackets. Once exposed, you can unscrew or unclip the mounting hardware. This method keeps the rack stable and neat.

Credit: www.reddit.com
Remove Screws And Brackets
Removing the screws and brackets is the key step to take down a towel rack safely. This process frees the rack from the wall without causing damage. It requires a few tools and careful handling. This section explains how to do it clearly.
Gather The Right Tools
Start by collecting a screwdriver that fits your screws. Usually, a Phillips head screwdriver works best. Have a drill handy if screws are tight. A putty knife can help if brackets stick to the wall.
Locate And Unscrew The Screws
Find the screws holding the towel rack’s brackets. They are often visible on the sides or under the rack. Turn the screwdriver counterclockwise to loosen and remove each screw. Keep the screws safe for later use.
Carefully Remove The Brackets
Once screws are out, the brackets should come off easily. If they resist, gently pry with a putty knife. Avoid forcing them to prevent wall damage. Remove each bracket slowly and place them aside.
Check The Wall For Damage
Look at the wall where the brackets were attached. Small holes or marks may be visible. These can be fixed with spackle or wall filler before repainting or reattaching a new rack.
Handle Wall Anchors
Wall anchors hold your towel rack firmly in place. Removing them carefully prevents damage to your wall. Handling these anchors right makes the job easier and cleaner. Follow simple steps to remove anchors and fix holes.
Remove Anchors Carefully
Start by loosening any screws left in the anchors. Use pliers to grip the anchor gently. Pull straight out to avoid tearing the wall. If the anchor is stuck, try pushing it deeper inside. This avoids wall damage and keeps surfaces smooth.
Fill Anchor Holes
Fill holes with spackling paste or wall filler. Use a putty knife to spread the filler evenly. Let it dry fully according to the product instructions. Sand the area smooth with fine sandpaper. This prepares the wall for painting or new fixtures.

Credit: www.youtube.com
Smooth The Wall Surface
After removing the towel rack, the wall surface often looks rough and uneven. Smoothing the wall helps prepare it for painting or other finishes. It gives your wall a clean, fresh look and hides any damage from the rack removal.
This step is key to making your wall look like new again. Start by sanding the area to remove bumps and rough spots. Then, apply touch-up paint to blend the repair with the rest of the wall.
Sand The Area
Use fine-grit sandpaper to smooth the wall surface. Sand gently around the holes or damaged spots. This removes old paint chips and rough edges. Sand until the wall feels even and smooth to touch. Wipe away dust with a clean cloth after sanding.
Apply Touch-up Paint
Choose paint that matches your wall color. Use a small brush or roller to apply paint over the sanded area. Apply thin coats and let each dry before adding more. This hides any marks and blends the repair into the wall. Finish by checking for any uneven spots and fix if needed.
Prevent Future Damage
Preventing damage after removing a towel rack protects your walls and saves time. Small steps can stop holes, scratches, and marks from forming. Careful work ensures the wall looks good for the next fixture or paint job.
Use Proper Tools For Removal
Choose the right screwdriver or drill to avoid stripping screws. A flat tool helps pry the rack gently without scratching the wall. Work slowly to keep the wall surface safe.
Fill Holes With Spackle
Fill screw holes with lightweight spackle or wall filler. Use a putty knife to smooth it out evenly. Let it dry completely before sanding for a neat finish.
Sand The Wall Smooth
Sand the patched area lightly to blend with the wall. Use fine-grit sandpaper for a smooth surface. Clean dust off with a soft cloth before painting.
Prime And Paint For Protection
Apply primer over the patched spots to seal the surface. Choose paint that matches your wall color. This covers repairs and prevents moisture damage.
Frequently Asked Questions
How Do I Safely Remove A Towel Rack From Drywall?
First, unscrew the mounting brackets using a screwdriver. Then, gently pull the rack off the wall. Use a putty knife to remove any wall anchors carefully. Finally, patch holes with spackle and sand smooth before repainting.
What Tools Are Needed To Remove A Towel Rack?
You need a screwdriver, putty knife, pliers, and spackle. A drill may help if screws are stuck. Sandpaper and paint are optional for wall repair after removal.
Can Removing A Towel Rack Damage My Bathroom Wall?
If done carefully, no damage occurs. Use the right tools to avoid drywall cracks. Patch small holes with spackle and repaint for a clean finish.
How To Remove Towel Rack Without Leaving Holes?
Use adhesive or suction cup towel racks instead. For screw-mounted racks, holes are inevitable but can be minimized by patching and painting afterward.
Conclusion
Removing a towel rack does not have to be hard. Follow the steps carefully and take your time. Use the right tools to avoid damage. Clean the wall after removal for a neat look. You can now change or move your towel rack easily.
Small tasks like this build your confidence in home projects. Keep safety in mind and ask for help if needed. Simple jobs like these make your space feel fresh and new.