Are you ready to transform your burlap wreath into a stunning centerpiece? Attaching decorations to a burlap wreath might seem tricky at first, but with the right tips, you can easily make your wreath stand out.
Whether you want to add flowers, ribbons, or seasonal accents, this guide will show you how to do it quickly and securely. Keep reading, and you’ll discover simple tricks to make your wreath look professionally crafted—no stress, no mess. Your perfect wreath is just a few steps away!
Choosing The Right Burlap Wreath
Choosing the right burlap wreath is the first step to a beautiful decoration. The wreath sets the base for all your creative ideas. It must fit your style and the space where you want to hang it. Picking the right wreath helps your decorations stand out and last longer.
Types Of Burlap Wreaths
Burlap wreaths come in many styles. Some have a simple, flat design. Others are full and fluffy. You can find wreaths with loops, ruffles, or mesh. Each type gives a different look and feel. Choose a style that matches your decoration theme.
Selecting The Size And Shape
Wreaths come in many sizes, from small to large. The size should fit the door or wall space. Round wreaths are classic and easy to decorate. Oval or square shapes offer a unique look. Pick a shape that matches your style and space size.
Gathering Essential Tools And Materials
Gathering the right tools and materials makes decorating a burlap wreath easier. Having everything ready helps you work smoothly. It saves time and keeps your project neat.
Choose supplies that suit your style and the look you want. Simple tools and pretty decorations make your wreath stand out. Prepare well before starting to create a beautiful piece.
Basic Craft Supplies
Start with scissors for cutting burlap and ribbons. Use a hot glue gun to attach decorations firmly. Floral wire holds items in place without damage. Wire cutters help trim the wire easily.
A ruler or measuring tape ensures even spacing. Twine or string can add rustic charm or hold items. Gloves protect hands from glue and sharp edges. Keep a clean workspace for better focus.
Decorative Elements To Use
Choose flowers, leaves, or pinecones for natural beauty. Fabric bows add color and texture. Small wooden signs or letters personalize your wreath. Buttons and beads bring extra detail and charm.
Seasonal items like mini pumpkins or ornaments fit holiday themes. Use berries or faux fruits for a fresh look. Pick decorations that match your home’s style. Keep balance by mixing sizes and shapes carefully.
Preparing Decorations For Attachment
Preparing decorations for attachment makes your burlap wreath look neat and beautiful. This step helps your decorations fit well and stay secure. It also saves time while attaching. Taking care in this stage ensures your wreath looks balanced and full.
Trimming And Shaping
Trim any excess stems or wires from your decorations. Cut loose threads or leaves that look messy. Shape flowers or greenery to fit the wreath’s curve. Small cuts can make big differences in appearance. Proper shaping helps decorations sit flat and hold better.
Grouping Small Items
Combine tiny decorations like berries or small flowers into clusters. Grouping creates a fuller look and makes attachment easier. Use floral tape or wire to keep groups tight. Clusters prevent decorations from looking scattered or sparse. This step gives your wreath a polished, cohesive feel.
Using Hot Glue For Secure Attachment
Using hot glue is a popular way to attach decorations to a burlap wreath. It creates a strong bond that holds items securely in place. Hot glue dries quickly, which makes the process fast and easy. It works well on different materials like fabric, wood, and plastic. This method ensures your decorations stay put through seasons and weather changes.
Applying hot glue carefully helps avoid mess and keeps the wreath looking neat. The glue sets fast, so work steadily but quickly. Proper use of hot glue enhances the wreath’s durability and appearance.
Safety Tips
Always use a low-temperature glue gun for burlap wreaths. High heat can burn the burlap fabric. Work in a well-ventilated area to avoid inhaling fumes. Keep the glue gun on a stable surface when not in use. Avoid touching the hot glue to prevent burns. Use protective gloves if needed. Keep children and pets away while gluing. Unplug the glue gun after finishing your project.
Best Practices For Gluing
Apply small glue dots instead of large blobs. This prevents glue from spilling over the edges. Press decorations firmly onto the glue for a few seconds. Let the glue cool completely before moving the wreath. Test glue on a scrap piece of burlap first. Use enough glue to hold the decoration but avoid excess. Work in sections to keep the wreath manageable. Check for loose spots and add glue if needed.
Attaching With Floral Wire
Attaching decorations to a burlap wreath with floral wire is a simple and strong method. Floral wire holds items firmly without damaging the wreath. It bends easily around shapes and stays secure for a long time.
This technique works well for flowers, ribbons, berries, and other accents. You can adjust the wire length and tightness to fit each decoration perfectly. Using floral wire keeps your wreath neat and beautiful.
Choosing Wire Gauge
Select the right wire gauge for your decorations. Thicker wire, like 18-20 gauge, is strong and good for heavy items. Thin wire, such as 22-24 gauge, works well for light decorations.
Thick wire holds better but is harder to bend. Thin wire is easy to twist but may not support large pieces. Pick the gauge based on your decoration size and weight.
Twisting And Securing Techniques
Start by cutting a piece of wire long enough to wrap around the decoration and wreath. Place the decoration on the burlap. Wrap the wire tightly around both the item and wreath base.
Twist the wire ends together on the back side to lock the decoration in place. Tuck the twisted wire ends into the burlap to avoid sharp points. Use pliers to make tight twists and secure hold.
Repeat this process for each decoration. This method keeps your wreath stable and looks clean. Adjust wires as needed for a balanced and beautiful wreath.

Credit: www.amazon.com
Incorporating Ribbon And Twine
Incorporating ribbon and twine into a burlap wreath creates a charming and rustic look. These materials add color and texture that bring the wreath to life. They also help secure other decorations in place. Using ribbon and twine is simple and offers many creative options. They work well for both indoor and outdoor wreaths. Here are some tips to use ribbon and twine effectively on your burlap wreath.
Tying Knots And Bows
Start by cutting ribbon or twine to the desired length. Tie simple knots to attach ribbons securely to the wreath base. Small knots keep decorations in place without damaging the burlap. For a decorative touch, tie bows with ribbon. Loops of bows add volume and softness. Adjust the bow size to fit your wreath style. Keep knots tight, so decorations do not slip off. Twine knots work well for a natural, rustic feel. Experiment with different knot styles for variety.
Adding Texture And Dimension
Mix ribbon and twine to create layers on the wreath. Use wide ribbons alongside thin twine for contrast. Curl or twist ribbons for extra shape. Wrap twine around the wreath base or other elements. This adds depth and interest to your design. Layering different textures makes the wreath more eye-catching. Combine smooth ribbons with rough twine for balance. Secure each layer firmly to avoid shifting. Texture and dimension help your wreath stand out beautifully.
Balancing Decoration Placement
Balancing decoration placement on a burlap wreath creates a pleasing look. Proper balance helps your wreath feel complete and well-made. It guides the eye and highlights the best parts of your design. You can choose different ways to balance decorations. Each choice changes the style and impact of the wreath.
Symmetry Vs. Asymmetry
Symmetry means decorations are evenly placed on both sides. This style feels calm and organized. It works well for formal or traditional wreaths. You can place flowers, ribbons, or ornaments in matching spots. This makes the wreath look neat and balanced.
Asymmetry places decorations off-center or unevenly. It feels more natural and creative. This style adds movement and interest to the wreath. Use bigger decorations on one side and smaller on the other. This draws attention and makes the wreath unique.
Focal Points And Layers
A focal point is where the eye stops first. Use a large flower or a bright ribbon as the focal point. Place it where it stands out the most. Surround it with smaller decorations to support it.
Layering adds depth to your wreath. Place some decorations under others. Use different sizes and shapes to create layers. This makes the wreath look full and rich. Layering also helps balance the weight of decorations across the wreath.

Credit: thehouseonsilverado.com
Tips For Durable Outdoor Wreaths
Creating a burlap wreath for outdoor use is a fun project. To keep your wreath looking fresh and lasting longer, you need to focus on durability. Outdoor wreaths face wind, rain, and sun. These elements can damage your decorations quickly.
Strong materials and simple care steps help protect your wreath. Follow these tips to make your burlap wreath last through many seasons.
Weatherproofing Materials
Choose decorations made from plastic, metal, or weather-resistant fabric. These materials hold up better than paper or natural items.
Use a clear spray sealant on the burlap and decorations. This spray helps stop water damage and fading from sunlight.
Secure decorations with waterproof glue or floral wire. Avoid tape or regular glue that can weaken outside.
Attach items tightly to prevent them from blowing away in strong winds.
Maintenance Advice
Check your wreath regularly for dirt or damage. A quick dust or wipe keeps it clean and fresh.
Remove any wet decorations after rain to stop mold and rot.
Store the wreath indoors during heavy storms or winter months. This prevents long-term damage.
Fix loose pieces as soon as you notice them. Small repairs extend the life of your wreath.
Creative Decoration Ideas
Decorating a burlap wreath offers many creative options. You can make it fit any style or season. These ideas help you create a unique wreath that stands out. Use simple materials and easy techniques to attach decorations. Your wreath becomes a beautiful, personal display.
Try different themes and personal touches. Change decorations often to keep your home fresh. Each wreath can tell a story or celebrate a special time.
Seasonal Themes
Seasonal decorations bring life to burlap wreaths. Use bright flowers and pastel ribbons for spring. Add small pumpkins or autumn leaves for fall. Pinecones, holly berries, and red ribbons work well for winter. Summer wreaths shine with seashells and vibrant colors. Switch decorations with the seasons to keep your wreath lively and new.
Personalized Touches
Make your wreath special with personal details. Use initials, small photos, or name tags. Add charms or miniature items that reflect hobbies. Hand-painted signs or fabric letters add charm. These small touches make the wreath more meaningful. Personalization helps your wreath tell your story.
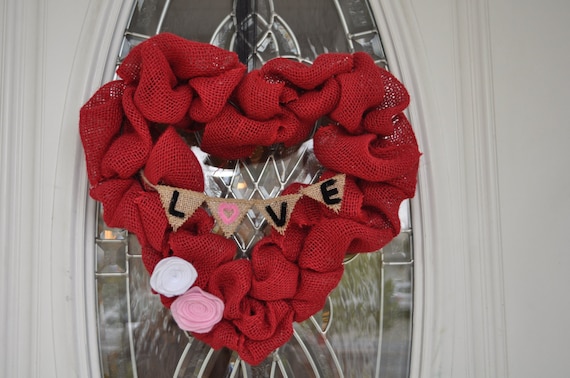
Credit: www.etsy.com
Frequently Asked Questions
How Do I Attach Decorations To A Burlap Wreath?
Use hot glue or floral wire to secure decorations. Hot glue works best for lightweight items. For heavier decorations, wrap floral wire tightly around the wreath frame. This ensures decorations stay in place without damaging the burlap.
What Types Of Decorations Work Best On Burlap Wreaths?
Lightweight decorations like faux flowers, ribbons, and small ornaments are ideal. Avoid heavy or sharp items that can tear burlap. Natural elements such as pinecones and dried leaves also complement burlap’s rustic look beautifully.
Can I Reuse Decorations On My Burlap Wreath?
Yes, you can reuse decorations if you carefully remove them. Use floral wire instead of glue for easy removal. Store decorations separately in a dry place to keep them in good condition for future wreaths.
How Do I Prevent Decorations From Falling Off Burlap Wreaths?
Secure decorations tightly with hot glue and floral wire. Allow glue to dry completely before hanging. Check and reinforce decorations periodically, especially if wreath is outdoors or exposed to wind.
Conclusion
Attaching decorations to a burlap wreath can be simple and fun. Use the right tools like hot glue or floral wire for a strong hold. Choose decorations that match your style and season. Take your time to place each piece carefully.
This way, your wreath will look neat and beautiful. Enjoy creating a unique decoration that brightens any space. Try different ideas and make your wreath truly special. Keep practicing, and your skills will improve every time. Decorating a burlap wreath is a great way to show creativity.