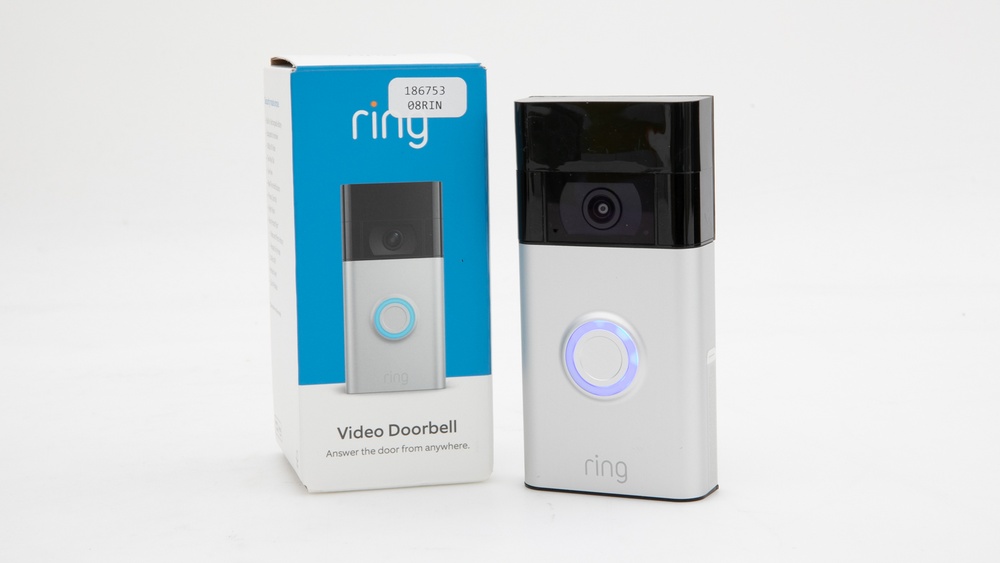

If you want to boost your home security and keep an eye on visitors right from your phone, installing the Ring Video Doorbell 2nd Gen is a smart choice. You might be wondering how to set it up quickly and correctly without any hassle.
This guide will walk you through each simple step, so you can start enjoying clear video, instant alerts, and peace of mind in no time. Keep reading, and by the end, you’ll have your Ring Doorbell working perfectly to protect your home.

Credit: vicentetorns.com
Unbox And Check Components
Unboxing your Ring Video Doorbell 2nd Gen is the first step to setup. This step ensures you have all parts needed. It also helps spot any damage before installation.
Carefully open the box and remove all items. Lay them on a flat surface. Check each component against the list in the manual.
Ring Video Doorbell Device
The main part is the video doorbell itself. It has a camera, button, and microphone. Inspect it for scratches or cracks. Make sure the lens is clean and clear.
Mounting Bracket And Screws
Look for the mounting bracket included in the box. It holds the doorbell on your wall. Screws and anchors come with it for secure fitting. Verify you have the correct number of screws.
Charging Cable And Battery
The device uses a rechargeable battery. Find the battery inside the package. A USB charging cable should be included. This cable charges the battery before installation.
Quick Start Guide And Stickers
The quick start guide gives basic setup instructions. It helps you begin the installation process. Also, check for stickers to warn visitors about the camera.
Charge The Doorbell Battery
Charging the Ring Video Doorbell 2nd Gen battery is a simple step. It ensures your doorbell works smoothly without interruptions. The battery must be fully charged before installation.
Proper charging helps the doorbell last longer. It also prevents sudden power loss. Follow the steps carefully for best results.
Remove The Battery From The Doorbell
Find the small release tab at the bottom of the doorbell. Press the tab and pull the battery out gently. Avoid using sharp tools that can damage the battery or doorbell.
Use The Provided Charging Cable
Take the USB charging cable included in the box. Connect one end to the battery and the other to a USB power source. A computer or USB wall adapter works well for this.
Charge Until The Led Light Turns Green
Watch the LED light on the battery. It glows red or orange during charging. When fully charged, the light turns green. This usually takes 5 to 10 hours.
Reinsert The Battery Into The Doorbell
After charging, slide the battery back into the doorbell. Make sure it clicks securely in place. Check the doorbell power by pressing the button once.
Download The Ring App
Downloading the Ring app is the first step to set up your Ring Video Doorbell 2nd Gen. The app controls your doorbell and lets you see who is at your door. It also sends alerts and records video. Without the app, you cannot use the full features of your doorbell.
The app is free and works on most smartphones and tablets. You will need it to connect the doorbell to your Wi-Fi and to manage settings. Follow the steps below to download the app quickly.
Download The Ring App From The App Store
Open the App Store on your iPhone or iPad. Tap the search bar and type “Ring”. Find the official Ring app by Ring.com. Tap the download button to install the app on your device.
Download The Ring App From Google Play
Open Google Play on your Android phone or tablet. Use the search bar to type “Ring”. Select the app published by Ring.com. Tap “Install” to add the app to your device.
Create A Ring Account
Open the Ring app after installation. Tap “Create Account”. Enter your email, create a password, and add your phone number. Follow the on-screen steps to finish setting up your account.
Sign In To The Ring App
Open the Ring app. Enter your email and password. Tap “Sign In” to access your account. You are now ready to connect your Ring Video Doorbell 2nd Gen.
Create Or Log Into Your Account
Creating or logging into your Ring account is the first step to use your Ring Video Doorbell 2nd Gen. This account connects your device to your phone and keeps your home secure. It also allows you to control settings and receive alerts.
The process is simple and quick. You only need a valid email and a password. Once logged in, the app guides you through the setup of your new doorbell.
Create A New Ring Account
Open the Ring app on your smartphone or tablet. Tap on “Create Account.” Enter your email address and create a strong password. Follow the instructions to add your phone number and verify your email. This helps keep your account safe.
Log Into Your Existing Ring Account
Open the Ring app and select “Log In.” Enter your registered email and password. Tap “Sign In.” If you forgot your password, use the “Forgot Password” link. Reset it quickly by following the email instructions.
Set Up Your Profile
After logging in, add your name and address. This information helps with emergency services if needed. You can also customize your notification preferences for alerts and updates.
Set Up The Doorbell In The App
Setting up the Ring Video Doorbell 2nd Gen in the app is the next step after physical installation. This process connects your doorbell to your Wi-Fi network. It also links the device to your smartphone. The app lets you control the doorbell from anywhere. You can see who is at your door and receive alerts instantly.
The app setup is simple and guides you through each step. It ensures your doorbell works smoothly. Follow the instructions carefully to avoid connection problems.
Download And Install The Ring App
Find the Ring app in your phone’s app store. It is free to download. Install the app and open it to start the setup. Create a new account or log in if you already have one.
Add Your Device In The App
Tap the “Set up a Device” button. Select “Doorbells” from the device list. Follow the on-screen prompts to add your Ring Video Doorbell 2nd Gen. The app will ask you to scan a QR code found on the doorbell or its packaging.
Connect To Wi-fi Network
Choose your home Wi-Fi from the list. Enter your Wi-Fi password carefully. The doorbell needs a strong connection to work well. The app will confirm when the doorbell connects successfully.
Test The Doorbell And Customize Settings
Press the doorbell button to test it. You should receive a notification on your phone. Adjust motion settings and notification preferences in the app. Customize alerts to fit your needs.
Credit: www.vicentetorns.com
Choose Installation Location
Choosing the right spot to install your Ring Video Doorbell 2nd Gen is key. The location affects video quality and motion detection. A good spot makes your home safer and your device work better.
Consider The Height
Place the doorbell at about 48 inches above the ground. This height captures faces clearly. It also detects motion well without missing visitors.
Check The Field Of View
Make sure the doorbell can see the entire porch area. Avoid places blocked by walls or plants. The camera should cover your doorstep and path.
Avoid Direct Sunlight
Sun glare can blur the video. Choose a shaded spot or one that faces away from the sun. This helps keep videos clear day and night.
Near Your Existing Doorbell
If you want to use your current doorbell’s wiring, install nearby. This makes connecting easier and keeps your setup neat.
Access To Wi-fi Signal
Strong Wi-Fi is essential for live video and alerts. Pick a spot close to your router or a Wi-Fi extender. Weak signals cause delays or no connection.
Mount The Doorbell Bracket
Mounting the doorbell bracket is a key step in installing the Ring Video Doorbell 2nd Gen. This bracket holds the doorbell securely to your wall or door frame. Proper mounting ensures the doorbell works well and stays in place.
Follow these steps to mount the bracket correctly. Use the tools and materials that come with your Ring doorbell. Take your time and make sure the bracket is level and strong.
Choose The Right Location
Select a spot near your front door, about 48 inches from the ground. This height captures clear video of visitors’ faces. Avoid placing the bracket in direct sunlight or where rain can hit it often.
Mark The Screw Holes
Hold the bracket against the wall. Use a pencil to mark the holes for screws. Double-check the bracket is straight by using a level tool.
Drill Holes For Anchors
Use a drill bit that matches the size of the wall anchors. Drill holes on the marks you made. Push the anchors into the holes until they fit tightly.
Attach The Bracket With Screws
Align the bracket with the drilled holes. Insert the screws through the bracket into the anchors. Tighten the screws firmly, but avoid over-tightening to prevent damage.
Connect To Existing Doorbell Wiring
Connecting your Ring Video Doorbell 2nd Gen to your existing doorbell wiring is an important step. It helps the doorbell get power and work smoothly. This connection lets you use the Ring app to see who is at your door anytime. Follow these simple steps to connect the wires safely and correctly.
Turn Off Power
First, switch off the power at your home’s circuit breaker. This stops electricity from flowing to the doorbell wires. It keeps you safe while working. Use a voltage tester to check that the wires have no power. Never touch live wires. Safety is the top priority.
Attach Wires
Next, take the two doorbell wires and connect them to the screws on the back of the Ring doorbell. It does not matter which wire goes to which screw. Just make sure the wires are secure and not loose. Use pliers to twist the wire ends for a better fit if needed. Avoid any bare wire that could cause shorts.
Secure Connections
Finally, tighten the screws to hold the wires firmly. Tug gently on the wires to check they do not move. Tuck the wires neatly into the wall cavity. Place the Ring doorbell on its mounting bracket and screw it in place. Secure connections ensure your device works without interruptions.
Attach The Doorbell To Bracket
Attaching the Ring Video Doorbell 2nd Gen to its bracket is a simple step in the installation process. This step secures the doorbell to your wall or door frame. It ensures the device stays in place and works properly.
Take your time to align the doorbell with the bracket carefully. A proper fit helps the doorbell capture clear video and stay stable in all weather conditions.
Align The Doorbell With The Bracket
Hold the doorbell close to the bracket on the wall. Match the bottom of the doorbell with the bottom of the bracket. Make sure the sides line up evenly.
Snap The Doorbell Into Place
Push the doorbell gently but firmly onto the bracket. You will hear a click sound. This means the doorbell is locked securely to the bracket.
Check The Doorbell Stability
Give the doorbell a small shake. It should not move or wiggle. If it does, remove and reattach it carefully. The doorbell must be stable to work well.
Secure With The Included Screws
Use the small screws that come with your Ring doorbell. Insert them into the holes at the bottom of the doorbell. Tighten them with a screwdriver to lock the doorbell in place.
Test The Doorbell Functionality
Testing the Ring Video Doorbell 2nd Gen ensures it works properly after installation. This step confirms the doorbell rings and the video feed functions well. It also verifies the connection between the device and your phone or tablet.
Taking time to test the doorbell avoids future issues. It helps identify any setup problems early. Follow the steps below to check the main features of your Ring doorbell.
Check The Doorbell Chime
Press the button on your Ring doorbell. Listen carefully for the chime sound inside your home. The chime should ring clearly and without delay. If you hear no sound, check the wiring or chime settings.
Test The Video And Audio Feed
Open the Ring app on your phone or tablet. Press the doorbell button to start a live video feed. Confirm the video shows your doorstep clearly. Speak into the app to test two-way audio. The doorbell’s speaker should play your voice.
Verify Motion Detection Alerts
Move near the doorbell to trigger motion detection. Watch for alerts sent to your phone. The Ring app should notify you quickly. Check the app settings to adjust detection zones if needed.
Adjust Motion Settings
Adjusting motion settings on your Ring Video Doorbell 2nd Gen helps control alerts and recordings. It reduces false alarms and saves battery life. Proper settings ensure you only get notifications for important movement.
Customize motion zones and sensitivity to fit your home’s layout. This makes your doorbell smart and efficient.
Accessing Motion Settings In The Ring App
Open the Ring app on your phone. Select your doorbell device from the list. Tap on “Motion Settings” to start adjusting. This section controls how your doorbell detects motion.
Setting Motion Zones
Motion zones define specific areas your doorbell watches. Draw or adjust zones on the screen. Focus on walkways, driveways, or porch areas. Avoid zones near busy roads or trees to reduce false alerts.
Adjusting Motion Sensitivity
Motion sensitivity controls how easily your doorbell triggers alerts. Move the slider to low, medium, or high. High sensitivity catches small movements but may cause extra alerts. Low sensitivity reduces alerts but might miss some motion.
Using Smart Motion Detection
Enable smart motion detection for better accuracy. It filters out pets, cars, and other non-human movement. This feature helps to receive only important alerts.
Troubleshoot Common Issues
Troubleshooting common issues with your Ring Video Doorbell 2nd Gen helps keep it working smoothly. Small problems can stop the doorbell from recording or sending alerts. Fixing these issues fast means better home security.
Follow these simple steps to solve frequent problems. These tips work for most users and require no special tools.
Check Your Wi-fi Connection
Weak Wi-Fi causes delays or no video feed. Move your router closer to the doorbell if possible. Restart your router to refresh the connection. Make sure your Wi-Fi password is correct in the app.
Restart The Ring Doorbell
Restarting the device clears temporary bugs. Press and hold the setup button for 20 seconds. Wait a few moments for the doorbell to reboot. Check if the problem is fixed after the restart.
Update The Ring App And Firmware
Old software can cause errors. Open the Ring app and check for updates. Install any available updates for the app and doorbell firmware. Updated software improves performance and security.
Check The Doorbell’s Battery
A low battery stops notifications and video recording. Remove the battery and charge it fully. Replace the battery if it no longer holds a charge. Keep the battery charged for best results.
Motion alerts may miss or trigger too often. Open the app and review motion zones. Customize the zones to focus on important areas. Lower sensitivity to reduce false alerts. Test the settings after changes.
Credit: vicentetorns.com
Frequently Asked Questions
How Do I Install Ring Video Doorbell 2nd Gen?
Start by charging the device fully. Download the Ring app and create an account. Mount the doorbell using the included tools. Follow app instructions to connect to Wi-Fi. Test the doorbell to ensure proper installation and functionality.
What Tools Are Needed For Ring Doorbell Installation?
You need a drill, screwdriver, level, and the mounting screws included. A pencil helps mark drill spots. A ladder may be useful for high placements. The Ring app guides you through the process step-by-step.
Can I Install Ring Doorbell Without Professional Help?
Yes, installation is designed for DIY users. The app provides clear setup instructions. Basic tools and a stable Wi-Fi connection are essential. Most users complete the process within 30 minutes.
How Do I Connect Ring Doorbell To Wi-fi?
Open the Ring app and select “Set Up Device. ” Follow prompts to choose your Wi-Fi network. Enter your Wi-Fi password carefully. The doorbell will connect and update automatically. Ensure strong Wi-Fi signal at installation spot.
Conclusion
Installing the Ring Video Doorbell 2nd Gen is simple and quick. Follow each step carefully for the best results. Your home will feel safer with this device. Enjoy clear video and easy access from your phone. Troubleshooting is easy if you face any issues.
Regular updates keep your doorbell working well. Stay connected to visitors anytime, anywhere. This device adds convenience and peace of mind. Start your installation today and protect your home.