Looking to fit a wing mirror on your Smart Car but unsure where to start? You’re in the right place.
A properly fitted wing mirror isn’t just about looks—it’s about your safety and confidence every time you hit the road. In this guide, you’ll find simple, clear steps to help you replace or install your Smart Car wing mirror quickly and without hassle.
By the end, you’ll know exactly what to do, saving time and avoiding costly mistakes. Ready to get your Smart Car looking sharp and driving safer? Let’s dive in.
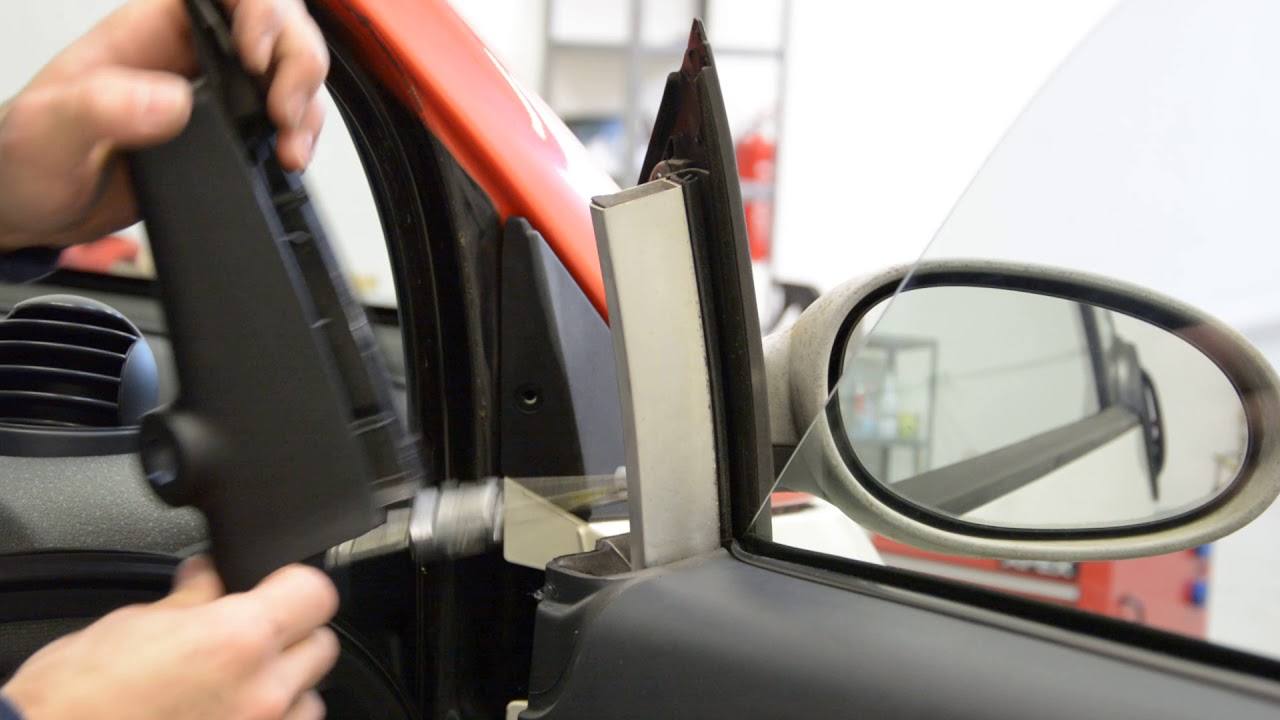
Credit: www.youtube.com
Tools Needed
Fitting a Smart Car wing mirror requires the right tools. Using proper tools makes the job easier and safer. It helps you avoid damage and saves time.
Essential Tools
- Screwdriver set – flathead and Phillips types
- Socket wrench with various sizes
- Trim removal tool or plastic pry tool
- Torx screwdriver or bit set
- Gloves to protect your hands
- Cleaning cloth for wiping surfaces
Optional Accessories
- Adhesive remover for old glue residue
- Electrical tape for securing wires
- Multimeter to check electrical connections
- Protective eyewear for safety
- Small container to hold screws and bolts

Credit: www.ebay.com
Preparing The Smart Car
Start by removing the old wing mirror carefully. Match the new mirror to the car’s fittings. Tighten screws firmly for a secure fit.
Preparing your Smart car before fitting a new wing mirror is important. It helps make the process safe and smooth. Taking the right steps protects you and your car from damage. This section guides you through the basic preparation.
Focus on safety and careful handling. Clear work space around the car. Have all tools ready before starting the work. These simple steps save time and avoid problems.
Parking And Safety Measures
Park your Smart car on a flat surface. Choose a quiet spot away from traffic. Turn off the engine and engage the handbrake. This stops the car from moving during the work.
Wear safety gloves to protect your hands. Use safety glasses to avoid dust or parts in your eyes. Keep children and pets away from the work area. Good lighting helps you see small parts clearly.
Removing The Old Wing Mirror
Start by lowering the window on the side you will work on. Locate the screws or clips holding the old wing mirror. Use the correct screwdriver or tool to remove them carefully. Keep the screws safe for reuse.
Gently pull the old wing mirror away from the car. Watch for wires if the mirror is electric. Disconnect the wires by pressing the clips or plugs. Do not pull hard to avoid damage to the wires.
Place the old mirror on a soft surface to prevent scratches. Clean the mounting area with a cloth. Remove dirt or old glue to ensure the new mirror fits well.
Inspecting The New Wing Mirror
Before fitting a new wing mirror on your Smart Car, a careful inspection is important. This step helps avoid problems later. You can check if the mirror fits well and works correctly. A good inspection saves time and effort. It also protects your car’s electrical system and ensures safety on the road.
Checking Compatibility
First, check if the new wing mirror matches your Smart Car model. Look at the shape and size closely. The mirror should fit the mounting points without force. Check the color and finish to match your car’s look. Using the wrong mirror can cause damage or poor fit.
Testing Electrical Connections
Next, test the electrical parts of the mirror. Most Smart Car mirrors have heating and adjustment features. Connect the wires to a power source carefully. See if the heating element warms up and the motor moves the mirror. Faulty wiring can cause failure or short circuits. Testing now prevents bigger problems later.
Installing The New Wing Mirror
Installing the new wing mirror on your Smart Car is a straightforward process. It requires careful alignment, secure mounting, and proper connection of electrical parts. Follow these steps to ensure your mirror fits correctly and works well.
Aligning The Mirror
Place the new wing mirror in the correct position. Make sure it matches the old mirror’s mounting points exactly. Check that the mirror glass faces the right direction. This step ensures clear visibility while driving. Adjust the mirror gently to avoid damage.
Securing The Mounting Bolts
Use the correct bolts to fasten the mirror tightly. Hand-tighten each bolt first to hold the mirror steady. Then, use a wrench to secure the bolts firmly. Do not overtighten, as this may crack the mirror housing. Tight bolts keep the mirror stable during movement.
Connecting Electrical Components
Locate the electrical connectors behind the wing mirror. Plug in the wires carefully, matching the colors or shapes. Ensure each connection is secure to avoid loose contacts. Test the mirror’s electronic functions before finalizing the fit. Proper connections enable features like heating and adjustment.
Adjusting And Testing
Adjusting and testing your Smart Car wing mirror is key for safe driving. Proper adjustment improves visibility and reduces blind spots. Testing ensures all parts work correctly before hitting the road.
Mirror Positioning
Start by sitting in the driver’s seat. Adjust the mirror so you see the side of your car. The main view should cover the road beside you. Tilt the mirror up or down to see the horizon line. Move it left or right to reduce blind spots. Make small changes and check the view each time.
Electrical Function Check
Turn on your car’s power. Use the mirror control switch to move the mirror. Check if the mirror moves smoothly in all directions. Test the heating function if your mirror has one. Make sure the indicator light on the mirror works. Fix any issues before driving to stay safe.

Credit: www.ebay.com
Troubleshooting Common Issues
Fitting a Smart Car wing mirror can sometimes lead to small problems. These issues are common and easy to fix. Knowing how to spot and solve them saves time and frustration. Here are two frequent problems and ways to handle them.
Loose Fittings
Loose fittings can cause the wing mirror to wobble or fall off. Check all screws and bolts after installation. Tighten them with the right tools. Avoid over-tightening to prevent damage to the mirror or car body. If clips or brackets are part of your mirror, make sure they snap firmly into place. Regularly inspect fittings to keep the mirror stable while driving.
Electrical Malfunctions
Electrical malfunctions can stop mirror adjustments or heating features from working. First, check the wiring connections behind the mirror. Look for loose or disconnected wires. Test the fuse related to the mirror’s power supply. Replace any blown fuses with the correct type. Use a multimeter to check for power flow if the problem continues. Make sure the control switch inside the car is working properly. Fixing electrical issues often restores full mirror function quickly.
Frequently Asked Questions
How Do I Remove A Smart Car Wing Mirror Safely?
To remove a Smart Car wing mirror, first disconnect the battery. Then, carefully unscrew the mirror housing bolts. Gently detach the mirror from the door panel. Avoid using excessive force to prevent damage.
What Tools Are Needed To Fit A Smart Car Wing Mirror?
You need a screwdriver, socket wrench, and trim removal tool. Additionally, having gloves and a clean cloth helps. These tools ensure smooth and safe installation without damaging the parts.
Can I Fit A Smart Car Wing Mirror Myself?
Yes, fitting a wing mirror is doable with basic tools. Follow the car manual instructions carefully. If unsure, consider professional help to avoid damage or incorrect fitting.
How Long Does It Take To Fit A Wing Mirror?
Fitting a Smart Car wing mirror typically takes 20 to 30 minutes. Time varies depending on experience and tool availability. Taking your time ensures proper installation and safety.
Conclusion
Fitting a smart car wing mirror is simple with the right steps. Take your time and follow each part carefully. Check the mirror’s fit before tightening screws fully. Clean the area to keep the mirror steady and clear. A well-fitted mirror helps you see better and drive safely.
Practice makes the task easier next time. Keep tools ready and stay patient throughout the process. Your smart car will look good and stay safe on the road.