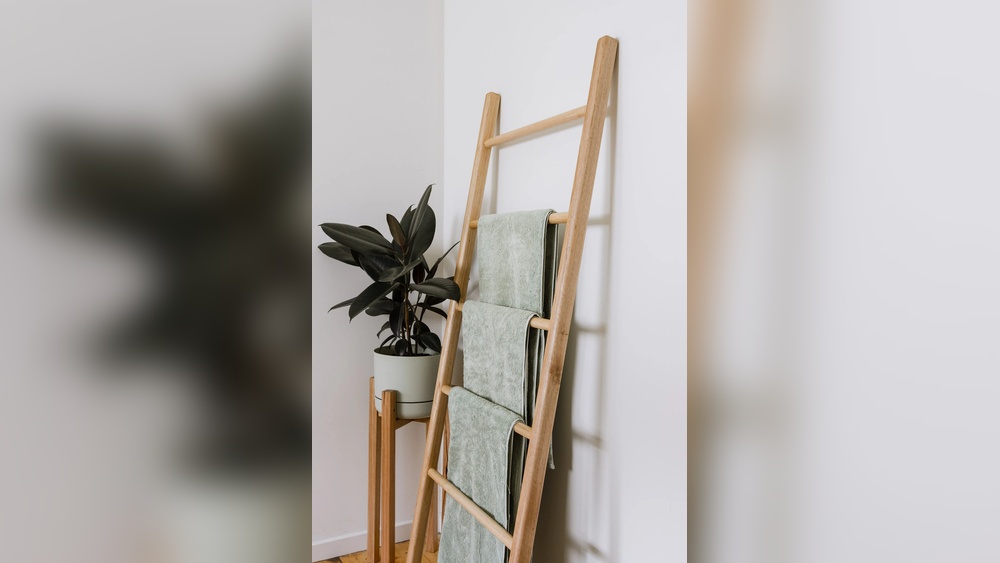

Are you tired of cluttered towels taking over your bathroom or laundry room? Imagine having a stylish, functional ladder towel rack that not only organizes your space but adds a touch of charm.
You don’t need to be a woodworking expert or spend a fortune to create one. In this guide, you’ll discover simple, step-by-step instructions to make your own ladder towel rack quickly and easily. By the end, you’ll have a beautiful piece that’s perfect for your home and a project you can be proud of.
Ready to transform your space? Let’s get started!

Credit: flexseal.ca
Materials Needed
Gathering the right materials is the first step to make a sturdy ladder towel rack. Having everything ready makes the building process smooth and fast. This section lists the wood types, tools, and other supplies needed.
Choosing The Right Wood
Pick wood that is strong and smooth. Pine, cedar, and oak work well for towel racks. Pine is cheap and easy to find. Cedar resists moisture and smells good. Oak is very strong but costs more. Choose wood with few knots and cracks for a clean look.
Essential Tools
Use tools that help cut, drill, and finish the wood. A saw is needed to cut the wood to size. A drill makes holes for screws. Sandpaper smooths rough edges. A measuring tape ensures correct lengths. A screwdriver helps tighten screws securely.
Additional Supplies
Other supplies complete the rack and protect the wood. Screws hold the pieces tightly together. Wood glue adds extra strength. Wood stain or paint gives a nice finish and protects the wood. Clear sealant prevents water damage. Use clamps to hold wood while glue dries.
Design Planning
Design planning is the first step in making a ladder towel rack. It helps you create a rack that fits your space and style. Careful planning saves time and materials. It ensures the rack is both useful and attractive.
Consider the size, style, and finish. These choices shape the final look and function of your rack. Each decision matters for a perfect fit in your room.
Measuring Space And Size
Start by measuring the wall or floor space where the rack will go. Note the height, width, and depth available. Leave some extra room for easy towel hanging and removal. Choose a ladder size that fits well without crowding the area. A well-sized rack feels balanced and looks neat.
Selecting Ladder Style
Pick a ladder style that matches your home’s decor. Simple, straight ladders suit modern rooms. Rustic ladders with rough wood add charm to country styles. Consider the number of rungs for hanging towels. More rungs mean more space but a bigger footprint. Choose a design that fits your needs and taste.
Deciding On Finish
Choose a finish that protects the wood and matches your decor. Natural wood finish keeps a warm, classic look. Paint adds color and can brighten your space. Stain enhances the wood grain and offers rich tones. A good finish also makes cleaning easier and protects from moisture.
Cutting The Wood
Cutting the wood is a key step in making your ladder towel rack. It shapes the pieces you will assemble. Accuracy and safety matter here. Take your time to get clean cuts. This ensures a solid and neat final product.
Marking Measurements
Start by measuring the wood pieces carefully. Use a tape measure and pencil to mark exact lengths. Double-check each mark before cutting. Clear lines help guide your saw. Mark every piece needed for the ladder rack.
Safe Cutting Techniques
Wear safety glasses and gloves to protect yourself. Use a saw with a sharp blade for smooth cuts. Cut slowly along the marked lines to avoid mistakes. Keep your fingers away from the blade. Work in a well-lit space for better control.
Sanding Edges
After cutting, sand all edges to remove splinters. Use fine-grit sandpaper for a smooth finish. Sand corners gently to round sharp points. This step makes the wood safe to handle. It also improves the rack’s appearance.
Assembling The Ladder
Assembling the ladder is a key step in making your towel rack sturdy and useful. This part brings together all the pieces into a solid structure. Pay close attention to how the side rails and rungs fit. Proper assembly ensures your ladder holds towels safely without wobbling.
Joining Side Rails And Rungs
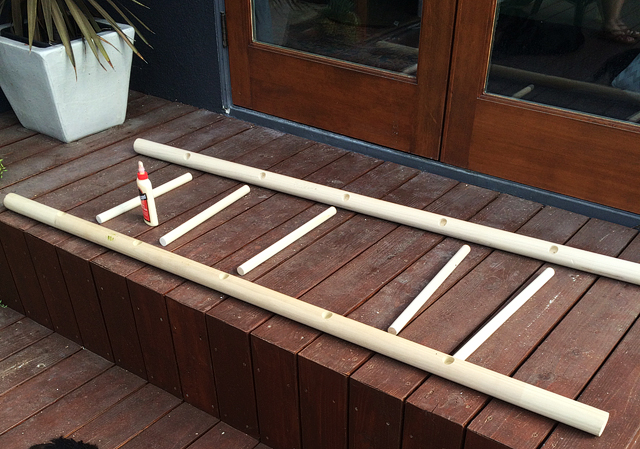
Start by placing the side rails parallel on a flat surface. Position the rungs evenly between the rails. Mark the spots where each rung will attach. Use a drill to make pilot holes for easy joining. Attach the rungs to the rails with screws or dowels. Check each connection for tightness. This forms the basic ladder frame.
Ensuring Stability
Stability is important for safety and durability. Make sure the ladder stands firm without rocking. Test the frame by pressing gently on different parts. Adjust the rungs if the frame feels loose. Sand any rough edges for a smooth finish. A stable ladder towel rack holds towels well and lasts longer.
Using Screws And Glue
Combine screws and glue for a strong bond. Apply wood glue to the ends of each rung. Insert the rung into the side rail holes. Secure with screws to lock the pieces in place. Wipe off any extra glue before it dries. Let the glue cure fully for maximum strength. This method prevents wobbling and keeps your ladder solid.
Finishing Touches
Finishing touches make your ladder towel rack look complete and last longer. They protect the wood and add style. This step is important for both beauty and durability.
Applying Paint Or Stain
Choose paint or stain based on your room’s style. Paint gives a solid color and hides wood grain. Stain shows the natural wood look. Use a brush or cloth for even coverage. Let it dry fully before the next step.
Adding Protective Coat
Apply a clear protective coat to guard against moisture and wear. Polyurethane or varnish works well. This layer makes cleaning easier and keeps the finish fresh. Use thin coats and allow drying time between layers.
Decorative Elements
Add hooks, small baskets, or rope for extra function and charm. These elements can hold small towels or accessories. Choose simple items that match your room’s look. They enhance the rack without making it too busy.
Credit: sssedit.com
Installation Tips
Installing a ladder towel rack correctly makes it last longer and look better. Proper setup keeps towels within easy reach. It also prevents the rack from falling or causing damage. Follow these simple installation tips for a safe and sturdy towel rack.
Positioning The Rack
Choose a spot with enough space for the ladder. Leave room to hang towels without them touching the floor. Avoid placing the rack where it blocks doors or walkways. A bathroom corner or next to the sink works well. Make sure the wall is strong enough to hold the rack’s weight.
Securing To Wall
Use a drill to make holes for screws. Insert wall anchors to hold screws firmly in place. Attach the rack with screws that fit the anchors. Tighten screws until the rack feels secure but avoid overtightening. Check the rack’s stability by gently pulling it. If it moves, tighten screws more or use stronger anchors.
Safety Considerations
Keep the rack away from heat sources like radiators. Make sure no sharp edges are sticking out. Place the rack where children cannot easily reach it. Use rubber pads under the rack’s feet to stop slipping. Regularly check screws and anchors for wear. Fix any loose parts immediately to avoid accidents.
Maintenance Advice
Maintaining your ladder towel rack ensures it stays functional and looks great. Regular care helps avoid damage and keeps the wood in good shape. Simple steps can extend the life of your rack and keep it safe to use.
Cleaning Techniques
Dust the rack with a soft cloth every week. For deeper cleaning, use a damp cloth and mild soap. Avoid soaking the wood to prevent warping. Dry the rack immediately after cleaning to keep moisture away.
Preventing Damage
Keep the ladder rack away from direct sunlight to avoid fading. Avoid placing heavy items on the rungs to prevent bending. Use felt pads under the rack if it touches the floor. This prevents scratches and keeps it stable.
Periodic Checks
Check for loose screws or joints every month. Tighten any loose parts to keep the rack sturdy. Look for signs of wood cracks or splits. Early repairs stop bigger problems and keep the rack safe.

Credit: www.youtube.com
Frequently Asked Questions
How Do I Start Making A Ladder Towel Rack?
Begin by selecting sturdy wood and cutting it to desired ladder height. Assemble side rails and rungs using screws and wood glue for stability.
What Tools Are Needed To Build A Ladder Towel Rack?
Basic tools include a saw, drill, measuring tape, screwdriver, sandpaper, and clamps. These help in cutting, assembling, and finishing the rack.
How Can I Finish The Ladder Towel Rack For Durability?
Apply wood stain or paint to protect the wood. Use a clear sealant to enhance durability against moisture in bathrooms.
What Are The Ideal Dimensions For A Ladder Towel Rack?
A typical ladder towel rack is 5-6 feet tall and 18-24 inches wide. This size fits most bathrooms and holds multiple towels.
Conclusion
Building a ladder towel rack is a simple and useful project. It adds style and saves space in your bathroom. You only need basic tools and wood pieces to start. The steps are easy to follow, even for beginners. This rack helps keep towels neat and dry.
Try making one to give your room a fresh look. A DIY ladder towel rack brings function and charm together. It’s a small project with a big impact.