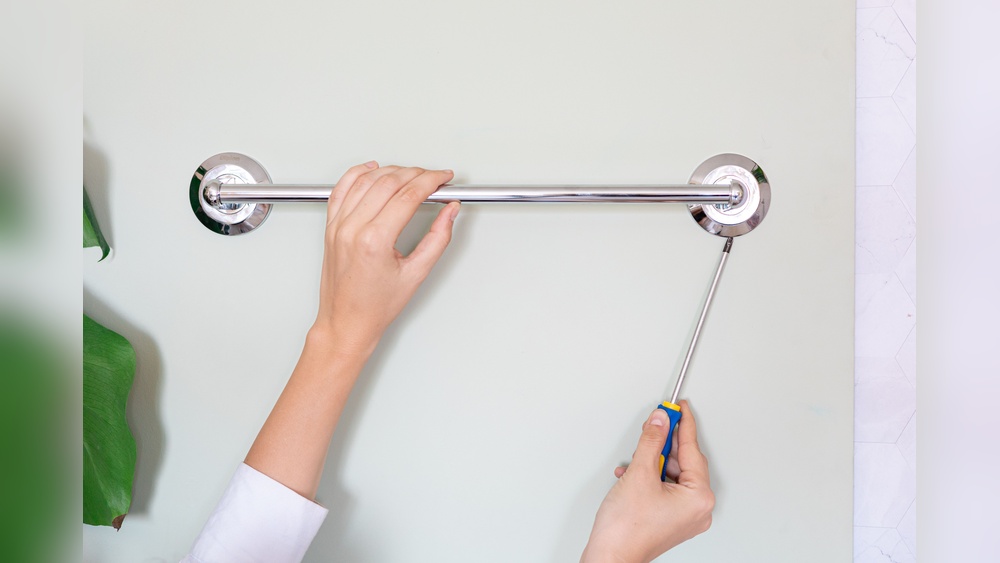

Are you looking to remove your towel rack quickly and without hassle? Whether you want to replace it with a new one or simply clear up space, knowing the right way to take it down can save you time and prevent damage to your walls.
In this guide, you’ll discover simple steps that anyone can follow, even if you’re not handy with tools. By the end, you’ll feel confident tackling the task yourself and ready to move on to your next bathroom project. Keep reading, and let’s make this easy!
Tools Needed
Taking down a towel rack needs the right tools. These tools make the job easier and safer. Prepare them before you start. This saves time and avoids frustration.
Common Tools
You will need a screwdriver, usually a Phillips head. Some racks use flathead screws. A drill can help if screws are stuck. A putty knife helps to pry off covers or caps. A level might be useful to check alignment before removal. A tape measure can check the space for new racks or repairs.
Safety Gear
Wear safety glasses to protect your eyes from dust and debris. Gloves help prevent cuts from sharp edges or tools. Closed-toe shoes protect your feet from dropped tools. A dust mask is useful if old paint or drywall dust is present. Safety gear keeps you safe during the whole process.
:max_bytes(150000):strip_icc()/how-to-remove-towel-bar-5221017-02-25716e1d19134b538fd87e85c8acbfa0.jpg)
Credit: www.thespruce.com
Prepare The Area
Preparing the area is the first step to safely removing a towel rack. A clean and organized space helps you work faster. It also stops damage to walls and floors. Taking time here saves trouble later.
Clear Surroundings
Remove items near the towel rack. This includes towels, toiletries, and decorations. Clear space lets you reach tools and parts easily. It also prevents objects from falling or breaking. A tidy area keeps the work safe and smooth.
Protect Surfaces
Cover floors and counters under the towel rack. Use a drop cloth, old sheet, or cardboard. This stops scratches and stains from tools or screws. Protecting surfaces keeps your bathroom clean. It also avoids extra cleaning after the job.
Locate Mounting Points
Locating the mounting points is the first step in taking down a towel rack. These points hold the rack firmly to the wall. Finding them helps you remove the rack safely without damage.
Look closely at the towel rack and the wall. Mounting points may be hidden under covers or caps. You will need to spot these before starting removal.
Identify Screws
Check the rack for visible screws. They usually hold the rack to the mounting brackets. Some screws sit under small plastic or metal covers. Pry these covers gently with a flat tool. Once exposed, use a screwdriver to remove the screws.
Check For Anchors
Anchors provide extra hold inside the wall. They look like plastic or metal sleeves around screws. After removing screws, pull the rack slightly. If it stays fixed, anchors are present. Use pliers to remove anchors carefully. Removing anchors prevents wall damage and makes reinstallation easier.
Credit: www.reddit.com
Remove Screws
Removing screws is the key step to take down a towel rack safely. You must remove each screw carefully to avoid damage. Take your time and work steadily. This part of the process sets the stage for a smooth removal.
Use The Right Screwdriver
Choose a screwdriver that fits the screw heads perfectly. A wrong size can strip the screws and make removal hard. Most towel racks use Phillips or flathead screws. Match your tool to the screw type for the best grip. Hold the screwdriver straight for steady turns. This helps prevent slipping and damage.
Handle Stubborn Screws
Some screws may be tight or stuck in place. Try applying gentle pressure while turning the screwdriver. Use a drop of lubricant if the screw resists. Let it sit for a few minutes to loosen the grip. Use short, firm turns instead of forcing the screw. If needed, tap the handle lightly with a hammer to help break rust or paint seals. Be patient and careful to avoid stripping.
Detach The Rack
Detaching the towel rack is the next important step in taking it down. This process requires care to keep your wall and rack safe. A careful approach helps avoid extra work later.
Gently Remove From Wall
Start by loosening any screws holding the rack. Use a screwdriver that fits well to prevent stripping the screws. Slowly pull the rack away from the wall. Support the rack with one hand to stop it from falling. Take your time to avoid breaking the rack or the wall surface.
Avoid Damage
Check for any hidden anchors or nails before pulling too hard. Use a putty knife to slide behind the rack if needed. This helps break any paint or adhesive seal gently. Keep tools steady and apply even pressure. Fix small holes or dents with spackle after removal to keep your wall smooth.

Credit: www.youtube.com
Patch And Repair
After removing the towel rack, the wall may have visible holes and marks. These need fixing to restore a clean look. The patch and repair process is simple and keeps your wall smooth. It prepares the surface for painting or wallpapering later.
Fill Holes
Start by cleaning the holes on the wall. Remove dust and loose paint with a soft brush. Use a putty knife to apply spackling paste or wall filler. Press the filler into the holes until they are full. Smooth the surface by scraping off extra filler. Allow it to dry fully, usually for a few hours. Sand gently with fine sandpaper to even out the area.
Touch Up Paint
Match the wall paint color before starting. Use a small brush or roller for touch-ups. Apply paint over the patched spots with light strokes. Blend the edges with the surrounding wall paint. Let the first coat dry, then add a second if needed. This restores the wall’s original look and hides repairs well.
Dispose Or Store Rack
After removing a towel rack, deciding what to do with it next is important. You can either store it safely for future use or dispose of it properly. Taking the right steps keeps your space neat and helps the environment.
Storage Tips
Clean the towel rack before storing it. Wipe off dust and dirt with a damp cloth. Dry it well to prevent rust or damage.
Wrap the rack in bubble wrap or old cloth. This protects it from scratches and dents. Store the rack in a dry, cool place like a closet or garage.
Label the storage box or shelf. It helps you find the rack easily later. Keep screws and small parts in a sealed bag attached to the rack.
Disposal Options
Check if the towel rack can be recycled. Metal racks usually go to scrap metal recycling centers. Plastic parts may need to go to specific recycling bins.
Donate the towel rack if it is still in good shape. Local charities or community centers may accept it. Someone else might need it more than you.
Throw away the rack only if it is broken beyond repair. Use your local waste guidelines for disposal. Avoid putting large metal pieces in regular trash bins.
Frequently Asked Questions
How Do I Safely Remove A Towel Rack?
Start by locating and unscrewing the mounting brackets. Use a screwdriver to remove screws carefully. Gently pull the rack away from the wall. Avoid forcing it to prevent wall damage. If anchors remain, remove or patch holes afterward.
What Tools Are Needed To Take Down A Towel Rack?
You typically need a screwdriver, drill, and possibly pliers. A putty knife helps to remove any adhesive or caulk. A level can be useful for reinstalling. Always use the right screwdriver type to avoid stripping screws.
How To Avoid Wall Damage When Removing Towel Racks?
Remove screws slowly and support the rack to prevent pulling on drywall. Use a putty knife to loosen any adhesive. Fill holes with spackle or wall filler. Sand and repaint if necessary for a smooth finish.
Can I Reuse Towel Rack Mounting Hardware?
Yes, if the screws and anchors are in good condition. Inspect them for rust or damage before reuse. Clean the hardware to ensure a secure fit. Using original hardware simplifies installation and maintains stability.
Conclusion
Taking down a towel rack is easier than you think. Use the right tools and work carefully. Remove screws step by step to avoid damage. Keep parts safe if you plan to reuse them. Clean the wall afterward for a neat look.
This simple task saves money and time. Try it yourself and enjoy the satisfaction. Small projects like this boost your confidence. Ready for your next home fix?


