Looking to boost your home’s security with a Ring Video Doorbell? Mounting it correctly is key to getting clear video and reliable alerts every time someone stops by.
You might be wondering where to start or how to avoid common mistakes that could cost you time or money. Don’t worry—this guide will walk you through simple, step-by-step instructions to mount your Ring Video Doorbell quickly and securely. By the end, you’ll have your doorbell set up perfectly, giving you peace of mind and control right at your fingertips.
Keep reading to discover how easy it can be!
:strip_icc()/BHG-how-to-install-video-doorbell-6833360-part-01-step-05_30445-c97141832b6541158a12194e97fccded.jpg)
Credit: www.shoshitamam.com
Tools And Materials Needed
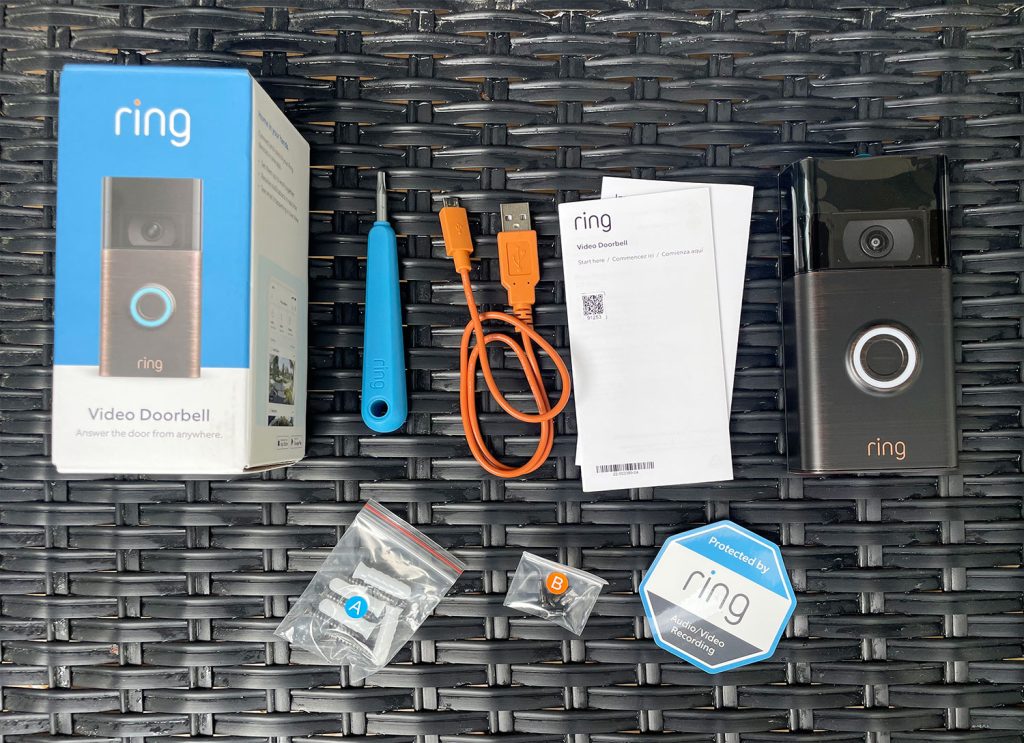
Before installing your Ring Video Doorbell, gather all necessary tools and materials. Having everything ready makes the process smooth and fast. This section lists what you need to start your installation.
Required Tools
- Power drill with drill bits
- Screwdriver (Phillips head)
- Level tool
- Measuring tape
- Pencil or marker for marking spots
- Wall anchors and screws (usually included with the doorbell)
- Smartphone or tablet for setup
- Wi-Fi connection for device activation
Optional Accessories
- Additional mounting brackets for angled placement
- Security screws for extra protection
- Wire extenders if connecting to existing doorbell wiring
- Drill bit for masonry, if mounting on brick or concrete
- Battery charger or extra battery pack
Choosing The Best Location
Choosing the best location for your Ring Video Doorbell is key. The right spot helps capture clear video and detects visitors well. This section explains how to find the perfect place for mounting your device.
Ideal Height And Angle
Mount the doorbell at about 4 feet high. This height captures faces clearly and covers the doorstep. Tilt the doorbell slightly downward. This angle improves motion detection and video quality.
Wi-fi Signal Considerations
Place the doorbell where the Wi-Fi signal is strong. A weak signal causes delays or poor video. Test your Wi-Fi strength near the door. Use a Wi-Fi extender if needed.
Avoiding Obstructions
Keep the doorbell clear of bushes, walls, or decorations. Obstructions block the camera view and motion sensors. Make sure nothing covers the lens or light sensor.
Preparing The Mounting Surface
Preparing the mounting surface is a key step for installing your Ring Video Doorbell. A clean, well-marked surface helps the device stay secure and work well. Take time to get this part right for a smooth installation.
Cleaning The Area
Start by cleaning the spot where you want to mount the doorbell. Use a cloth and mild soap to remove dirt and dust. A clean surface stops the mounting from loosening over time. Let the area dry fully before moving to the next step.
Marking Drill Points
Hold the mounting bracket against the surface. Use a pencil to mark the holes where you will drill. Check the marks twice to make sure they are straight and level. Accurate marks make drilling easier and keep your doorbell steady.
Credit: www.younghouselove.com
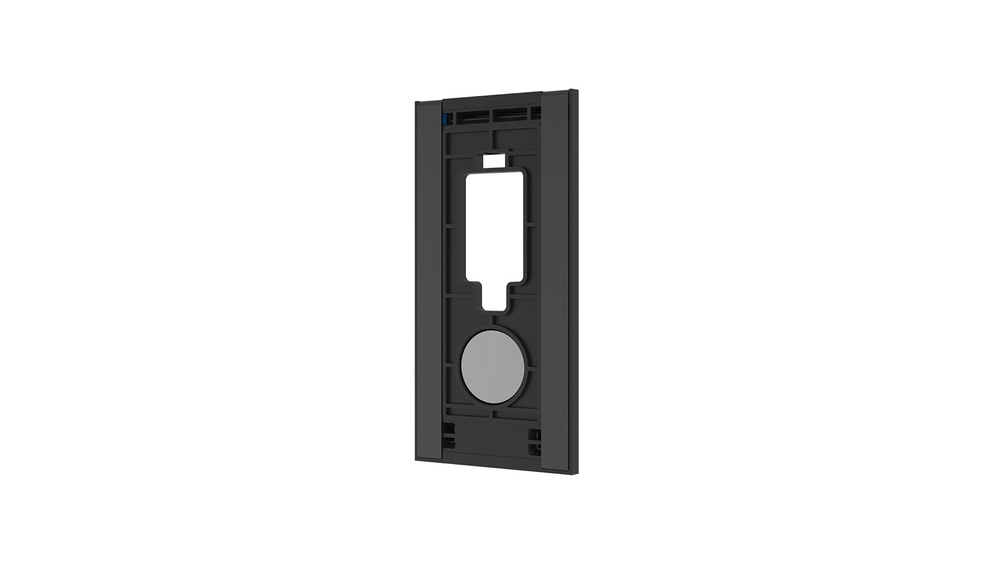
Mounting The Bracket
Mounting the bracket is the first step to install your Ring Video Doorbell securely. This bracket holds the device in place on your wall or door frame. Proper mounting ensures the doorbell stays steady and functions well.
Choose a spot near your front door where the camera can see clearly. Make sure the surface is flat and clean for the best fit. A firm installation helps the doorbell avoid damage from weather or touch.
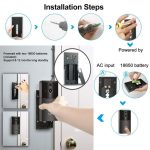
Using Screws And Anchors
Most Ring Video Doorbell kits come with screws and wall anchors. Use a drill to make small holes where you want to mount. Insert the anchors into these holes. Anchors keep screws tight on surfaces like brick or drywall.
Next, align the bracket with the anchors and screw it in. Turn screws until the bracket feels firm but avoid over-tightening. The bracket should not wobble or move after securing.
Alternative Mounting Options
Some surfaces do not work well with screws or anchors. Try using strong double-sided tape for smooth surfaces like metal or glass. Make sure the area is clean and dry before applying tape.
Another option is a mounting plate or corner kit. These help adjust the angle of the doorbell for better view. These accessories come with their own screws or adhesive pads for easy setup.
Attaching The Doorbell
Attaching the Ring Video Doorbell is a simple step that brings your home security to life. This part focuses on placing the device firmly and setting the perfect view angle. Proper attachment ensures clear video and reliable motion detection.
Securing The Device
Start by aligning the doorbell with the mounting bracket. Press the device firmly against the bracket until it clicks into place. Use the included screws to lock the doorbell securely. Tighten the screws with a screwdriver to prevent any movement. Check if the doorbell feels stable. A secure fit stops the device from falling or shifting.
Adjusting The Angle
Adjust the doorbell angle for the best camera view. Slightly tilt the device up or down to cover your doorstep fully. Use the wedge or corner mounts if needed for better angles. Test the video feed on your app to see the coverage. Make small angle changes until you get a clear view. Proper angle adjustment helps catch every visitor and movement.
Connecting To Power
Connecting your Ring Video Doorbell to power is an essential step for its operation. The device needs a steady power source to work without interruptions. You can power the doorbell using its built-in battery or by wiring it to your existing doorbell system. Each method has its own setup process.
Battery Setup
The Ring Video Doorbell comes with a rechargeable battery. Start by charging the battery fully before installation. To charge, remove the battery and connect it to a USB charger. The battery icon will show when it is fully charged.
Once charged, insert the battery into the doorbell. The battery allows your doorbell to work without wiring. This option is good if you do not have existing doorbell wires. You will need to recharge the battery every few months.
Wiring For Existing Doorbell
If your home has an existing doorbell, you can connect the Ring doorbell to its wiring. This setup provides constant power without battery changes. Turn off the power at the breaker before starting.
Remove your old doorbell and disconnect its wires. Attach the wires to the screws on the back of your Ring doorbell. Make sure the wires are secure and not loose. Restore power and check if the Ring doorbell powers on. This method keeps your doorbell charged all the time.
Setting Up The Device
Setting up your Ring Video Doorbell is simple and quick. Follow these steps to get your device ready to protect your home. Start by downloading the app, then connect the doorbell to your Wi-Fi. Finally, test the device to ensure it works perfectly.
Downloading The App
First, download the Ring app on your smartphone or tablet. The app is available on both Android and iOS platforms. Open your app store, search for “Ring,” and tap install. Once installed, open the app and create an account or log in. This app lets you control your doorbell and see visitors anytime.
Connecting To Wi-fi
Next, connect your Ring Doorbell to your home Wi-Fi. Make sure your phone is near the doorbell during setup. In the app, follow the instructions to find your Wi-Fi network. Enter your Wi-Fi password carefully to avoid errors. Connecting to Wi-Fi allows the doorbell to send alerts and stream video.
Testing The Doorbell
After connecting, test your doorbell to confirm it works. Press the button to check if your phone receives alerts. Speak through the app to test the microphone and speaker. Also, check the video feed for clear image quality. Testing ensures your Ring Doorbell is ready to keep you safe.

Credit: www.amazon.com
Troubleshooting Tips
Troubleshooting your Ring Video Doorbell can save time and frustration. Some problems may arise during or after installation. Knowing simple fixes helps you get the doorbell working fast.
Small errors often cause big issues. Checking common problems first can solve most troubles. Also, a strong Wi-Fi signal is key for clear video and fast alerts.
Common Installation Issues
Incorrect mounting is a frequent problem. Make sure the doorbell is level and firmly attached. Loose screws can cause the device to fall or not work properly.
Wiring mistakes affect power supply. Double-check the wires match the instructions. Use a voltage tester to confirm power is on before installing.
App setup errors block notifications. Ensure the doorbell is connected to the correct Wi-Fi network. Restart the app or device if it won’t sync.
Improving Wi-fi Connection
Place the router close to the doorbell for a strong signal. Walls and metal objects weaken Wi-Fi strength. Use a Wi-Fi extender if needed.
Check your internet speed. Slow speed affects video quality and response time. Upgrade your plan if speeds are consistently low.
Reset the doorbell’s Wi-Fi settings to fix connection drops. Follow the Ring app’s instructions to reconnect the device. A stable connection keeps your doorbell reliable.
Frequently Asked Questions
How Do I Mount A Ring Video Doorbell?
To mount your Ring Video Doorbell, choose a suitable location near your door. Use the provided screws and anchors. Mark holes, drill, and fix the mounting bracket. Attach the doorbell to the bracket securely. Finally, test the device to ensure proper installation.
What Tools Are Needed To Install Ring Doorbell?
You need a drill, screwdriver, level, and pencil. These tools help mark, drill holes, and secure the mounting bracket. Most Ring kits include screws and anchors. Having these tools ensures an easy and secure installation process for your doorbell.
Can I Mount Ring Doorbell Without Wiring?
Yes, you can mount Ring Doorbell without wiring using the battery-powered model. Simply charge the battery, mount the doorbell using screws, and connect it via Wi-Fi. This method avoids electrical work and allows flexible placement anywhere near your door.
How High Should Ring Doorbell Be Mounted?
Mount your Ring Doorbell 48 inches above the ground. This height captures faces and packages clearly. It balances visibility and security effectively. Proper height ensures better motion detection and video quality for your front door area.
Conclusion
Mounting your Ring Video Doorbell is simple and quick. Follow the steps carefully for the best results. Use the right tools to avoid damage. Place the doorbell where it sees visitors clearly. Check the connection and settings before finishing. Enjoy better home security with your new device.
Stay safe and watch your doorstep anytime. This small effort brings big peace of mind.