
Are you tired of that old wooden towel rack taking up space or just looking to give your bathroom a fresh new look? Removing it might seem tricky, but with the right steps, you can do it yourself quickly and safely.
In this guide, you’ll discover simple tips that make the whole process smooth and stress-free. By the end, you’ll feel confident tackling the task and ready to upgrade your space exactly how you want. Keep reading to learn how to remove your wooden towel rack without any hassle.
Tools Needed
Removing a wooden towel rack requires the right tools. Using proper tools makes the job easier and faster. Some tools are necessary for every removal task. Others help with tough or stubborn racks. Prepare your workspace with these tools before starting.
Essential Tools List
- Screwdriver (flathead or Phillips)
- Drill with screwdriver bits
- Putty knife or paint scraper
- Hammer
- Measuring tape
- Step ladder (if needed)
The screwdriver or drill removes screws holding the rack. The putty knife helps to loosen the rack from the wall. Use a hammer carefully to tap the putty knife if needed. Measuring tape helps check space after removal. A ladder may be necessary for high racks.
Optional Tools For Stubborn Racks
- Pry bar or crowbar
- Utility knife
- Wood filler and sandpaper
- Safety goggles and gloves
A pry bar helps to lift racks stuck on the wall. Use a utility knife to cut paint or caulk around the rack. Wood filler and sandpaper fix any wall damage after removal. Safety goggles and gloves protect your eyes and hands during work.
:max_bytes(150000):strip_icc()/how-to-remove-towel-bar-5221017-hero-01-c6a21614aaeb4e9ca8071b79bd398ef6.jpg)
Credit: www.thespruce.com
Prepare The Area
Preparing the area is the first step before removing a wooden towel rack. This step keeps your space safe and clean. It helps avoid damage to walls, floors, and nearby items. Taking time to prepare makes the removal process smooth and easy.
Clear Surrounding Space
Remove all items near the towel rack. Take away towels, toiletries, and decorations. This creates room to work freely and safely. Clear space also prevents accidental damage to your belongings. A tidy area helps you focus on the task.
Protect Walls And Floor
Use painter’s tape or masking tape around the towel rack. This protects the wall paint from scratches or marks. Place a drop cloth or old towel on the floor under the rack. It catches dust, debris, and falling screws. Protecting surfaces saves you extra cleaning later.
Inspect The Rack
Before removing a wooden towel rack, inspect it carefully. This step helps you understand how the rack is attached. Knowing this makes removal easier and safer. Take a close look at the rack and the wall area around it.
Check Mounting Type
First, check how the rack is mounted on the wall. Some racks are glued, while others are screwed or nailed. Look for signs of brackets or plates that hold the rack. Spotting the mounting type guides you on the tools needed. It also helps avoid damaging the wall or rack during removal.
Identify Fasteners
Next, find the fasteners securing the rack. These could be screws, nails, or bolts. Sometimes, fasteners hide under caps or decorative covers. Use a flashlight if needed to see clearly. Knowing fastener types helps you choose the right screwdriver or wrench. This step ensures a smooth and safe removal process.

Credit: diy.stackexchange.com
Remove Fasteners
Removing the fasteners is the key step in taking down a wooden towel rack. Fasteners hold the rack firmly to the wall. They may be screws, nails, or anchors. Removing them carefully prevents damage to your wall and rack. Follow these steps to remove all types of fasteners safely.
Unscrew Visible Screws
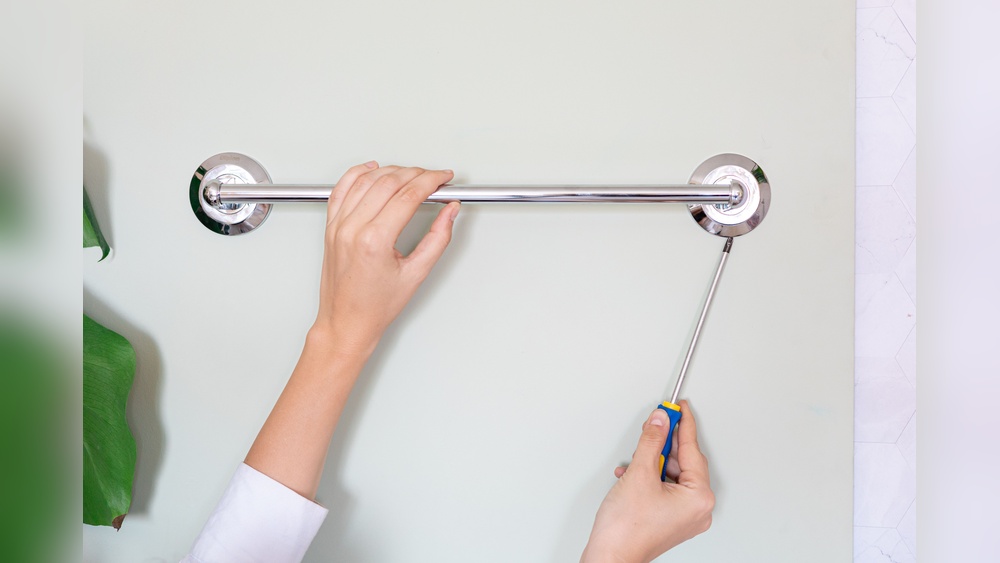
Look for screws that you can see easily on the rack. Use a screwdriver that fits the screw head well. Turn the screwdriver counterclockwise to loosen the screws. Keep steady pressure to avoid stripping the screw heads. Remove each screw completely before moving on. If a screw is stuck, try applying a little oil to loosen it. Save the screws if you plan to reuse the rack.
Pry Off Hidden Nails Or Anchors
Some towel racks use nails or wall anchors hidden under paint or wood. Use a flat pry bar or a putty knife to gently lift these fasteners. Slide the tool under the nail or anchor head. Tap the handle lightly if needed to lift it. Pull the fastener out slowly to avoid wall damage. Use pliers to grip small or bent nails for easy removal. Fill any holes left behind with wall putty for a smooth finish.
Detach The Rack
Detaching the wooden towel rack is the next step after loosening any screws or fasteners. This part needs care to avoid damage to the wall or the rack itself. Work slowly and pay close attention to how the rack is fixed.
Keep your hands steady and be ready to support the rack as you remove it. This will help prevent sudden falls or breaks during the process.
Lift Rack Carefully
Place your hands firmly under the rack. Lift it gently straight away from the wall. Avoid pulling or twisting, as this may break the wood or harm the wall surface. Hold the rack steadily to keep it balanced. Move it slowly to prevent any accidents.
Handle Stubborn Attachments
Some racks stick tightly due to glue or old paint. Use a flat tool, like a putty knife, to loosen these spots. Slide the tool gently between the rack and the wall. Work in small sections to avoid damage. If the rack resists, try applying a little heat with a hairdryer to soften adhesives. Patience is key here. Pulling hard can cause unwanted breaks.
Fix Wall Damage
Removing a wooden towel rack often leaves marks or holes on the wall. Fixing this damage helps the wall look clean and smooth again. It also prepares the surface for new paint or decorations. Taking time to repair the wall keeps your home looking neat and fresh.
Fill Holes And Cracks
Start by cleaning the holes and cracks with a dry cloth. Remove any dust or loose material. Use a putty knife to apply wall filler or spackle into the holes. Press the filler firmly to fill every gap. Let the filler dry completely. This usually takes a few hours. Use extra filler if the hole is deep. Wait for it to dry again before moving on.
Sand And Smooth Surface
Once the filler is dry, use sandpaper to smooth the area. Sand gently until the wall feels even. Remove dust with a soft cloth or brush. Smooth surfaces make painting easier and better. Take your time to ensure no bumps remain. A flawless surface improves the final look of your wall.
Clean Up
Cleaning up after removing a wooden towel rack is important. It helps keep the space neat and safe. This step also prepares the wall for any future use or decoration. Follow simple steps to clear out old parts and clean the area well.
Dispose Of Old Hardware
Gather all screws, nails, and brackets left from the rack. Put them in a small container to avoid losing pieces. Check if any parts can be recycled or need special disposal. Throw away broken or rusty hardware carefully to prevent injury. Keeping the area free of debris reduces the chance of accidents.
Wipe Down Area
Use a damp cloth to clean the wall and surrounding area. Remove dust, dirt, and any leftover glue or paint. Dry the wall with a clean towel to stop moisture damage. This makes the surface smooth and ready for repainting or new installations. A clean wall also improves the overall look of the room.

Credit: www.youtube.com
Frequently Asked Questions
How Do I Safely Remove A Wooden Towel Rack?
First, locate and unscrew the mounting brackets with a screwdriver. Gently pry off the rack to avoid damaging the wall. Use a putty knife for stubborn spots. Clean any leftover adhesive or screws from the surface afterward.
What Tools Are Needed To Remove A Wooden Towel Rack?
You will need a screwdriver, a putty knife, and possibly a drill. A level may help during reinstallation. Gloves protect your hands during removal. These tools ensure safe and efficient removal of the wooden towel rack.
Can I Reuse The Wooden Towel Rack After Removal?
Yes, you can reuse the wooden towel rack if it remains undamaged. Carefully remove it without cracking or breaking. Inspect for loose screws or worn parts. Sand and refinish if necessary before reinstalling.
How To Repair Wall Damage After Removing Towel Rack?
Fill holes with spackle or wall filler. Sand smooth once dry for a clean finish. Repaint or touch up the area to match your wall color. This restores the wall’s appearance after towel rack removal.
Conclusion
Removing a wooden towel rack is simple with the right steps. Start by gathering tools and clearing the area. Unscrew the rack carefully to avoid damage. Check the wall for leftover marks or holes. Fill any holes with putty and sand smooth.
Paint or touch up the wall to finish. Taking your time makes the task easier. Now, your bathroom looks neat and ready for a new rack or decoration. Small projects like this can boost your home’s look quickly.