Are you thinking about upgrading your home security with a video doorbell? Installing one might seem tricky, but it’s easier than you think.
Imagine knowing who’s at your door without even getting up, or checking on your home anytime from your phone. This guide will walk you through every step, making sure you get it right the first time. Keep reading to discover how simple it is to boost your home’s safety and convenience with a video doorbell you can count on.
Credit: www.techradar.com
Choosing The Right Video Doorbell
Choosing the right video doorbell is important for home security and ease of use. The right device fits your needs and works well with your home setup. Different models offer different features and power options. Understanding these can help you make a smart choice.
Features To Consider
Look for clear video quality and wide viewing angles. Night vision helps see visitors in the dark. Two-way audio lets you talk to guests remotely. Motion detection alerts you when someone is near. Cloud storage or local storage options keep your videos safe.
Wired Vs. Wireless Options
Wired doorbells need existing doorbell wiring. They offer constant power and stable connection. Wireless doorbells run on batteries and are easy to install. Battery life varies, so check how often you need to recharge. Choose based on your home’s wiring and your installation skill.
Compatibility With Smart Home Systems
Check if the video doorbell works with your smart home devices. Some connect easily with Alexa, Google Assistant, or Apple HomeKit. Integration allows voice control and automation. Make sure the app is user-friendly and updates regularly. Compatibility ensures smooth and simple operation.
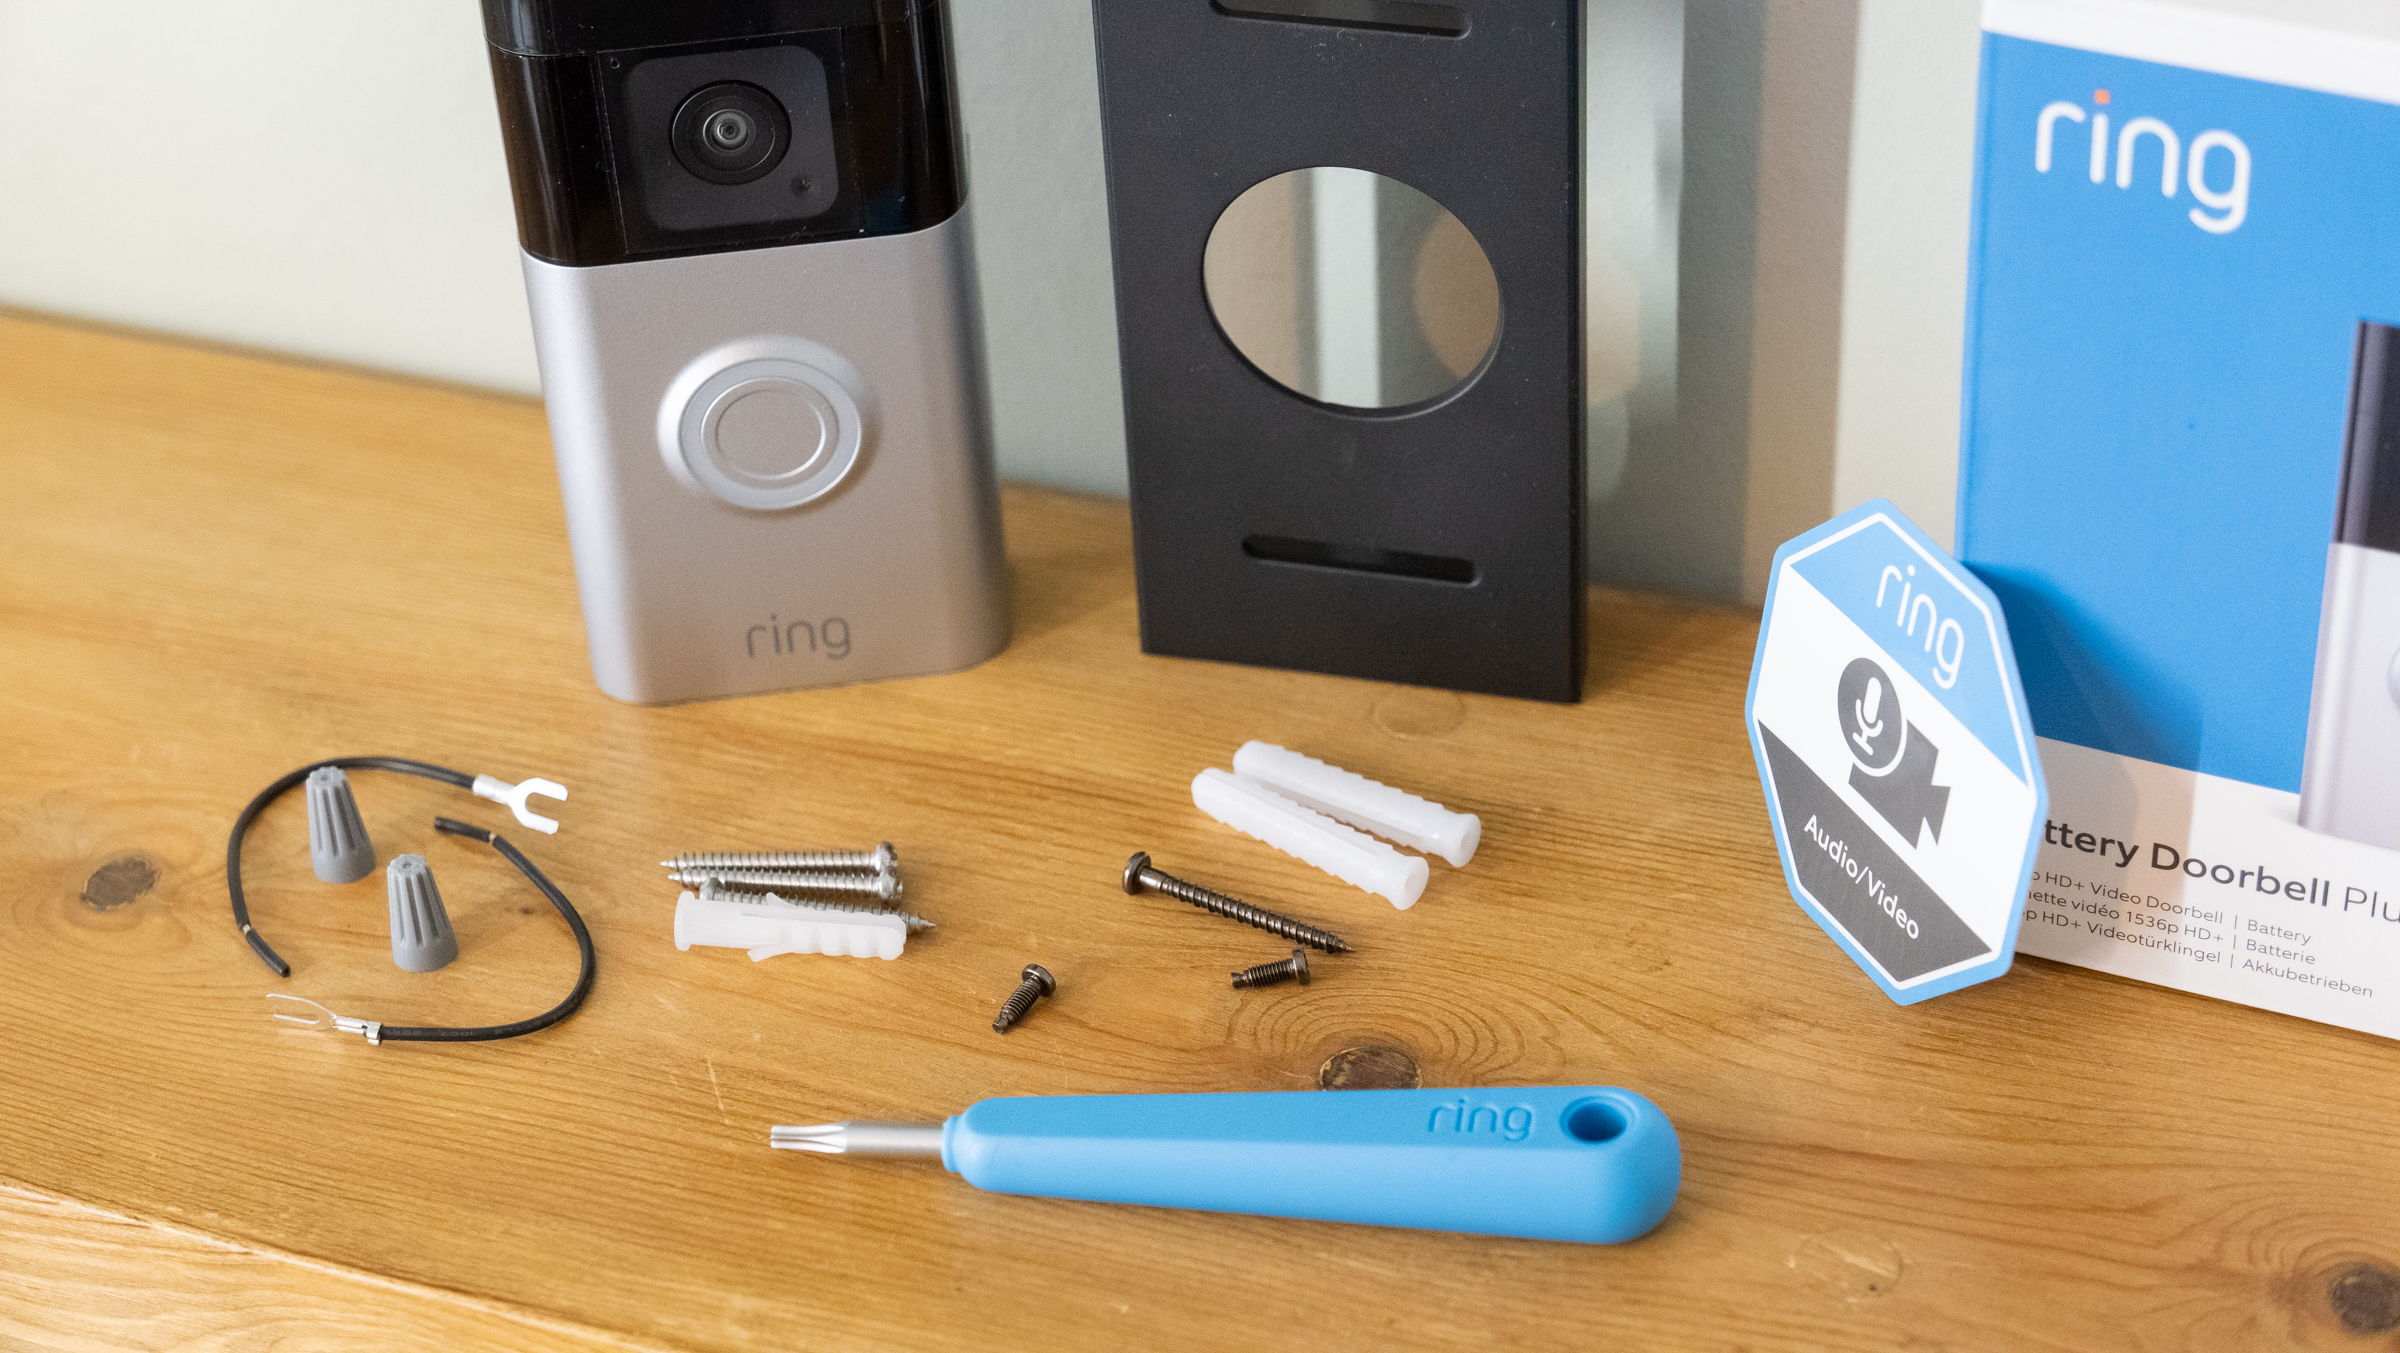
Gathering Necessary Tools
Installing a video doorbell is easier with the right tools. Gathering everything before starting saves time and avoids frustration. This part guides you through the necessary items to prepare.
Having tools ready helps the installation go smoothly. It also ensures safety and accuracy. Below is a list of basic tools and safety gear you need.
Basic Tools Checklist
- Electric drill with drill bits
- Screwdrivers (Phillips and flathead)
- Wire strippers
- Voltage tester
- Measuring tape
- Pencil for marking spots
- Level to keep the doorbell straight
- Mounting screws and anchors
Safety Equipment
- Safety goggles to protect your eyes
- Work gloves for hand protection
- Insulated tools for electrical safety
- Step ladder for reaching high spots
- Flashlight for better visibility in dark areas
Preparing Your Doorway
Preparing your doorway is the first step to install a video doorbell correctly. This step makes sure your device works well and stays safe. Proper preparation can save time and prevent problems during installation.
Before drilling holes or mounting the doorbell, check the area carefully. This helps find the best spot and ensures the doorbell connects to power and Wi-Fi smoothly.
Selecting The Installation Spot
Choose a spot near your front door that captures a clear view. The doorbell should see visitors’ faces clearly. Avoid places with bright sunlight or heavy shadows. These can affect video quality.
Make sure the spot is easy to reach for installation and future maintenance. Avoid areas blocked by plants or decorations. A spot near your existing doorbell wiring is best if your device needs power.
Checking Power Supply
Check if your doorbell gets power from batteries or wires. Wired doorbells need a nearby power source. Use a voltage tester to confirm power availability. Batteries should be fresh and fully charged.
Ensure the power source matches the video doorbell’s requirements. Too much or too little power can damage the device. If unsure, call an electrician for help.
Ensuring Wi-fi Connectivity
The video doorbell needs a strong Wi-Fi signal to send video and alerts. Test the Wi-Fi strength at your chosen spot. Use a smartphone or a Wi-Fi tester app.
Weak signals cause delays or lost connections. Consider moving your router closer or adding a Wi-Fi extender. Reliable Wi-Fi ensures smooth operation and quick notifications.
Step-by-step Installation Guide
Installing a video doorbell is easier than many think. This step-by-step guide helps you replace your old doorbell with a new smart one. Follow these clear steps for a smooth setup. No special tools or skills needed. Just simple instructions and careful work.
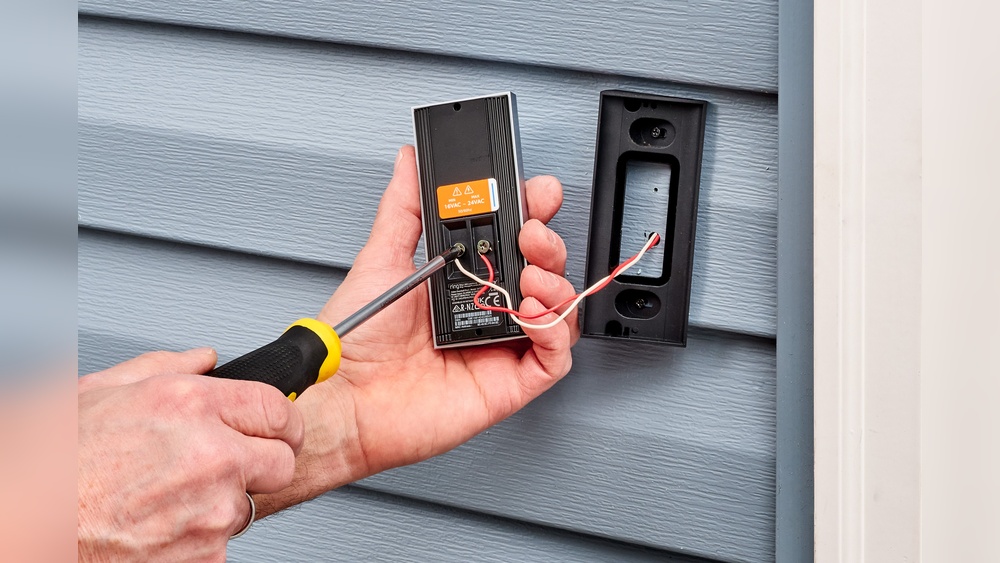
Removing Old Doorbell
Start by turning off the power to the doorbell circuit. Use a screwdriver to remove the old doorbell from the wall. Carefully disconnect the wires from the old device. Keep track of which wire goes where. Remove any screws or mounting brackets left behind.
Mounting The New Doorbell
Choose the right spot near your door for the new doorbell. Use the mounting bracket that comes with your device. Hold it in place and mark screw holes with a pencil. Drill holes if needed. Attach the bracket firmly to the wall using screws.
Connecting Wires Or Setting Up Battery
Connect the doorbell wires to the new device’s terminals. Match the wires based on the old doorbell setup. Tighten screws to secure the wires. If your doorbell uses batteries, insert them now. Check the device manual for proper battery placement.
Securing The Device
Attach the video doorbell unit to the mounting bracket. Press or screw it in place until it is secure. Make sure it fits tightly to avoid movement. Restore power to the doorbell circuit. Test the video doorbell to confirm it works correctly.
Setting Up The Software
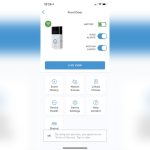
Setting up the software for your video doorbell is simple. This step connects your device to your smartphone. It lets you see who is at your door anytime. Follow these easy instructions to get started quickly.
Downloading The App
First, download the official app for your video doorbell. Check the app store on your phone. Look for the brand name of your device. The app is free and easy to install. Open the app after the download finishes.
Pairing The Device
Turn on your video doorbell. Open the app and select “Add Device.” Follow the instructions on the screen. The app will search for your doorbell nearby. Confirm the connection to pair your phone with the device. This step may take a few minutes.
Configuring Alerts And Settings
Set up alerts to know when someone is at your door. Choose the types of notifications you want. Adjust the motion detection sensitivity if available. Customize settings like video quality and sound alerts. Save your preferences to start using your doorbell fully.

Credit: www.youtube.com
Testing And Troubleshooting
Testing and troubleshooting your video doorbell is important after installation. It ensures the device works well and keeps your home safe. This step helps catch any issues early and fix them quickly. Follow simple checks to confirm video and audio quality. Adjust settings and angles for the best view. Learn common problems and how to solve them easily.
Verifying Video And Audio Quality
Start by checking the video feed on your phone or device. Make sure the picture is clear and bright. Test the audio by speaking near the doorbell and listening through the app. Confirm both microphone and speaker work well. Good video and sound help you see and hear visitors clearly. Try testing at different times of day to check lighting.
Adjusting Angle And Settings
Adjust the doorbell’s camera angle to cover your doorstep fully. Tilt it to avoid glare from the sun or lights. Use the app settings to change brightness, contrast, and volume. Set motion detection zones carefully to avoid false alerts. Small changes improve your view and notifications. Test after each adjustment to get the best setup.
Common Issues And Fixes
One common issue is weak Wi-Fi causing poor video quality. Move your router closer or use a Wi-Fi extender. Another problem is delayed notifications; check your app settings and permissions. If the doorbell does not ring, check wiring or battery level. Restart the device to clear minor glitches. Most problems have easy fixes without expert help.
Maintaining Your Video Doorbell
Maintaining your video doorbell ensures it works well for a long time. Simple care steps keep the camera clear and the system reliable. Regular upkeep helps avoid common problems and keeps your home safe.
Regular Cleaning
Clean the lens with a soft, dry cloth. Dirt or dust can blur the video. Avoid using water or harsh chemicals on the device. Wipe the doorbell body gently to remove grime. Clean it at least once a month to keep the image clear.
Battery Replacement Tips
Check the battery level often through the app. Replace batteries before they run out completely. Use the recommended battery type for your model. Turn off the doorbell before replacing batteries. Insert new batteries carefully and close the cover tightly. This keeps your device powered and ready.
Firmware Updates
Keep your doorbell’s firmware up to date. Updates fix bugs and add features. Connect your doorbell to Wi-Fi for smooth updates. Enable automatic updates in the app for convenience. Check for updates regularly to maintain security and performance.

Credit: www.eufy.com
Frequently Asked Questions
What Tools Are Needed To Install A Video Doorbell?
You need a drill, screwdriver, level, wire stripper, and voltage tester. Some models include mounting kits and screws. Always turn off power before installation to ensure safety.
How Do I Connect A Video Doorbell To Wi-fi?
After mounting, use the doorbell’s app to connect it to your Wi-Fi. Follow on-screen instructions to enter your network credentials securely for smooth operation.
Can I Install A Video Doorbell Myself?
Yes, most video doorbells are designed for DIY installation with clear instructions. Basic electrical knowledge helps, but professional help is recommended for complex wiring.
How Long Does Video Doorbell Installation Take?
Installation typically takes 20 to 45 minutes depending on your experience. Setup and app configuration may add extra time but are usually quick.
Conclusion
Installing a video doorbell is easier than many think. Follow the steps carefully for the best results. Test the device to ensure it works properly. Keep your home safer with clear video and alerts. A well-installed doorbell adds convenience and peace of mind.
Take your time, and don’t rush the process. Soon, you will enjoy the benefits of your new video doorbell. Simple tools and clear instructions make the job smooth. Ready to enhance your home security? Start your installation today.