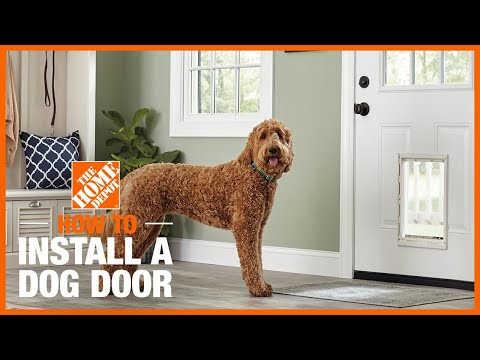
If you have a pet, you know how tricky it can be to keep your furry friend safe while still having easy access to different rooms. Installing a pet panel door can solve this problem perfectly.
Imagine giving your pet the freedom to move around without you constantly opening doors, while still keeping your space secure. In this guide, you’ll learn step-by-step how to install a pet panel door quickly and easily, even if you’ve never done a project like this before.
Ready to make life easier for both you and your pet? Let’s get started!
Credit: www.homedepot.com
Choosing The Right Pet Panel Door
Choosing the right pet panel door is important for your pet’s safety and comfort. The door should fit well and be easy for your pet to use. It also needs to match your home’s style and materials. This section will help you pick the best pet panel door for your space.
Types Of Pet Panel Doors
Pet panel doors come in several types. Swing doors allow pets to push through both ways. Sliding doors save space and slide open smoothly. Hinged doors work like regular doors but smaller for pets. Each type suits different needs and spaces.
Measuring Your Doorway
Measure the height and width of your doorway carefully. Make sure the pet door fits your pet’s size. Leave extra space for easy movement. Accurate measurements avoid gaps or tight fits. Use a tape measure and note down the numbers.
Material Options
Pet panel doors come in wood, plastic, and metal. Wood looks natural and matches many homes. Plastic is lightweight and easy to clean. Metal is strong and lasts long. Choose a material that fits your style and budget.
Tools And Materials Needed
Installing a pet panel door requires the right tools and materials. Having everything ready makes the job easier and faster. This section lists the essential tools and extra supplies you may need.
Essential Tools
- Measuring tape for accurate dimensions
- Pencil to mark cut lines
- Power drill to make holes and screw parts
- Screwdriver for tightening screws
- Level to ensure the door is straight
- Jigsaw or handsaw to cut the door panel
- Hammer for small adjustments
Additional Supplies
- Screws suitable for wood or metal
- Sandpaper to smooth edges after cutting
- Wood filler to fix small gaps or holes
- Paint or sealant to protect the door
- Safety glasses to protect your eyes
- Work gloves for hand safety
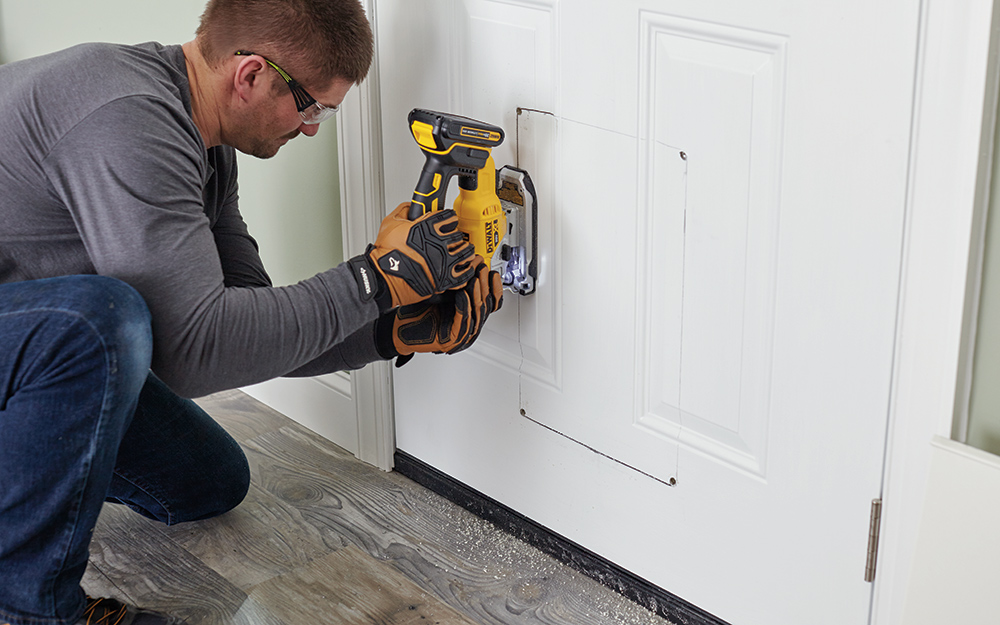
Preparing The Doorway
Preparing the doorway is the first step to install a pet panel door. This process helps create a smooth fit and proper function. Taking time here prevents issues later. Follow simple steps to get ready.
Clearing The Space
Remove all objects near the doorway. This includes rugs, furniture, and decorations. A clear area gives room to work safely and easily. Clean the floor and door frame to remove dust and dirt. This helps the door sit well and look neat.
Checking Door Frame Alignment
Use a level tool to check if the door frame is straight. A crooked frame causes the door to stick or not close. Measure the width and height of the frame at several points. Make sure the frame is the right size for the pet panel door. Fix small gaps or uneven parts with wood filler or sandpaper. A well-aligned frame ensures smooth door movement.
Credit: www.homedepot.com
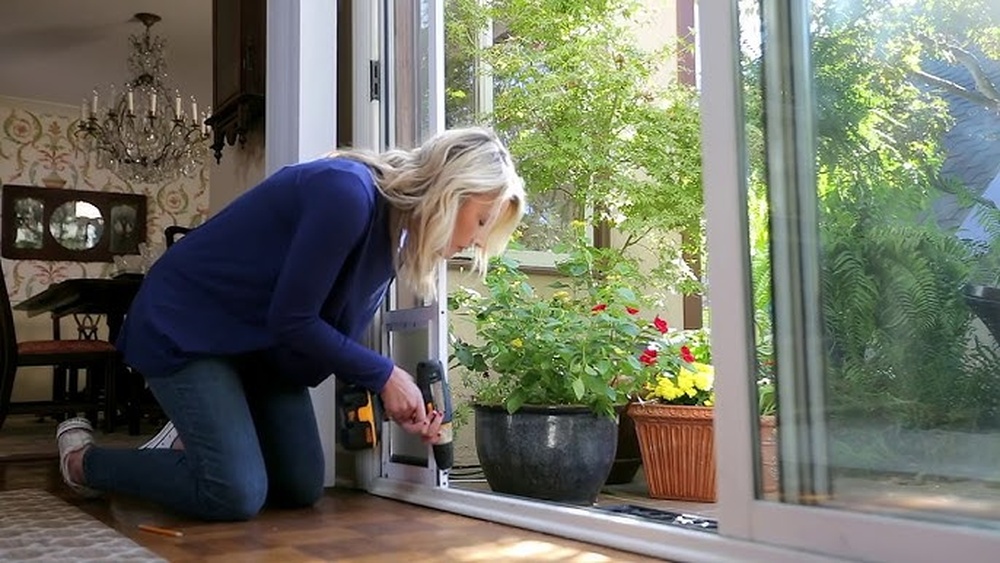
Installing The Pet Panel Door
Installing a pet panel door is a simple way to give your pet freedom. It lets your pet move between rooms easily. This section shows clear steps for a smooth installation. Follow each step carefully for the best results.
Positioning The Door
Place the pet panel door in the desired doorway. Check the height and width to match your pet’s size. Make sure the panel swings freely without hitting the floor. Mark the spots for hinge placement on the door frame.
Securing Hinges And Screws
Attach the hinges to the pet panel door first. Use screws that fit well and hold firmly. Align the door with the marks on the frame. Screw the hinges into the door frame carefully. Test the door’s movement before tightening all screws fully.
Adjusting For A Perfect Fit
Open and close the door several times to check the fit. Adjust the hinges if the door sticks or is loose. Ensure the door swings smoothly without gaps. Tighten all screws once the fit is right. Your pet panel door is now ready for use.
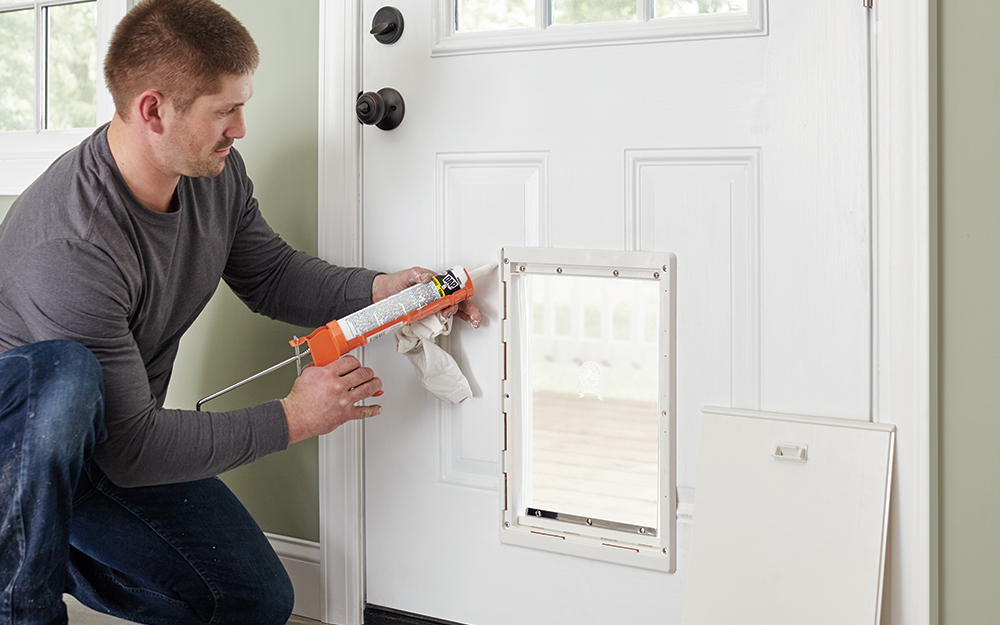
Testing And Final Adjustments
Testing and making final adjustments are key steps after installing a pet panel door. These steps ensure the door works well and keeps your pet safe. Take your time to check every part and fix small issues.
Ensuring Smooth Operation
Open and close the pet panel door several times. Watch for any sticking or resistance. The door should move freely without force. Check the hinges and latch for smooth action. Listen for unusual noises that may mean tight spots. Make sure the pet panel aligns well with the frame.
Making Necessary Corrections
If the door sticks or does not close properly, adjust the hinges. Tighten or loosen screws to improve fit. Use a screwdriver to shift the door slightly. Check the latch to ensure it locks securely. Sand any rough edges that block movement. Repeat testing until the door opens and closes easily every time.
Credit: www.homedepot.com
Maintaining Your Pet Panel Door
Maintaining your pet panel door keeps it working well for a long time. Clean and check the door often to avoid damage. A well-kept door looks good and stays safe for pets. Follow easy steps to care for your pet panel door. This helps prevent problems and saves money on repairs.
Cleaning Tips
Use a soft cloth to wipe the door regularly. Dust and dirt can build up fast. Clean the panels with mild soap and warm water. Avoid harsh chemicals that can damage the finish. Dry the door well after cleaning to stop water marks. Check the pet door flap for dirt and clean it gently. Clean both sides of the door to keep it fresh.
Routine Checks
Look at the hinges and screws once a month. Tighten any loose screws to keep the door stable. Check the pet flap for cracks or tears. Replace worn parts to keep the door safe for pets. Test the door’s movement to ensure it opens and closes smoothly. Check weather stripping to stop drafts and save energy. Regular checks stop small problems from becoming big issues.
Frequently Asked Questions
What Tools Are Needed To Install A Pet Panel Door?
You need a drill, screwdriver, measuring tape, level, saw, and screws. These tools ensure precise fitting and secure installation.
How Do I Measure For A Pet Panel Door?
Measure the door width and height accurately. Check your pet’s size to ensure the panel fits comfortably.
Can I Install A Pet Panel Door Myself?
Yes, with basic DIY skills and the right tools, you can install it yourself. Follow instructions carefully for best results.
How Do I Secure The Pet Panel Door Properly?
Use screws and anchors to secure the panel firmly. Ensure it’s level and fits snugly to prevent gaps.
Conclusion
Installing a pet panel door is simple with clear steps. Measure carefully and choose the right door size. Use basic tools and follow instructions closely. Take your time to fit the door securely. This helps keep your pet safe and happy.
Enjoy the convenience of easy pet access every day. A well-installed pet door adds comfort to your home. Try it yourself and see how easy it can be. Small effort brings big benefits for you and your pet.