Imagine starting your day with a mirror that not only shows your reflection but also displays the weather, news, and your daily schedule—all in one place. You can build this smart mirror yourself using a Raspberry Pi, even if you’re not a tech expert.
This guide will walk you through each step, making it simple and fun. By the end, you’ll have a cool, personalized gadget that makes your morning routine smarter and more efficient. Ready to transform your mirror into a powerful smart assistant?
Let’s dive in!
Choosing The Right Raspberry Pi Model
Choosing the right Raspberry Pi model is key to building a smart mirror that works well. The model you pick affects speed, display quality, and power use. Each version of the Raspberry Pi has different features. Understanding these helps you make a smart choice. Below is a simple guide to help you select the best Raspberry Pi for your smart mirror.
Comparing Pi Versions
The Raspberry Pi comes in many versions. The Pi 3 and Pi 4 are popular for smart mirrors. Pi 3 is cheaper but slower. Pi 4 offers faster processing and better graphics. The Pi Zero is very small and cheap but less powerful. For a smooth smart mirror, speed and memory matter most. Think about what apps you want to run on your mirror. More apps need a faster Pi.
Recommended Specs For Smart Mirror
Choose a Raspberry Pi with at least 2 GB of RAM. This amount helps the mirror run apps smoothly. A quad-core processor is best for multitasking. The Pi 4 has this and supports full HD display. Make sure the model has good Wi-Fi and Bluetooth. These help connect the mirror to your phone and internet. Power supply should be stable to avoid crashes. Pick a model with enough USB ports for sensors or cameras.
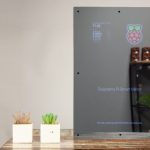
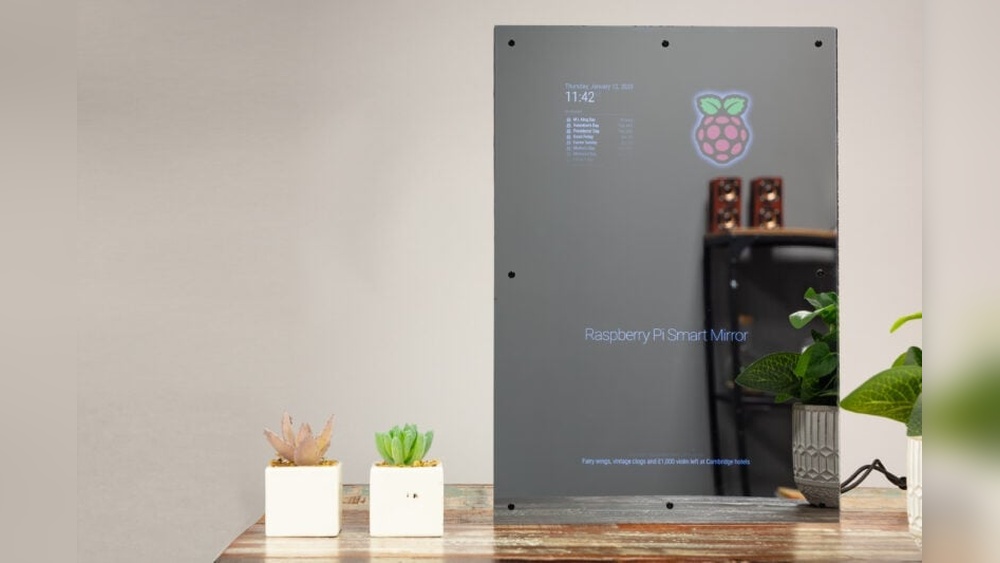
Credit: www.hackster.io
Gathering Materials And Tools
Building a Raspberry Pi smart mirror starts with gathering the right materials and tools. Having everything ready saves time and makes the project smoother. Prepare a clean workspace for assembling the parts.
Essential Components
The main parts include a Raspberry Pi, a two-way mirror, and a monitor or screen. The Raspberry Pi acts as the brain of the smart mirror. A two-way mirror allows the display to show through while reflecting like a regular mirror.
You will also need power supplies for the Pi and monitor. A microSD card stores the software and settings. Cables like HDMI connect the Raspberry Pi to the monitor. A frame or case holds all parts securely.
Optional Accessories
Extras can improve the smart mirror’s look and function. A motion sensor can turn the display on and off. Speakers add voice or sound notifications. A camera allows video calls or facial recognition.
Adding a touch screen makes the mirror interactive. LED lights around the frame provide better lighting. Consider these accessories to enhance your smart mirror experience.
Designing The Mirror Frame
Designing the mirror frame is a key step in building your Raspberry Pi smart mirror. The frame holds the mirror and electronics, shaping the final look. A well-designed frame makes the smart mirror both functional and stylish.
Selecting Mirror Type
Choose a mirror that shows the display clearly. Two-way acrylic mirrors are popular. They let light from the screen pass through while reflecting your image. Glass two-way mirrors work well but are heavier and fragile. Acrylic mirrors are lighter and safer for DIY projects. Pick the size based on your space and Raspberry Pi screen.
Building Or Buying A Frame
Frames come in many styles and materials. You can build one from wood, metal, or plastic. Building lets you customize size and color. Wood is easy to cut and paint. Metal frames offer a modern look but need special tools. Buying a ready-made frame saves time. Make sure it fits the mirror and screen. Check that it has room for cables and the Raspberry Pi board.

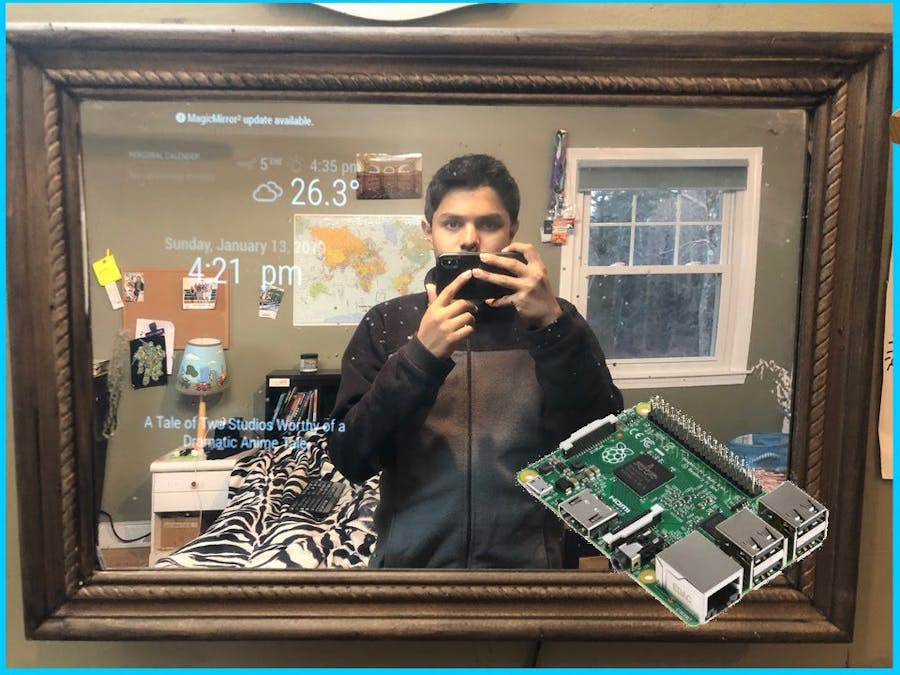
Credit: www.instructables.com
Setting Up The Raspberry Pi
Setting up the Raspberry Pi is the first key step in making your smart mirror work. This small computer will be the brain of the mirror. It runs the software that shows weather, news, time, and more on the mirror’s surface. A proper setup ensures smooth performance.
Follow clear steps to prepare the Raspberry Pi. These steps include installing the operating system and configuring the network and other settings. Both are essential for your smart mirror to connect to the internet and display real-time information.
Installing The Operating System
Start by downloading the Raspberry Pi OS. Use the official Raspberry Pi website for the latest version. Next, flash the OS image onto a microSD card. Tools like Balena Etcher make this process easy and quick.
Insert the microSD card into the Raspberry Pi. Power it on and wait for the OS to boot. The initial setup wizard will guide you through language, time zone, and password settings. Complete these steps carefully to avoid issues later.
Configuring Network And Settings
Connect your Raspberry Pi to the internet via Wi-Fi or Ethernet. Access the network settings from the desktop or terminal. Enter your Wi-Fi name and password to connect.
Adjust system settings for best performance. Set the screen resolution to fit your mirror display. Enable SSH for remote control if needed. Update the OS and installed packages to keep the system secure and efficient.
Installing Smart Mirror Software
Installing the smart mirror software is a key step in building your Raspberry Pi smart mirror. This software controls what shows on your mirror screen. It displays weather, news, calendar, and other useful info. Choosing the right software makes your smart mirror more functional and fun.
Some software platforms offer easy setup and many features. Others allow more customization but need more work. The installation process usually involves downloading files, installing dependencies, and running the program on your Raspberry Pi.
Popular Smart Mirror Platforms
MagicMirror² is the most popular smart mirror platform. It is open-source and has many modules for weather, news, and calendar. The community support is strong and active.
HomeMirror is a simpler alternative. It focuses on basic information and is easy to set up for beginners. It works well on Raspberry Pi with minimal resources.
MirrorMirror offers a clean design with customizable widgets. It supports voice control and smart home integration. It suits users wanting more control over the interface.
Step-by-step Installation
First, update your Raspberry Pi system. Use the terminal command sudo apt-get update && sudo apt-get upgrade. This ensures all packages are current.
Next, install Node.js. MagicMirror² requires it to run. Use the command curl -sL https://deb.nodesource.com/setup_14.x | sudo -E bash - and then sudo apt-get install -y nodejs.
After that, download the MagicMirror² software. Run git clone https://github.com/MichMich/MagicMirror in the terminal. Change to the MagicMirror folder using cd MagicMirror.
Now, install the dependencies with npm install. This step might take a few minutes depending on your internet speed.
Finally, start the smart mirror by running npm start. The interface should appear on your Raspberry Pi screen.
Customizing The Display Features
Customizing the display features of your Raspberry Pi smart mirror lets you tailor it to your needs. This step makes the mirror more useful and fun to use. You can add information you want to see daily and change how it looks.
Focus on adding widgets and modules that show weather, news, or calendar events. These small tools bring important updates to your mirror’s screen. Adjusting the appearance helps match the mirror to your room style. Colors, fonts, and layout can all change.
Adding Widgets And Modules
Widgets and modules display useful data on your smart mirror. Choose from many options like weather forecasts, clocks, or news feeds. Install only the widgets that you find helpful. This keeps the screen clean and easy to read.
Use the MagicMirror² platform for many ready-made modules. You can also create custom ones if you know some coding. Arrange widgets in a way that fits your daily routine. For example, place the calendar at eye level for quick checks.
Personalizing Appearance
Change colors and fonts to make the mirror feel personal. Pick soft colors for a calm look or bright ones for energy. Select fonts that are easy to read from a distance. Avoid fancy fonts that may confuse the eyes.
Adjust the layout to highlight the most important information. Use a simple design to avoid clutter. Experiment with backgrounds or transparency to blend with your room. Personal touches make the smart mirror truly yours.
Integrating Voice Control
Adding voice control to your Raspberry Pi smart mirror makes it more user-friendly. Voice commands let you interact without touching the screen. This feature improves convenience and modernizes your mirror.
Setting up voice control involves choosing a voice assistant and configuring the microphone. Both steps are important for smooth performance. Let’s explore your options and setup process.
Voice Assistant Options
Popular voice assistants include Google Assistant, Amazon Alexa, and Mycroft. Google Assistant offers good accuracy and many features. Alexa works well with smart home devices. Mycroft is open source and easy to customize.
Choose an assistant that fits your needs and technical skills. Each has guides for Raspberry Pi integration. Check compatibility with your mirror software before starting.
Setting Up Microphone And Commands
Use a USB or Bluetooth microphone for clear voice input. Test your microphone with simple commands first. Place it near the mirror for better sound pickup.
Configure wake words to activate the assistant hands-free. Program common commands like weather updates or news briefings. Keep commands short and clear for best results.
Regularly update your assistant software to improve recognition. Voice control adds a smart touch to your mirror. It makes daily use easier and more interactive.
Final Assembly And Testing
Final assembly and testing bring your smart mirror project to life. This step ensures everything fits well and works correctly. Careful assembly protects your components and improves mirror performance. Testing confirms that the software and hardware run smoothly.
Mounting The Raspberry Pi
Start by fixing the Raspberry Pi behind the mirror frame. Use screws or double-sided tape for a secure hold. Make sure the ports face outward for easy access. Avoid blocking the camera or sensors. Keep cables neat to prevent damage or loose connections.
Troubleshooting Common Issues
Check power supply if the mirror does not turn on. Ensure all cables are plugged correctly and tightly. If the display is blank, verify the HDMI connection. Restart the Raspberry Pi to fix minor glitches. Look at the software logs for error messages. Adjust screen brightness if the text is hard to read. Test sensors separately to confirm they work well.
Expanding Smart Mirror Capabilities
Expanding your Raspberry Pi smart mirror’s capabilities can make it more useful. It turns a simple mirror into a powerful tool for daily life. Adding extra features helps the mirror respond to your needs. It also improves convenience and interaction.
Adding Sensors
Sensors help your smart mirror gather information from the environment. You can add temperature, humidity, and motion sensors. These sensors allow the mirror to show real-time data. For example, it can display room temperature or notify you of movement.
Light sensors adjust the screen brightness automatically. This makes the mirror easier to read in different lighting conditions. Proximity sensors can wake the mirror when you stand close. This saves power and improves user experience.
Connecting Smart Home Devices
Linking your smart mirror to other smart home gadgets increases its functionality. You can control lights, thermostats, and security cameras from the mirror. This centralizes your home controls in one place.
Use protocols like MQTT or Zigbee for smooth device communication. Voice assistants can also be integrated to control devices by speaking. This hands-free control adds comfort and efficiency to your daily routine.

Credit: www.sunfounder.com
Frequently Asked Questions
What Parts Are Needed For A Raspberry Pi Smart Mirror?
You need a Raspberry Pi, a two-way glass or acrylic mirror, a monitor, and a frame. Additional components include power cables, HDMI cables, and mounting hardware. These parts create the core structure for your smart mirror setup.
How Do I Install Software On The Raspberry Pi Mirror?
Install Raspbian OS on the Raspberry Pi first. Then, download and configure MagicMirror² software. This open-source platform enables customizable smart mirror features like weather, news, and calendar updates.
Can I Customize The Display On My Smart Mirror?
Yes, MagicMirror² allows you to add and customize modules. You can change layouts, themes, and add widgets for weather, news, time, and more. Customization enhances usability and personalizes your smart mirror experience.
How Do I Power My Raspberry Pi Smart Mirror?
Use a standard 5V 3A power supply for the Raspberry Pi. The monitor may require a separate power source depending on its specifications. Proper power management ensures stable and continuous operation of the smart mirror.
Conclusion
Building a Raspberry Pi smart mirror is fun and practical. You get a device that shows time, weather, and news at a glance. The steps are simple and fit any skill level. This project saves money and adds tech to your home.
Try it yourself and see how useful it can be. Small changes make your daily routine better. Why not start today?