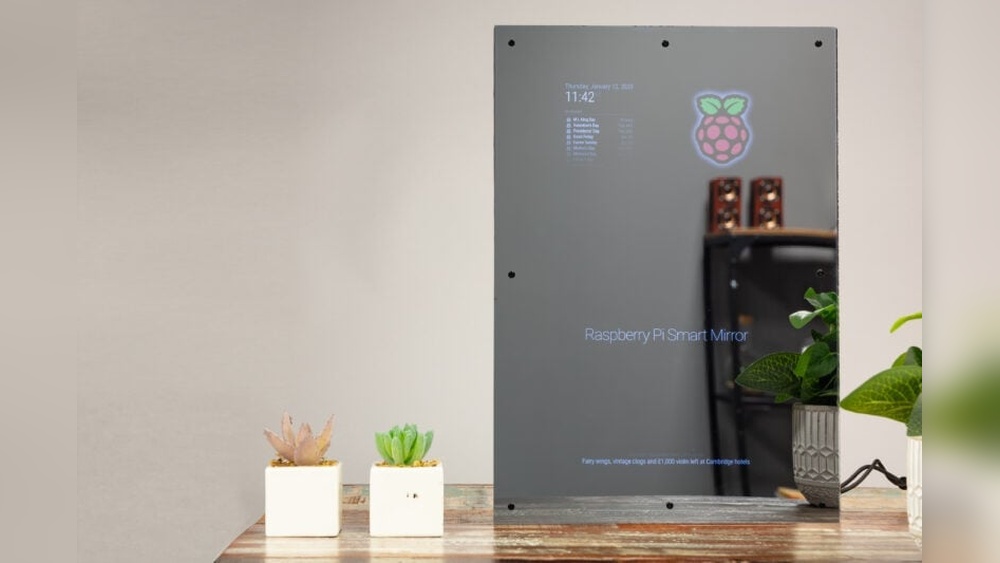
Imagine starting your day with a mirror that shows more than just your reflection. What if your mirror could display the weather, news, calendar events, and even your to-do list—all while you get ready?
You can make this happen yourself using a Raspberry Pi. It’s easier than you think, and the result is a smart mirror that fits perfectly into your daily routine. Keep reading, and you’ll discover step-by-step how to build your own smart mirror that makes your mornings smoother and your home smarter.
Materials Needed
Building a smart mirror with a Raspberry Pi needs the right materials. Choosing good parts makes your project work well. This list helps you get everything for a smart mirror.
Raspberry Pi Model Options
The Raspberry Pi is the brain of your smart mirror. The Raspberry Pi 4 is popular for this project. It has good speed and enough ports. The Raspberry Pi 3 can also work but is slower. Pick the model that fits your budget and needs.
Display Choices
The display shows the mirror’s information. Use an LCD or LED screen with HDMI input. A 15 to 24-inch screen works well for most mirrors. Choose a screen with good brightness and resolution. Avoid screens that use too much power.
Two-way Mirror Selection
A two-way mirror lets you see the display behind it. Acrylic two-way mirrors are light and easy to cut. Glass two-way mirrors are clearer but heavier. Size the mirror to fit your screen exactly. The mirror must be clean and scratch-free.
Additional Components
You need a power supply for the Raspberry Pi and screen. A microSD card stores the software and data. A frame holds the mirror and screen together. Optional parts include a motion sensor or a microphone. Use cables to connect all parts securely.
Preparing The Raspberry Pi
Preparing the Raspberry Pi is the first step in building your smart mirror. This stage ensures the device runs smoothly. It involves installing the operating system, connecting to the network, and adding necessary software. Each part is crucial for the mirror to work well.
Installing The Operating System
Begin by downloading the Raspberry Pi OS from the official website. Use a tool like Raspberry Pi Imager to write the OS to a microSD card. Insert the card into your Raspberry Pi. Power on the device and follow the on-screen instructions to complete the setup. This process makes the Pi ready for use.
Setting Up Network Connectivity
Connect your Raspberry Pi to the internet for updates and software downloads. Use Wi-Fi or an Ethernet cable. Open the network settings on the Pi and select your Wi-Fi network. Enter the password if needed. Confirm the connection to ensure the Pi is online. This step is vital for smooth operation.
Installing Required Software
Next, install the software needed for your smart mirror. Open the terminal on your Raspberry Pi. Use commands like sudo apt update and sudo apt install to add required packages. Common software includes a web browser and smart mirror frameworks. Proper installation guarantees your mirror displays useful information.
Choosing The Display
Choosing the right display is an important step in building your smart mirror. The display shows all the useful information you want to see. Picking the best screen makes your smart mirror clear and easy to use. Consider size, resolution, touch features, power needs, and connections.
Screen Size And Resolution
The screen size affects how much information appears at once. A bigger screen shows more data but may be harder to fit in a frame. A smaller screen saves space but shows less detail.
Resolution matters for clear images and text. Choose at least 720p for sharp display. Higher resolution like 1080p looks better but uses more power.
Touchscreen Vs Non-touchscreen
A touchscreen lets you tap and swipe to control the mirror. This adds extra convenience but costs more. It may also need extra setup.
Non-touch screens are simpler and cheaper. You can control the mirror with a keyboard or phone. This is easier for beginners and saves money.
Power And Connectivity
Check how much power the display uses. Low power screens keep your smart mirror energy efficient. Some screens need a separate power source.
Connectivity options include HDMI, USB, or GPIO pins. Make sure your Raspberry Pi supports the screen’s input. Good connections make setup easier and reduce problems.
Constructing The Mirror Frame
Constructing the mirror frame is a key step in building a smart mirror. It holds all parts together and shapes the final look. The frame must be strong, neat, and fit the mirror perfectly. Follow simple steps to build a frame that works well and looks good on your wall.
Selecting Frame Materials
Choose materials that are easy to work with and sturdy. Wood is a popular choice because it is strong and looks natural. You can also use plastic or metal if you want a modern style. Make sure the materials are light enough to hang on the wall safely.
Measure the size of your two-way mirror before buying materials. Add extra length for corners and joints. Smooth surfaces help the frame look clean and professional.
Assembling The Frame
Cut the materials to the right size using a saw or cutter. Sand the edges to avoid splinters and rough spots. Join the pieces with nails, screws, or glue. Use clamps to hold parts tight while drying.
Check the frame’s shape by placing it flat on a table. Adjust corners if they are not square. Painting or staining the frame adds color and protects the material.
Mounting The Two-way Mirror
Place the two-way mirror inside the frame carefully. The reflective side should face out. Use small brackets or clips to keep the mirror steady inside the frame.
Do not press hard on the mirror to avoid cracks. Seal gaps with silicone or weatherstrip tape to hold the mirror firmly. This prevents dust and moisture from entering behind the glass.
Configuring The Smart Mirror Software
Configuring the software is a key step to bring your smart mirror to life. This process sets up the interface and features you will see on the mirror’s screen. It also allows you to add personal touches like weather updates or news feeds. Proper configuration ensures the mirror runs smoothly and meets your needs.
Below are the main stages to configure your smart mirror software using Raspberry Pi.
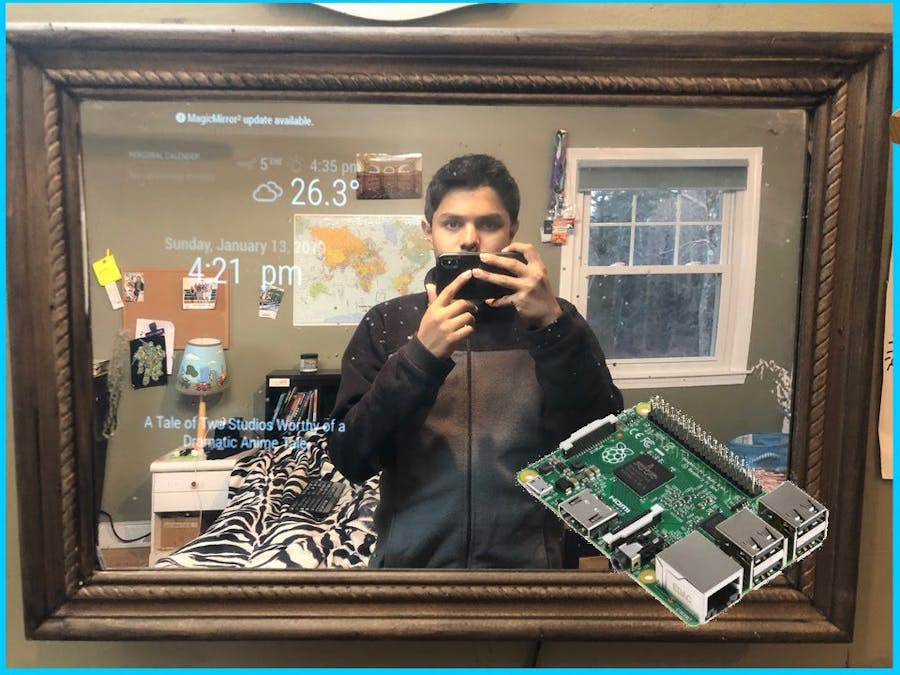
Installing Magicmirror²
MagicMirror² is the most popular software for smart mirrors. Start by updating your Raspberry Pi’s system. Use simple commands in the terminal to install Node.js, a software needed for MagicMirror². Then download MagicMirror² from its official source. Follow the on-screen instructions carefully. After installation, launch the app to check if it runs correctly.
Customizing Modules
Modules are small programs that display information on your mirror. You can add modules for weather, calendar, news, and more. Open the configuration file to choose which modules to show. Change settings like location, language, or update intervals to suit your needs. Save the file and restart MagicMirror² to see the changes.
Adding Voice Control
Voice control makes your smart mirror easier to use. It allows you to ask questions or give commands without touching the screen. Install voice recognition software that works with MagicMirror². Set up a microphone on your Raspberry Pi for clear audio input. Train the software to recognize your voice commands. Test it by asking simple questions or commands. This feature adds hands-free convenience to your smart mirror.

Credit: www.youtube.com
Integrating Sensors And Controls
Integrating sensors and controls makes your smart mirror more useful and interactive. Sensors help the mirror respond to your presence and environment. Controls allow easy management without touching the screen. These features enhance user experience and save energy.
Motion Sensors For Activation
Motion sensors detect when someone stands near the mirror. The mirror turns on automatically, showing useful information. This saves power by keeping the screen off when no one is around. You can use PIR sensors with Raspberry Pi. They are easy to connect and program.
Ambient Light Adjustment
Ambient light sensors measure the room’s brightness. The smart mirror adjusts the screen brightness based on light levels. This prevents glare and saves energy. A simple light sensor like a photoresistor works well. Connect it to the Raspberry Pi’s input pins. Then, write code to change the display brightness smoothly.
Remote Control Options
Remote controls let you change settings without touching the mirror. Use Bluetooth or Wi-Fi remote apps for convenience. You can also add physical buttons or a small remote control device. This helps users who prefer manual control over sensors. Raspberry Pi supports many remote control options to fit your needs.
Power Management
Power management is a key part of building a smart mirror with Raspberry Pi. It ensures your device runs smoothly and safely. Good power setup protects the components and keeps the mirror working all day. Let’s explore how to manage power properly for your smart mirror project.
Power Supply Requirements
The Raspberry Pi needs a stable power source. Use a power supply with 5V and at least 3A output. This prevents sudden shutdowns and hardware damage. Choose a power adapter with good quality and safety certifications. Avoid cheap or weak power supplies. They can cause voltage drops and errors.
Cable Management Tips
Organize cables to avoid clutter and damage. Use cable ties or clips to bundle wires neatly. Keep power cables separate from data cables to reduce interference. Measure cable lengths before cutting or buying. This helps prevent loose or tight connections. Good cable management improves safety and makes maintenance easier.
Energy Efficiency
Energy-saving helps reduce electricity costs and heat. Use a low-power Raspberry Pi model if possible. Turn off or dim the display when not in use. Enable power-saving settings in the software. Unplug the mirror during long periods of inactivity. These steps keep energy use low and extend device life.

Credit: www.sunfounder.com
Troubleshooting Common Issues
Building a smart mirror with Raspberry Pi is exciting. Sometimes, you might face issues. These problems can stop your mirror from working well. Knowing how to fix common problems saves time and stress. This section covers easy ways to solve usual troubles.
Display Problems
The screen may stay black or flicker. Check the power supply first. Make sure the HDMI cable is tight. A loose connection can cause display errors. Adjust the screen resolution in Raspberry Pi settings. Wrong resolution might make the display not fit well. Clean the mirror surface; dirt can affect visibility. Use a good quality monitor for better results.
Software Glitches
The smart mirror app might freeze or not start. Restart the Raspberry Pi to clear minor bugs. Update the software to the latest version. Old versions can have errors or missing features. Look at the log files for error messages. These logs help find the source of problems. Reinstall the smart mirror software if needed. Use official guides to avoid installation mistakes.
Connectivity Challenges
The mirror needs internet to show weather or news. Check if Wi-Fi is turned on and connected. Restart your router if the connection is slow or lost. Use a wired connection for more stable internet. Verify the Raspberry Pi’s network settings are correct. Sometimes firewalls block data; check your network rules. Keep the Raspberry Pi close to the router for better signal.
Enhancing Your Smart Mirror
Enhancing your smart mirror takes your project beyond basic functions. It allows you to customize the mirror to fit your daily needs. You can add new features to make the mirror more useful and fun. These upgrades turn a simple mirror into a smart assistant for your home.
Adding Custom Widgets
Custom widgets show information like weather, news, or calendar events. You can build widgets using simple code or download them from online sources. Widgets make your mirror more interactive and informative. Choose widgets that match your lifestyle and preferences.
Integrating Smart Home Devices
Connect your smart mirror to devices like lights, thermostats, or speakers. This integration lets you control your home from the mirror’s screen. Use voice commands or touch controls to manage devices easily. Your smart mirror becomes a hub for your smart home.
Future Upgrades
Plan for future upgrades to keep your mirror up to date. Add features like facial recognition or voice assistants later. New software updates can improve performance and add options. Regular upgrades ensure your smart mirror stays useful over time.
Credit: www.hackster.io
Frequently Asked Questions
What Components Are Needed For A Raspberry Pi Smart Mirror?
You need a Raspberry Pi, a two-way mirror, a monitor, and a frame. Additional items include power supply, cables, and optional sensors. These components create a functional smart mirror with interactive display features.
How Do I Install Software On A Raspberry Pi Smart Mirror?
Install Raspbian OS on the Raspberry Pi first. Then, download and configure MagicMirror² software. Follow setup guides to customize modules and connect internet services for a smart mirror experience.
Can I Add Voice Control To My Smart Mirror?
Yes, voice control can be added using a microphone and software like Google Assistant or Alexa. Integrate these with Raspberry Pi to enable hands-free interaction with your smart mirror.
How Do I Customize The Display On A Smart Mirror?
Customize by editing MagicMirror² configuration files. You can add weather, calendar, news, and other modules. This allows personalized information to show on the smart mirror interface.
Conclusion
Building a smart mirror with Raspberry Pi can be fun and useful. You get to learn about technology step by step. This project fits well for beginners and tech lovers alike. It shows how simple parts create something special. You can customize the mirror to fit your needs.
Try adding weather, news, or your calendar. Small changes make it more personal and handy. Keep experimenting and enjoy your smart mirror every day. It’s a smart way to bring tech into your home.