Are you struggling to keep your pet safe while still giving them freedom to roam? Assembling your Carlson Pet Gate might seem tricky at first, but with the right steps, you can have it set up quickly and easily.
This guide will walk you through each part of the process, so you don’t have to waste time or get frustrated. By the end, you’ll have a secure gate that fits perfectly in your home, giving you peace of mind and your pet the space they deserve.
Ready to make your home safer for your furry friend? Let’s get started!

Credit: carlsonpetproducts.com
Tools Needed
Gathering the right tools makes assembling the Carlson Pet Gate easier and faster. Having everything ready helps you avoid interruptions during the process. The tools needed are simple and common. You might already have them at home.
Phillips Head Screwdriver
This tool helps tighten screws securely. A Phillips head screwdriver fits the screws that come with the gate. It allows you to fasten parts without damaging them.
Measuring Tape
Measure the doorway or opening where you will place the gate. Accurate measurement ensures the gate fits perfectly. It prevents gaps that pets could slip through.
Drill (optional)
A drill can speed up screw installation. It is not required but useful for tougher walls. Use a low-speed setting to avoid damage.
Level
A level ensures the gate stands straight and balanced. A crooked gate looks bad and may not work well. Check the gate’s alignment before final tightening.
Pencil
Mark positions for screws or brackets with a pencil. Clear marks guide where to drill or screw. It keeps the installation neat and precise.
Unboxing The Gate
Unboxing the Carlson Pet Gate is the first step to securing your home for your pet. It’s important to carefully open the package and check all parts. This ensures a smooth assembly and avoids missing pieces later.
Take your time. A neat unboxing sets the tone for easy setup. Organizing parts helps you understand the gate’s design better.
Unpacking The Box
Start by placing the box on a flat surface. Use scissors or a box cutter to open it carefully. Avoid cutting too deep to protect the contents inside.
Remove the gate and components gently. Lay them out so you can see each part clearly. This includes the gate frame, hardware, and instructions.
Checking Included Parts
Look for all items listed in the manual. These usually include side panels, mounting hardware, and the gate itself. Missing parts can delay assembly.
Count screws, brackets, and other small pieces. Keep them in a small container to prevent loss. Confirm everything matches the parts list.
Inspecting For Damage
Examine each piece closely. Look for dents, scratches, or broken parts. Damage can affect the gate’s safety and function.
If you spot any issues, contact the seller before assembly. It’s easier to resolve problems early than after setup.
Identifying Parts
Before assembling the Carlson Pet Gate, identifying each part is essential. This step saves time and avoids confusion during setup. Each piece has a specific role in the gate’s structure and function.
Taking a moment to separate and name each part helps you understand the assembly process better. Check the instruction manual for a parts list and compare it with what you have. Here is a guide to recognize the main parts of the Carlson Pet Gate.
Gate Frame
The gate frame forms the main body of the pet gate. It is usually rectangular and made of metal or wood. This part holds the gate securely in place once installed.
Mounting Brackets
Mounting brackets attach the gate frame to the door frame or wall. They keep the gate stable and prevent it from moving. Usually, there are two or more brackets included.
Gate Door
The gate door is the movable part that opens and closes. It fits inside the gate frame. This piece often has a latch to keep the gate locked when closed.
Latch Mechanism
The latch mechanism secures the gate door. It ensures the gate stays closed and pets cannot push it open. Some latches use a simple push or pull system.
Extension Panels (if Included)
Extension panels widen the gate for larger openings. These pieces attach to the gate frame. They are useful for wider doorways or hallways.
Screws And Hardware
All screws, bolts, and small hardware are necessary for assembly. Keep them organized in one place to avoid losing any parts. They hold the gate and brackets firmly together.
Preparing The Installation Area
Preparing the installation area is the first step to assemble the Carlson Pet Gate. A clean and clear space helps make the process smooth and fast. It also ensures the gate fits well and works safely for your pet.
Before starting, check the area where you want to install the gate. This helps avoid problems during assembly and keeps your pet safe.
Clear The Space
Remove furniture, toys, and other objects near the gate area. This creates enough room to work without obstacles. It also prevents accidents and damage to items during installation.
Measure The Opening
Use a tape measure to check the width and height of the doorway or stairway. Write down the measurements to compare with the gate size. Correct measurements ensure a good fit and prevent gaps.
Check Wall And Door Frames
Examine walls and door frames for cracks, loose paint, or damage. Fix any issues before installing the gate. Strong surfaces help keep the gate stable and safe for your pet.
Gather Necessary Tools
Collect tools like a screwdriver, drill, and level before starting. Having tools ready saves time and avoids interruptions. Follow the gate instructions for specific tool needs.
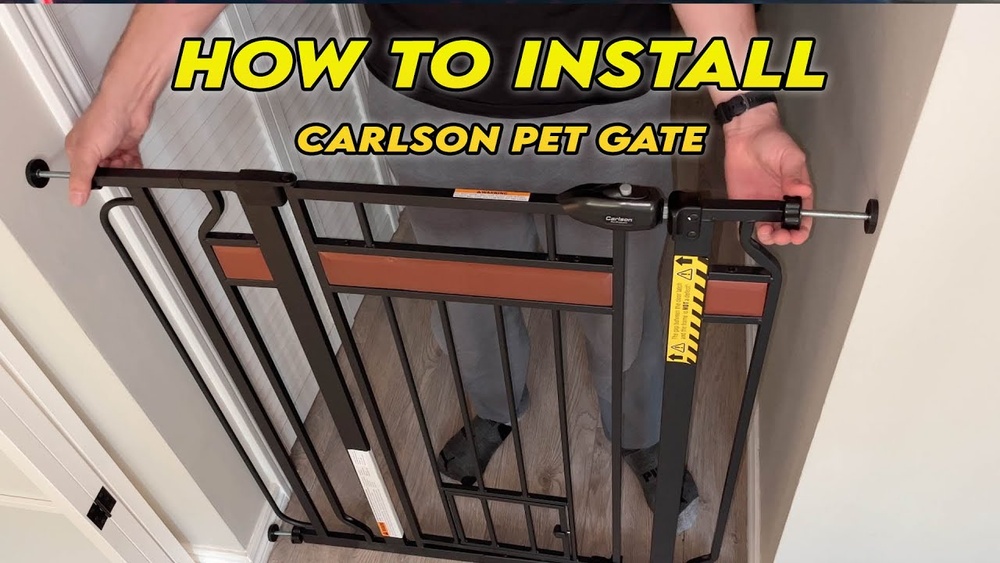
Step-by-step Assembly
Assembling the Carlson Pet Gate is simple and quick. Follow these steps carefully to set it up properly. This guide helps you put the gate together without stress.
Attaching The Panels
Start by laying the gate panels flat on the floor. Align the panels side by side. Connect the hinges between the panels. Press firmly until they click into place. Check that the panels move smoothly.
Securing The Mounting Hardware
Locate the mounting hardware in the package. Attach the brackets to the wall or door frame. Use a screwdriver to tighten the screws securely. Make sure the brackets are level and stable. This keeps the gate firm and safe.
Adjusting The Gate Width
Measure the opening where you want to install the gate. Extend or retract the gate panels to match the width. Lock the panels in place using the adjustment mechanism. Confirm that the gate fits snugly without gaps. This prevents pets from slipping through.
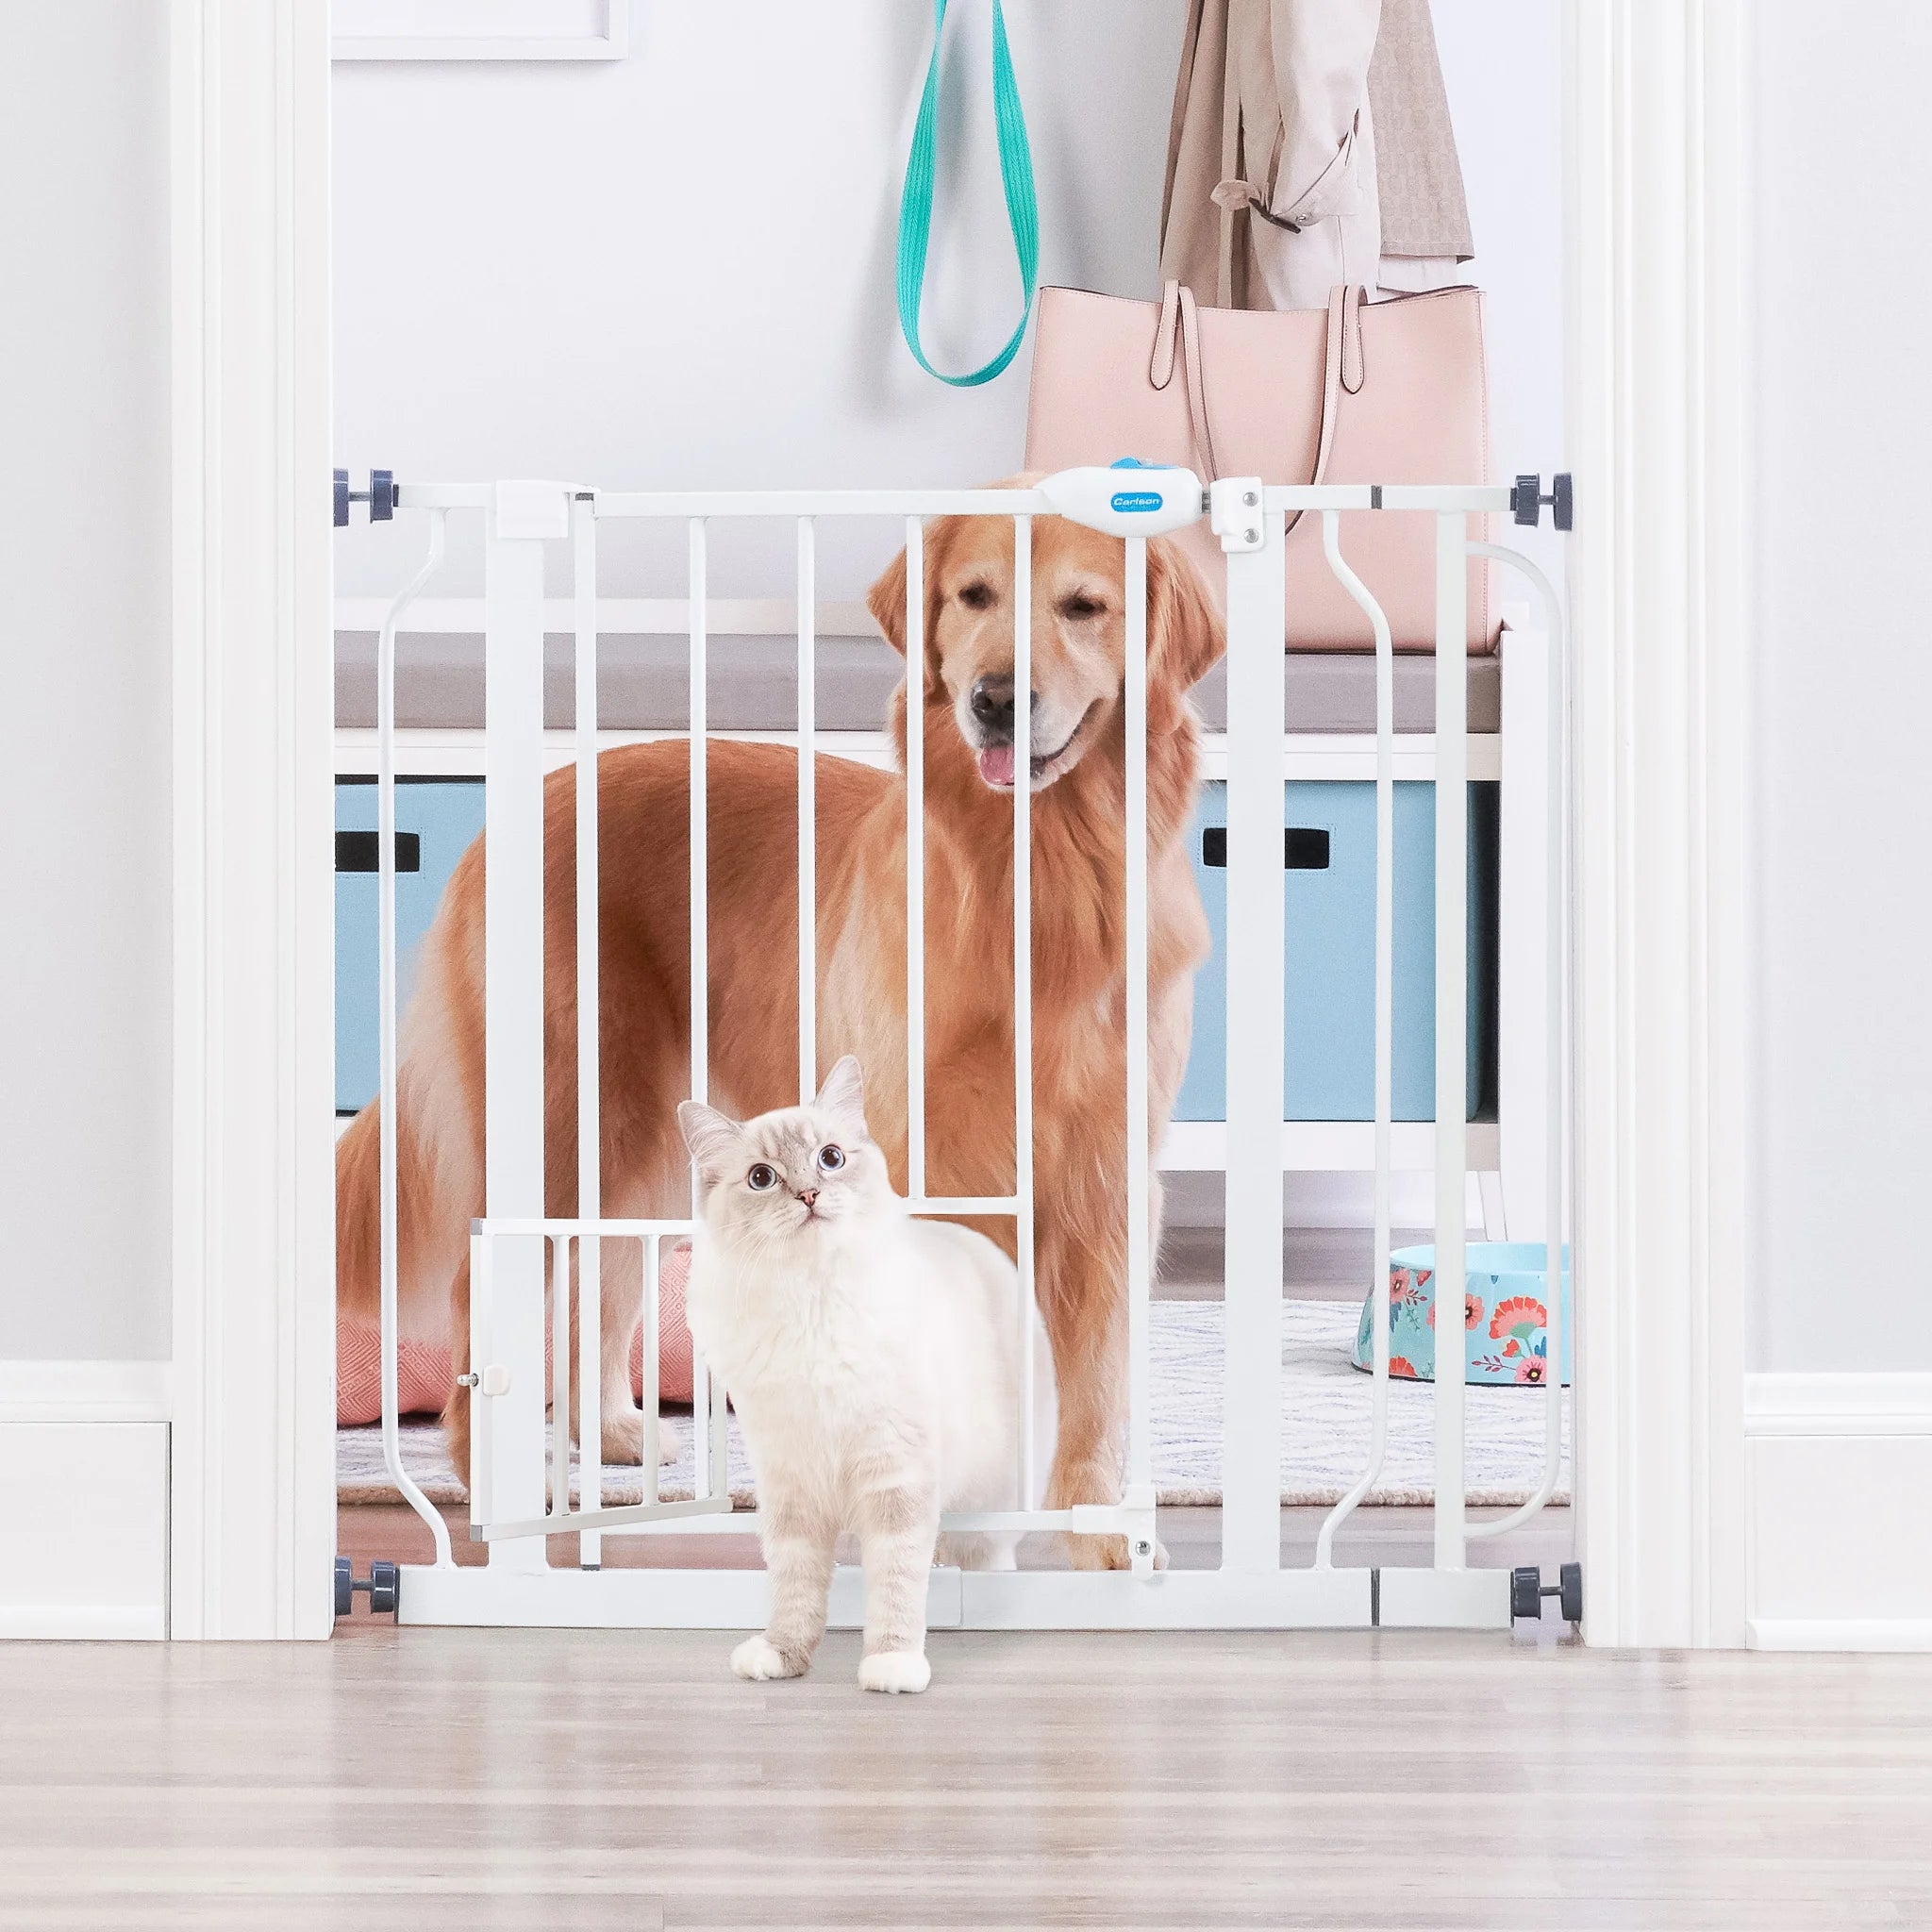
Testing The Gate
Testing the gate is a key step after assembly. It confirms the gate works well and keeps pets safe. This step helps spot issues early before use. Let’s look at how to test the gate properly.
Checking For Stability
Stand in front of the gate. Push it gently with your hand. The gate should not wobble or shift. Check all corners for firm contact with the wall. If the gate moves, tighten the screws or adjust the fit. A stable gate prevents pets from pushing it open.
Ensuring Proper Latch Function
Open and close the latch several times. It should click securely each time. Test the latch from both sides of the gate. Make sure it locks and unlocks smoothly. A proper latch keeps the gate closed and pets safe. Fix any sticking or loose latches before use.
Troubleshooting Tips
Assembling the Carlson Pet Gate can be simple, but sometimes problems occur. This section offers easy troubleshooting tips to help fix common issues fast. Clear steps guide you to make sure the gate works well and keeps your pet safe.
Checking Gate Alignment
Make sure the gate fits evenly between walls or doorways. Uneven gaps cause the gate to wobble or not close properly. Use a level to check if the gate is straight. Adjust the pressure mounts until the gate sits firmly without tilting.
Fixing Lock Mechanism Issues
The lock should open and close smoothly. If it sticks, clean any dirt or debris inside. Check if parts are bent or damaged. Tighten screws that might be loose but avoid overtightening. Apply a small amount of lubricant if needed to ease movement.
Adjusting Gate Width
The Carlson Pet Gate extends for wider openings. If it won’t fit, confirm the extension pieces are attached correctly. Slide the extensions gently and lock them into place. Avoid forcing parts, which can cause damage or poor fit.
Dealing With Pressure Mount Problems
Pressure mounts keep the gate secure without drilling holes. If the gate slips, tighten the mounts by turning them clockwise. Check if the rubber pads touch the wall fully. Replace worn pads to improve grip and prevent slipping.
Handling Gate Swing Direction
The gate swings open in one direction. Confirm the hinges are installed on the correct side. Reverse the gate if needed by following the instructions. Ensure the swinging side matches your room layout for easy use.

Credit: www.youtube.com
Maintenance And Care
Proper maintenance and care keep your Carlson Pet Gate working well for years. Regular cleaning and checks help avoid damage. Caring for the gate ensures safety for your pets and family.
Cleaning The Gate
Use a soft cloth to wipe the gate regularly. Mild soap and water remove dirt and dust easily. Avoid harsh chemicals that can damage the finish. Dry the gate fully after cleaning to stop rust.
Checking For Loose Parts
Look at screws and bolts often. Tighten any loose parts with a screwdriver. Loose parts can make the gate unsafe. Regular checks keep the gate stable and strong.
Lubricating Moving Parts
Apply a small amount of lubricant on hinges. This keeps the gate swinging smoothly. Use pet-safe oils to protect your animals. Lubrication prevents squeaks and wear over time.
Inspecting For Damage
Check for cracks or bends in the gate frame. Replace broken parts quickly to avoid injury. Look at the locking mechanism to ensure it works well. Damaged gates should not be used until fixed.
Credit: carlsonpetproducts.com
Frequently Asked Questions
How Do I Assemble A Carlson Pet Gate Quickly?
To assemble the Carlson Pet Gate quickly, first unpack all parts. Follow the step-by-step instructions carefully. Use the included hardware and tools. Align the panels properly and secure the screws tightly for stability. This ensures a safe and fast setup.
What Tools Are Needed To Assemble Carlson Pet Gate?
No additional tools are typically needed. The gate includes an Allen wrench for assembly. You might need a screwdriver for wall mounting. Check the instruction manual for specific tool requirements. Having basic tools handy can speed up the process.
How Do I Mount Carlson Pet Gate On Walls?
Use the included mounting hardware to attach the gate to walls. Locate studs for secure installation. Measure and mark the desired height. Drill pilot holes, then screw the brackets firmly. This ensures the gate is stable and safe for pets.
Can I Adjust The Carlson Pet Gate Size?
Yes, the Carlson Pet Gate is expandable. You can add extension panels sold separately. This allows fitting in wider doorways or openings. Follow assembly instructions for adding extensions securely and safely.
Conclusion
Assembling the Carlson Pet Gate is simple and quick. Follow each step carefully for best results. Your pet stays safe and secure with the gate in place. No special tools or skills are needed to finish the task. Enjoy peace of mind knowing your pet cannot roam freely.
This gate fits well in most doorways and hallways. Take your time, and the job will be done right. A well-installed gate makes daily life easier for you and your pet.