Are you ready to boost your home’s security with a Ring Video Doorbell but unsure where to start? Installing your new device might seem tricky, but with the right tools and simple steps, you can have it up and running in no time.
In this guide, you’ll discover exactly what you need for the installation, so you can avoid frustration and get straight to enjoying the peace of mind that comes with knowing your front door is always watched. Keep reading, and you’ll be set to make your home smarter and safer today.
Credit: breezeresidency.com
Ring Video Doorbell Models
Ring offers several video doorbell models. Each model has features suited for different needs. Choosing the right one helps in smooth installation and use.
Some models work with batteries. Others need wiring to power them. Knowing these options helps pick the best doorbell for your home.
Battery Vs Wired Options
Battery models are easy to install. They do not need any wiring. You can place them anywhere near your door.
Batteries need recharging or replacement over time. This means occasional maintenance.
Wired models connect to your home’s existing doorbell wires. They get constant power without the need for batteries.
Wired doorbells offer continuous operation. They do not run out of power unexpectedly.
Choosing The Right Model
Think about your home setup first. Do you have existing doorbell wiring? If yes, wired models suit you well.
If no wiring exists, battery models are better. They allow flexible placement.
Also, check your internet speed and Wi-Fi range. Some models need stronger connections.
Consider your budget. Battery models may cost less upfront. Wired models might save money long-term.
Pick a model that matches your needs and home layout. This makes installation easier and use better.
Tools Needed For Installation
Installing a Ring Video Doorbell requires a few simple tools. Having the right tools makes the process smooth and fast. Most tools are common and easy to find. Gather everything before starting to avoid delays.
Basic Tools Checklist
- Drill with drill bits
- Screwdriver (Phillips and flathead)
- Level tool
- Measuring tape
- Pencil or marker for marking spots
- Wire stripper (if connecting to existing doorbell wires)
- Safety glasses
Optional Tools For Ease
- Power drill with screwdriver bit for faster screwing
- Stud finder to avoid drilling into pipes or wires
- Voltage tester to check doorbell wiring
- Step ladder for higher doorbell placements
- Masking tape to hold wires in place
Power Requirements
Understanding the power requirements is important before installing a Ring Video Doorbell. This device needs a steady power source to work well. You can choose between battery power or a wired connection. Each option has different needs and benefits. Knowing these can help you set up your doorbell correctly and avoid power issues.
Battery Life And Charging
The Ring Video Doorbell has a built-in rechargeable battery. It lasts about six to twelve months, depending on use. Frequent motion alerts and video recording can shorten battery life. Charging the battery is simple. You just remove the doorbell and connect it to a USB charger. No need to uninstall the whole device.
Keep the battery charged to avoid missing any visitors or alerts. The device will send notifications when the battery is low. This helps you stay prepared and keep your doorbell active.
Wired Power Considerations
You can also power the Ring Video Doorbell using existing doorbell wires. It needs a voltage between 16 and 24 volts AC. Not all homes have compatible wiring, so check before installation. Using wired power means you don’t have to recharge batteries. The doorbell stays powered all the time.
Wiring the device requires basic electrical knowledge or a professional installer. Make sure to turn off power at the breaker before connecting wires. Proper wiring ensures continuous operation and reliable performance.
Wi-fi And Network Setup
Setting up the Wi-Fi and network is key for your Ring Video Doorbell to work well. A strong and steady Wi-Fi connection ensures clear video and quick alerts. Without a good network, the doorbell may lag or lose connection. This section explains what you need to know about Wi-Fi signal and network compatibility.
Wi-fi Signal Strength
The Ring Video Doorbell needs a strong Wi-Fi signal. If the signal is weak, video quality drops and notifications delay. Place your Wi-Fi router close to your front door. Walls and metal objects can block the signal. Test the signal with a phone before installation to ensure it is strong enough.
Network Compatibility
Your Wi-Fi network must be compatible with the Ring Doorbell. It works on 2.4 GHz networks, not 5 GHz alone. Many routers have both bands. Check your router settings to confirm the 2.4 GHz band is active. The doorbell also needs a stable internet speed of at least 1 Mbps upload. This keeps video clear and streaming smooth.
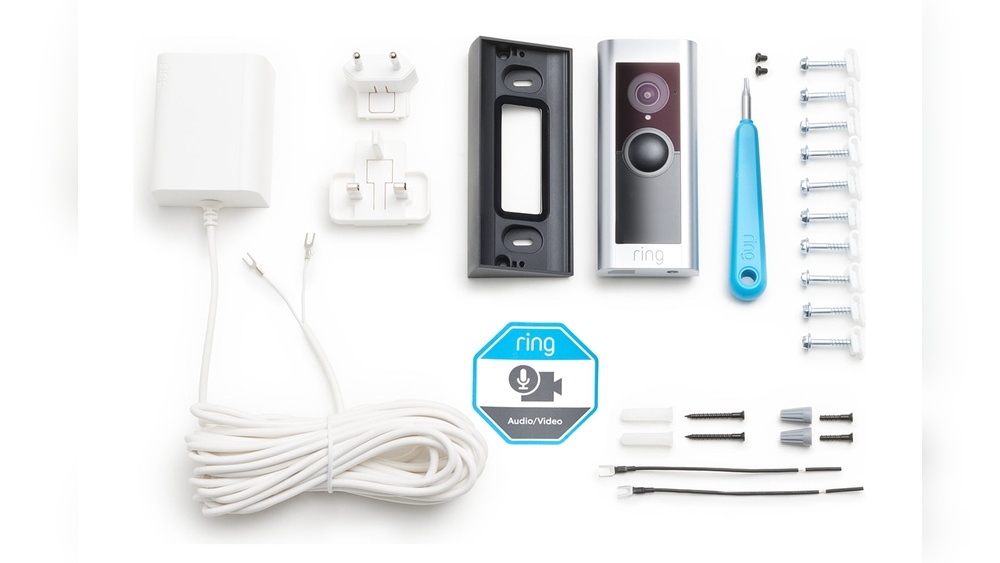
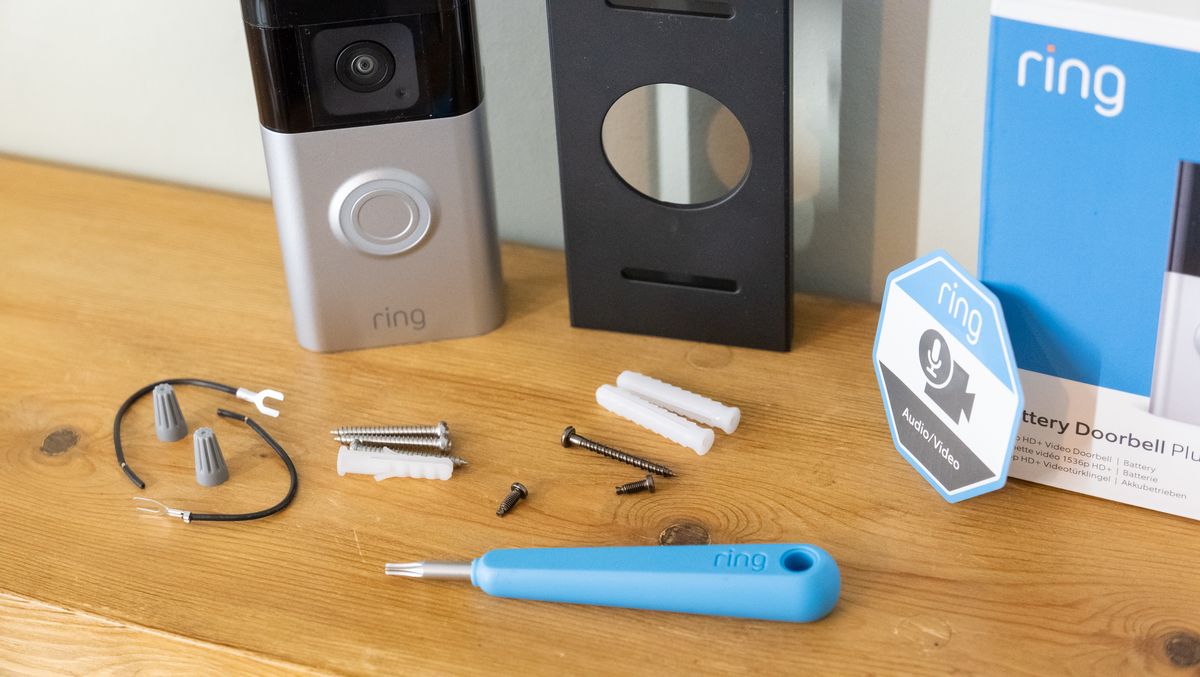
Mounting Materials
Mounting materials are essential for installing your Ring Video Doorbell securely. These materials keep the doorbell in place and ensure it works well. Choosing the right mounting materials depends on your wall type and the mounting location. This section helps you understand what you need for a safe and stable setup.
Mounting Brackets And Screws
The mounting bracket holds the Ring Video Doorbell firmly. It fits behind the doorbell and attaches to the wall. Screws secure the bracket tightly. Usually, the Ring package includes the correct bracket and screws. Use the screws that come with the device for best results. Strong screws prevent the doorbell from falling or shifting.
Wall Types And Anchors
Different walls need different anchors. Drywall, brick, wood, or stucco each require special anchors. Anchors give extra grip for the screws. For drywall, use plastic anchors. Brick or concrete walls need masonry anchors or screws. Wooden walls often only need wood screws. Pick anchors based on your wall type for a solid hold.
Credit: ring.com
Mobile App And Account Setup
Setting up the Ring Video Doorbell starts with the mobile app and account. This step allows you to control and monitor your doorbell from anywhere. The app connects your device to your phone, making it easy to receive alerts and view live video.
Before installation, make sure your phone is ready for the app. The Ring app works on both Android and iOS devices. It is essential to have a stable internet connection for smooth operation.
Downloading The Ring App
First, open your phone’s app store. For Android, use Google Play Store. For iPhone, use the Apple App Store. Search for “Ring” in the store’s search bar. Find the official Ring app and tap the download button. The app is free and takes only a few minutes to install.
After downloading, open the app. You will see the welcome screen. The app guides you through the next steps clearly.
Creating An Account
To use the Ring app, you need an account. Tap on “Create Account” on the welcome screen. Enter your email address and create a strong password. The app asks for your phone number for extra security. You will receive a verification code via email or text.
Enter the code in the app to confirm your account. Once done, you can add your Ring Video Doorbell to the app. Your account keeps your devices safe and lets you manage multiple Ring products easily.
Safety And Security Tips
Installing a Ring Video Doorbell improves home safety. It helps you see who is at your door anytime. Protecting your device and privacy is important. Follow these safety and security tips to keep your home secure.
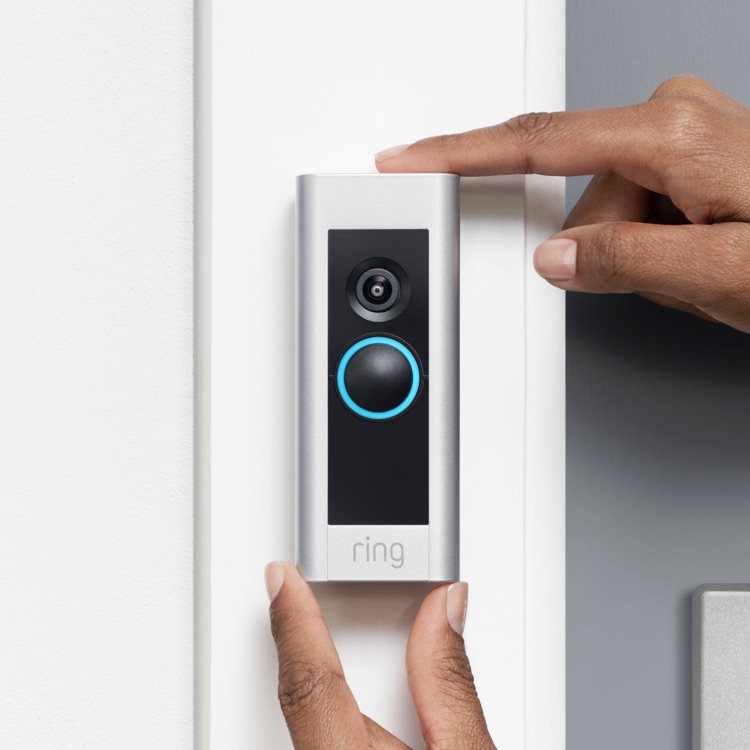
Secure Installation Practices
Choose a strong, stable surface for mounting. Use the screws and anchors that come with the device. Tighten all screws firmly to prevent theft or damage. Avoid hiding the doorbell in hard-to-reach places. Place it at eye level for clear video capture. Test the connection to your Wi-Fi before finalizing. Secure your home network with a strong password. This stops hackers from accessing your video feed.
Privacy Settings
Set up notifications to alert only you or trusted family members. Adjust the motion detection zones to avoid false alerts. Turn off audio recording if you want extra privacy. Review and update privacy settings regularly in the app. Share access carefully and remove users who no longer need it. Check app permissions to limit data sharing with third parties. These steps keep your video and personal data safe.

Credit: treefruitresearch.org
Frequently Asked Questions
What Tools Do I Need To Install A Ring Video Doorbell?
You will need a drill, screwdriver, level, and a pencil for marking. A power drill helps with mounting. Use a level to ensure straight placement.
Is A Wi-fi Connection Necessary For Installation?
Yes, a stable Wi-Fi connection is essential for live video streaming and notifications. Without Wi-Fi, the doorbell cannot connect to the app.
Can I Install Ring Video Doorbell Without Existing Doorbell Wiring?
Yes, Ring offers battery-powered models that don’t require existing wiring. These are easy to install and operate independently from your home’s wiring.
How Much Time Does Ring Video Doorbell Installation Take?
Installation typically takes 20 to 30 minutes. Time varies based on your doorbell model and home setup. Preparation can speed up the process.
Conclusion
Installing a Ring Video Doorbell needs a few simple tools and clear steps. You need a power source, Wi-Fi, and basic tools like a drill and screwdriver. Follow the instructions carefully to avoid mistakes. Check the connection and test the doorbell before finalizing.
This setup helps keep your home safe and connected. With the right preparation, installation goes smoothly and quickly. Stay secure and enjoy your new doorbell’s features every day.