Are you ready to boost your home’s security with a Xfinity Video Doorbell? Installing it yourself might seem tricky, but it’s simpler than you think.
This guide will walk you through every step, making sure your doorbell works perfectly to keep an eye on your doorstep. By the end, you’ll have a smart, reliable way to see who’s visiting—right from your phone. Let’s get started and make your home safer today!

Credit: yao.com.do
Preparing For Installation
Preparing for the installation of your Xfinity Video Doorbell is the key to a smooth setup. Taking time to get ready helps avoid delays and mistakes. Follow these steps to ensure everything is set before you start.
Checking Compatibility
Make sure your doorbell works with your home system. Check if your doorbell wiring supports the device. Confirm your Wi-Fi signal is strong near your front door. Verify your smartphone or tablet is compatible with the app.
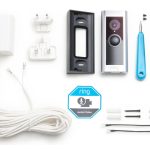
Gathering Required Tools
Collect all tools before starting the installation. You will need a drill, screwdriver, and level. Have the mounting screws and anchors ready. Keep your smartphone or tablet nearby for app setup. A ladder may be necessary for high doorbells.
Reviewing Safety Precautions
Turn off power at the circuit breaker before touching wires. Use insulated tools to avoid electric shock. Work in dry weather to prevent slips and hazards. Read the safety instructions in the doorbell manual carefully. Keep children and pets away from the work area.
Removing Existing Doorbell
Removing your old doorbell is the first step in installing a Xfinity Video Doorbell. This process ensures a safe and clean setup. It also prepares the area for the new device. Follow these simple steps to remove the existing doorbell carefully.
Turning Off Power
Start by turning off the power to your doorbell. Find the correct breaker in your electrical panel. Switch it off to avoid any electric shocks. Use a voltage tester to confirm no power flows to the wires. Safety comes first in this step.
Detaching Old Doorbell
Remove the screws holding the old doorbell in place. Gently pull the doorbell away from the wall. Be careful not to damage the wires behind it. Keep the screws safe if you plan to reuse them. This step clears the space for your new device.
Inspecting Wiring
Check the wires for any damage or wear. Look for frayed or exposed wires that need fixing. Make sure wires are long enough to connect to the new doorbell. Clean any dirt or debris from the area. Proper wiring is essential for your doorbell to work well.
Installing The Xfinity Doorbell
Installing the Xfinity Video Doorbell is a straightforward process that anyone can follow. This guide breaks down the main steps to help you set up your doorbell quickly and safely. You will learn how to mount the bracket, connect the wires, and secure the doorbell properly.
Mounting The Bracket
Start by choosing the best spot near your door. Make sure the surface is flat and clean. Use the screws provided in the package to attach the mounting bracket. Hold the bracket firmly and drill holes into the wall. Fix the bracket tightly so it does not move.
Connecting The Wires
Turn off the power from your home’s main electrical panel. Locate the doorbell wires on your wall. Connect the wires to the terminals on the back of the Xfinity doorbell. Tighten the screws to hold the wires in place. Check that the wires do not touch each other.
Securing The Doorbell
Align the doorbell with the mounting bracket. Press it firmly until you hear a click. Use the security screws to lock the doorbell to the bracket. This step prevents the doorbell from falling or being removed easily. Turn the power back on and test the device to confirm it works.

Credit: www.xfinity.com
Setting Up The Device
Setting up your Xfinity Video Doorbell is a simple process. It requires just a few steps to get your device ready. This section guides you through the key stages to complete the setup.
Follow these instructions carefully to ensure your doorbell works properly. Each step builds on the previous one, making the setup smooth and easy.
Downloading The Xfinity App
Start by downloading the Xfinity app on your smartphone. The app is available for both Android and iOS devices. Search for “Xfinity” in your app store. Install and open the app to begin the setup process. This app controls your doorbell and sends notifications.
Connecting To Wi-fi
Next, connect your doorbell to your home Wi-Fi network. The app will guide you through this step. Make sure your Wi-Fi signal is strong where you plan to install the doorbell. Choose your Wi-Fi network and enter the password carefully. A stable connection ensures the doorbell works without interruptions.
Configuring Settings
After connecting to Wi-Fi, configure your doorbell settings in the app. Adjust motion detection sensitivity to your preference. Set up alerts to receive notifications on your phone. You can also customize video quality and privacy options. These settings help personalize your device for the best experience.
Testing And Troubleshooting
Testing and troubleshooting your Xfinity Video Doorbell ensures it works well. This step helps catch problems early and keeps your home safe. Follow these simple checks to confirm the doorbell is ready to use.
Checking Video And Audio
Start by opening the Xfinity app on your phone. Check the live video feed from the doorbell. Make sure the picture is clear and not blurry. Listen to the audio to confirm the sound is loud and clear. Test the two-way talk feature by speaking through the app. Ensure both sides can hear each other without delay or noise.
Adjusting Doorbell Position
Look at the doorbell’s view on your screen. Adjust the angle if the video misses important areas. Loosen the screws and tilt the doorbell up or down. Tighten screws once the view covers your doorstep well. Check that the doorbell is easy to reach for visitors. A good position improves video quality and motion detection.
Resolving Common Issues
Check your Wi-Fi connection if video or audio is poor. Restart the router and doorbell to refresh the connection. Make sure the doorbell has enough power or battery charge. Update the doorbell firmware through the Xfinity app. Clear any dirt or debris from the camera lens. If problems continue, contact Xfinity support for help.

Credit: www.youtube.com
Maintenance Tips
Maintaining your Xfinity Video Doorbell keeps it working smoothly and extends its life. Simple care steps help avoid common problems. Regular attention ensures clear video and reliable alerts.
Cleaning The Doorbell
Keep the doorbell lens clean for clear video. Use a soft cloth and mild cleaner. Avoid harsh chemicals that can damage the surface. Clean the button area to keep it responsive. Do this once a month or more if needed.
Updating Firmware
Firmware updates improve performance and security. Check for updates in the Xfinity app regularly. Install new updates quickly to fix bugs. Updates can add new features and improve battery use.
Extending Battery Life
Lower video quality to save battery. Set motion detection zones to reduce false alerts. Turn off notifications you do not need. Charge the battery fully before first use. Avoid extreme temperatures to protect battery health.
Frequently Asked Questions
How Do I Install A Xfinity Video Doorbell?
First, turn off power to your doorbell circuit. Remove the old doorbell and mount the Xfinity Video Doorbell. Connect the wires and secure the device. Finally, restore power and follow the app instructions to complete setup.
What Tools Are Needed For Installation?
You will need a screwdriver, drill, level, and wire stripper. Having a voltage tester and mounting screws also helps. These tools ensure a safe and accurate installation process.
Can I Install The Doorbell Without Professional Help?
Yes, the Xfinity Video Doorbell is designed for easy DIY installation. The instructions are clear, and the app guides you step-by-step. However, if unsure, hiring a professional is recommended for safety.
How Long Does The Installation Process Take?
Installation typically takes 20 to 30 minutes. Time varies based on your existing doorbell setup and wiring condition. Following instructions carefully helps complete the process quickly.
Conclusion
Installing a Xfinity video doorbell is simple and fast. Follow each step carefully to avoid mistakes. Test the doorbell after installation to ensure it works well. This device helps keep your home safe and lets you see visitors clearly. Enjoy the peace of mind it brings every day.
Maintenance is easy, so check it now and then. Stay connected with your home, even when you are away. This small device makes a big difference in home security.