Is your towel rack loose, outdated, or just not fitting your style anymore? Replacing it might seem tricky, but it’s easier than you think.
Imagine having a sturdy, fresh towel rack that not only holds your towels perfectly but also adds a touch of style to your bathroom. In this guide, you’ll discover simple steps to replace your towel rack quickly and confidently—no special tools or skills needed.
Ready to upgrade your bathroom with a small change that makes a big difference? Keep reading, and you’ll have your new towel rack installed before you know it.
Tools And Materials Needed
Replacing a towel rack is a simple project. Having the right tools and materials makes the job easier and faster. Gather everything before starting. This helps avoid stops and delays.
Use tools that fit well and work properly. Materials should match your bathroom style. This ensures a neat, long-lasting result.
Tools Needed
- Screwdriver (Phillips and flathead)
- Power drill with drill bits
- Level
- Measuring tape
- Stud finder
- Utility knife
- Hammer
- Allen wrench (if required by rack)
Materials Needed
- New towel rack
- Wall anchors or screws
- Painter’s tape (optional)
- Touch-up paint (optional)
- Cleaning cloth

Credit: www.youtube.com
Choosing The Right Towel Rack
Choosing the right towel rack is important for both style and function. A good towel rack keeps towels dry and your bathroom organized. It should fit your space and match your bathroom decor. Consider your needs and bathroom size before buying.
Types Of Towel Racks
There are several types of towel racks to choose from. Wall-mounted racks save floor space and look neat. Freestanding racks are portable and easy to move. Over-the-door racks fit on your bathroom door and save space. Choose a type that suits your bathroom layout and use.
Material And Finish Options
Towel racks come in many materials like metal, wood, and plastic. Metal racks are strong and last long. Wood racks add warmth and style but need care. Plastic racks are light and budget-friendly. Finishes like chrome, brushed nickel, and matte black add style and resist rust. Pick a material and finish that match your bathroom’s look.
Measuring Your Space
Measure the wall or area where you want to place the towel rack. Check the available width and height carefully. Leave space around the rack for easy towel access. Remember to measure the length of your towels too. Proper measurements help avoid buying a rack that is too big or small.
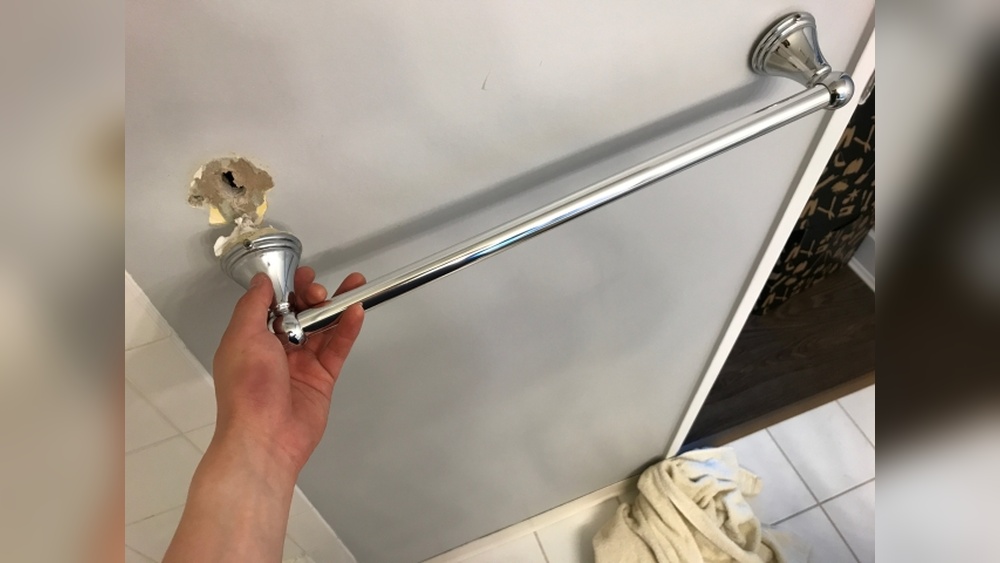
Removing The Old Towel Rack
Removing the old towel rack is the first step in installing a new one. This process helps prepare the wall for a smooth and clean setup. Taking your time during removal avoids damage and makes the job easier. Follow these simple steps to remove the towel rack safely.
Locating Mounting Hardware
Start by finding the screws or brackets holding the towel rack. Look behind the rack for visible screws. Sometimes the hardware hides under caps or covers. Gently pry off any covers to expose the screws. Knowing the exact location of the mounting hardware saves time.
Removing Screws And Anchors
Use a screwdriver to remove all screws securing the towel rack. Turn the screws counterclockwise until they come out. If anchors hold the screws, pull them out carefully. Use pliers if the anchors are stuck in the wall. Removing all hardware clears the way for the new rack.
Preparing The Wall Surface
After removing the rack, check the wall for damage. Fill any holes or cracks with spackle or wall filler. Smooth the surface with sandpaper once the filler dries. Cleaning the wall ensures the new rack sticks properly. A neat surface gives a professional finish.
Credit: prettyhandygirl.com
Installing The New Towel Rack
Installing a new towel rack is a key step in bathroom updates. It improves both function and style. Proper installation ensures the rack stays strong and holds towels well. This section breaks down the installation process into easy steps.
Marking Mounting Points
Start by holding the towel rack against the wall. Use a level to keep it straight. Mark the spots where the screws will go. Double-check the marks to avoid mistakes. Accurate marks make the next steps easier.
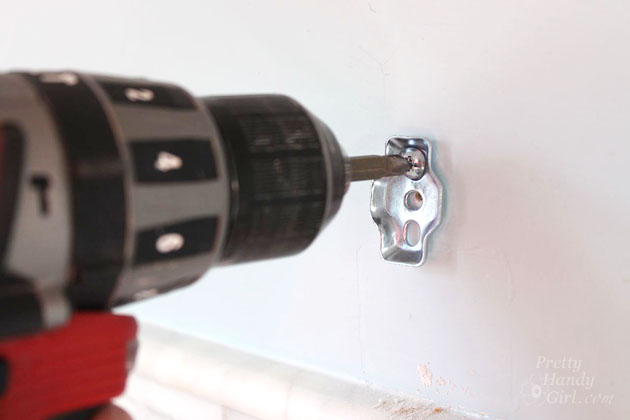
Drilling Holes And Using Anchors
Choose a drill bit that fits the wall anchors. Drill holes at the marked points. Insert wall anchors to support the screws. Anchors are important for drywall or plaster walls. They prevent the rack from falling off.
Securing The Rack To The Wall
Align the rack with the drilled holes. Insert screws through the rack brackets into the anchors. Tighten the screws firmly but not too much. Check that the rack is steady. A secure rack lasts longer and holds more weight.
Tips For A Professional Finish
Getting a professional finish on your towel rack replacement makes a big difference. It shows attention to detail and improves your bathroom’s look. Small steps can help the rack look neat and last longer. Follow these tips to achieve a clean, polished result.
Ensuring Level Installation
Use a spirit level to check the rack’s position before drilling. Mark the spots carefully to avoid crooked installation. A level towel rack looks balanced and prevents towels from slipping off. Double-check the measurements on both sides for even spacing.
Hiding Visible Screws
Choose towel racks with covers or caps to hide screws. Paint the screws with matching paint if covers aren’t available. This hides the hardware and keeps the rack looking tidy. Clean screw holes before covering to ensure a smooth finish.
Cleaning And Maintenance
Wipe the rack with a damp cloth after installation to remove dust. Clean regularly to prevent buildup of dirt and moisture. Use mild soap to avoid damage to the rack’s finish. Dry the rack after cleaning to stop rust or corrosion.

Credit: www.youtube.com
Frequently Asked Questions
How Do I Remove An Old Towel Rack Safely?
To remove an old towel rack, first unscrew the mounting brackets carefully. Use a screwdriver or drill. Gently pull the rack away from the wall. If adhesive is present, use a putty knife to loosen it without damaging the wall surface.
What Tools Are Needed To Replace A Towel Rack?
You will need a screwdriver, drill, level, measuring tape, wall anchors, and screws. These tools help remove the old rack and securely install the new one. A stud finder is useful to locate wall studs for better support.
How Do I Choose The Right Towel Rack Size?
Measure the space where the towel rack will be installed. Consider the length of towels you use. Choose a rack that fits comfortably without overcrowding the wall. The rack should allow towels to hang freely and dry properly.
Can I Install A Towel Rack On Tile Walls?
Yes, you can install a towel rack on tile walls. Use a drill with a masonry bit to create holes. Insert wall anchors designed for tile to secure screws firmly. Be careful to avoid cracking the tiles during installation.
Conclusion
Replacing a towel rack can be simple and quick. Follow the steps carefully to avoid mistakes. Use the right tools and materials for a strong hold. Take your time to measure and mark properly. Enjoy a neat and functional bathroom space afterward.
Small changes like this improve your home’s look. Give your bathroom a fresh feel with ease. You can do it yourself with confidence.