Are you tired of towels cluttering your bathroom or laundry room? A wooden towel rack with bars could be the perfect solution for you.
It’s not only practical but also adds a warm, natural touch to your space. Imagine having a sturdy, stylish rack that you made yourself—tailored exactly to your needs. In this guide, you’ll discover simple steps to create your own wooden towel rack bars, even if you’re new to woodworking.
By the end, you’ll have the confidence and know-how to build something functional and beautiful, transforming your daily routine. Ready to get started? Let’s dive in!
Materials And Tools Needed
Creating a wooden towel rack requires the right materials and tools. These ensure your project is sturdy and looks great. You need to prepare everything before starting. This saves time and avoids mistakes. Below, find what you need for a smooth build.
Choosing The Right Wood
Select wood that is strong and moisture-resistant. Pine and cedar work well for towel racks. They handle humidity and last long. Avoid soft woods that bend easily. Look for smooth boards with few knots. This makes sanding and finishing easier.
Essential Tools For The Project
Basic tools help you cut, shape, and assemble the rack. A saw is necessary for cutting wood pieces. Use a drill to make holes and fix screws. Sandpaper smooths rough edges for a clean look. A measuring tape keeps your cuts accurate. Clamps hold parts steady while you work.
Additional Supplies
Besides wood and tools, gather screws and wood glue. These hold the rack parts together securely. Choose screws that won’t rust in moist rooms. Wood finish or paint protects the rack and adds style. Clean cloths help apply finishes evenly. Prepare all supplies before you start building.

Credit: www.impconsultores.com
Planning Your Towel Rack
Planning your wooden towel rack is the first step to a successful project. Careful planning saves time and materials. It helps you create a rack that fits perfectly and looks great. Think about the space where you will hang the rack. Consider your needs and style preferences. This way, you can build a towel rack that works well in your home.
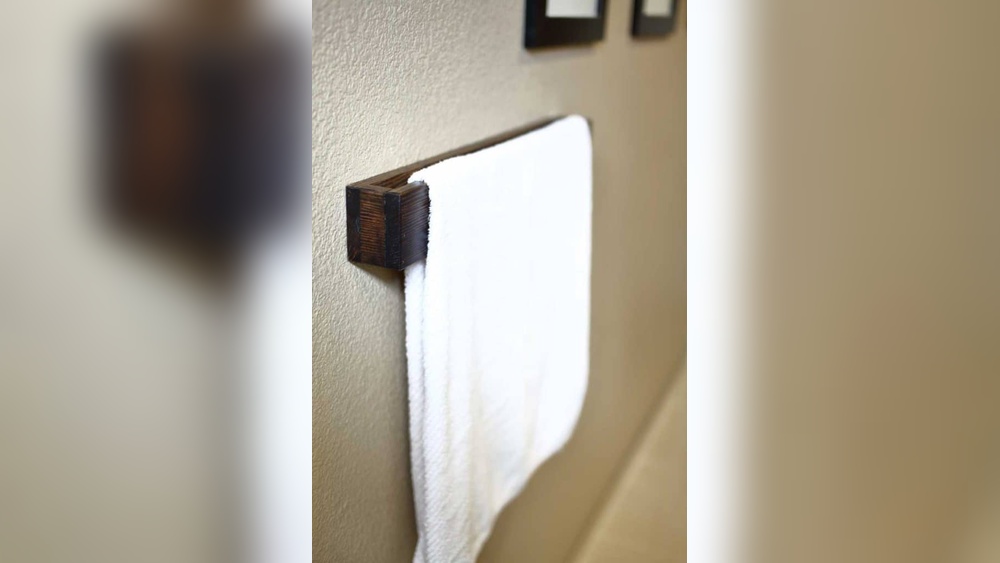
Deciding On Size And Design
Start by choosing the size of your towel rack. Measure the wall space available. Think about how many towels you want to hang. The design should match your bathroom style. Simple designs work well for most rooms. You can choose straight bars or curved ones. Keep your towel rack easy to use and clean.
Measuring And Marking Wood
Next, select the wood pieces for your rack. Use a pencil to mark where to cut. Measure twice to avoid mistakes. Mark the length of each bar carefully. Mark the positions for holes or screws. Clear markings help during assembly and ensure accuracy.
Selecting Bar Placement
Place the bars so towels hang freely without touching each other. Space the bars evenly for a neat look. Consider the height for easy reach. Leave enough space between bars for air circulation. Good placement helps towels dry faster and prevents mildew.
Cutting And Preparing Wood
Cutting and preparing wood is the first step in making wooden towel rack bars. This step shapes the wood and gets it ready for assembly. Careful cutting and smoothing help the rack look neat and last longer.
Focus on measuring the wood accurately before cutting. Use sharp tools for clean cuts. Preparing the wood well makes the building process easier and safer.
Cutting Bars To Length
Measure the length of each towel bar carefully. Mark the wood with a pencil where you will cut. Use a handsaw or power saw for straight cuts. Cut slowly to avoid splintering the wood. Double-check the length after cutting each bar.
Sanding And Smoothing Edges
Sand all edges of the cut wood bars. Use medium-grit sandpaper to remove rough spots and splinters. Then switch to fine-grit sandpaper for a smooth finish. Sand in the direction of the wood grain. Smooth edges prevent injuries and give a polished look.
Drilling Holes For Assembly
Mark where the holes will go on each bar. Use a drill with the right bit size for screws or dowels. Drill slowly to avoid cracking the wood. Keep holes straight and even for a strong assembly. Clean any wood dust from the holes before joining parts.
Credit: www.advancedresources.com
Assembling The Rack
Assembling the wooden towel rack is an important step. It brings all parts together to create a sturdy and functional rack. Careful assembly ensures the rack holds towels safely and looks great. Follow these steps to join the bars to the frame and secure everything tightly.
Joining Bars To Frame
Place the wooden bars evenly across the frame. Make sure they fit snugly in the slots or grooves. Align each bar so it sits straight and level. Check spacing to allow enough room for towels. Hold the bars firmly while preparing to fasten them.
Using Screws And Wood Glue
Apply a thin line of wood glue on each contact point. This creates a strong bond between bars and frame. Next, drill pilot holes to prevent wood from splitting. Use screws to attach each bar securely. Tighten screws without cracking the wood. The glue and screws together make the rack durable.
Ensuring Stability And Alignment
After fastening, double-check all bars for level alignment. Use a carpenter’s square or level tool for accuracy. Press on the rack gently to test stability. Tighten any loose screws found during this check. Proper alignment and stability prevent wobbling and increase safety.
Finishing Touches
Finishing touches give your wooden towel rack a polished look. They also protect the wood. These steps make your rack last longer and look great in your bathroom.
Applying Stain Or Paint
Choose a stain or paint color that matches your bathroom decor. Use a brush or cloth to apply it evenly. Let the first coat dry completely before adding another. Stains bring out the wood’s natural beauty. Paint covers the wood and adds color. Both protect the wood from daily wear.
Sealing For Moisture Resistance
Bathrooms have high moisture levels. Sealing the wood stops water damage and warping. Use a clear sealant or varnish made for wood. Apply it in thin, even coats. Let each coat dry fully before the next. A good sealant keeps your rack safe from steam and splashes.
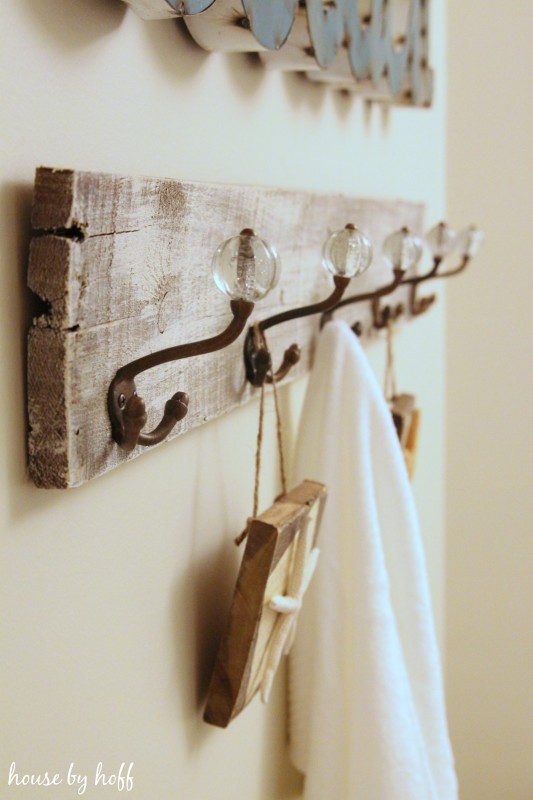
Mounting The Rack On Walls
Find the right spot on your bathroom wall. Use a level to keep the rack straight. Mark the holes for screws with a pencil. Drill pilot holes to avoid splitting the wood. Attach the rack firmly using wall anchors if needed. Make sure the rack feels strong and secure before use.
Credit: www.impconsultores.com
Maintenance Tips
Maintaining your wooden towel rack bars keeps them looking fresh and strong. Regular care helps the wood last longer and stay beautiful. Simple steps can protect your rack from wear and damage.
Cleaning The Wooden Surface
Use a soft cloth to dust the wooden bars often. Wipe with a damp cloth to remove dirt or stains. Avoid harsh cleaners that can damage the wood finish. Dry the surface fully after cleaning to stop water spots.
Preventing Damage From Moisture
Wood and water do not mix well over time. Keep your towel rack dry by removing wet towels promptly. Use a water-resistant finish on the wood to block moisture. Ventilate the bathroom to reduce humidity around the rack.
Periodic Inspections And Repairs
Check your towel rack for cracks or loose parts regularly. Tighten screws or nails that may have loosened. Sand rough spots gently to prevent splinters. Apply wood oil or varnish again if the finish fades or peels.
Frequently Asked Questions
What Materials Are Needed For Wooden Towel Rack Bars?
You need wooden bars, screws, brackets, wood glue, sandpaper, and finish. Choose sturdy wood like pine or oak for durability. Proper tools like a drill and saw are essential for cutting and assembly.
How Do You Assemble Wooden Towel Rack Bars?
Cut wooden bars to size, sand edges smooth. Attach brackets to the wall securely. Fix bars onto brackets using screws and wood glue. Ensure everything is level and firmly attached for safety.
Can I Customize The Size Of Towel Rack Bars?
Yes, you can cut wooden bars to any length. Measure your space accurately before cutting. Custom sizes help fit unique bathroom layouts perfectly and improve functionality.
What Finish Is Best For Wooden Towel Racks?
Use water-resistant varnish or wood sealant for protection. This prevents moisture damage and extends the rack’s lifespan. Choose finishes that enhance the wood’s natural look.
Conclusion
Making wooden towel rack bars is simple and fun. You only need basic tools and wood pieces. Follow the steps carefully to get strong, useful racks. These racks save space and keep towels neat. You can paint or stain them to match your room.
Building your own rack adds a personal touch to your home. Try this project and enjoy the satisfaction of creating something by yourself. It’s a great way to learn and decorate at once. Your bathroom will look nicer and stay organized.
Give it a try today!