Are you thinking about upgrading your home security with a video doorbell but worried that installation might be too complicated? You’re not alone.
Many people hesitate because they imagine a tangle of wires and confusing instructions. The good news is, installing a video doorbell is easier than you think. Whether you’re a tech beginner or someone who just wants a quick and hassle-free setup, this guide will walk you through every step.
By the end, you’ll have the confidence to install your video doorbell smoothly and start enjoying the peace of mind it brings. Keep reading to discover how simple your home can become smarter and safer.
Choosing The Right Video Doorbell
Choosing the right video doorbell is important for easy installation and daily use. The right choice depends on your home setup and what features you want. This section helps you decide the best video doorbell for your needs. It covers types of doorbells, compatibility, and key features.
Wired Vs. Wireless Options
Wired video doorbells connect to your home’s existing doorbell wires. They get constant power and usually have stable video quality. Installation takes more time and may need some electrical work. Wireless doorbells run on batteries. They are easier to install and can be placed anywhere. Battery life varies, so charging or replacing batteries is needed. Choose wired for steady power. Choose wireless for flexible placement.
Compatibility With Existing Doorbell
Check if the new video doorbell works with your current doorbell system. Some doorbells need a chime or transformer that fits your wires. Others work without any wiring. Compatibility saves time and extra parts. If unsure, look at the product details or ask a professional. This step avoids problems during installation.
Features To Consider
Look for features that match your needs. High video resolution gives clear images. Night vision helps see visitors in the dark. Motion detection alerts you when someone approaches. Two-way audio lets you talk to visitors. Some doorbells include cloud storage or local storage. Choose features that improve your home’s security and convenience.
Gathering Tools And Materials
Before installing a video doorbell, gathering the right tools and materials is crucial. This step makes the installation smoother and faster. Having everything ready avoids interruptions and frustration.
Preparation also helps ensure safety and accuracy. Knowing what tools you need and how to use them will give you confidence. It also reduces the risk of mistakes during installation.
Essential Tools Needed
Start with a drill and drill bits for mounting the doorbell. A screwdriver is necessary for tightening screws securely. Wire strippers help prepare electrical wires for connection. A voltage tester checks if wires have power, ensuring safety. A level tool keeps the doorbell straight on the wall. Finally, have screws and anchors suitable for your wall type.
Safety Precautions
Turn off the power at the circuit breaker before starting any electrical work. Use a voltage tester to confirm no electricity flows in the wires. Wear safety glasses to protect your eyes from dust and debris. Avoid working in wet conditions to prevent electric shocks. Keep your workspace clean and organized to prevent accidents. Always follow the manufacturer’s instructions carefully.
Preparing The Installation Site
Preparing the installation site is the first step to a smooth video doorbell setup. This phase ensures the spot is ready and safe for your new device. Taking time here saves effort later and helps avoid common problems.
Removing Old Doorbell
Start by turning off the power at the breaker. This stops any electric shocks. Unscrew the old doorbell from the wall carefully. Detach the wires and keep them safe. You may need these for your new doorbell.
Checking Power Supply
Check the voltage on the wires using a voltage tester. Most video doorbells need 16 to 24 volts. No power? You might need an electrician to install a transformer. Good power supply means your doorbell works properly.
Marking Mounting Points
Hold the mounting bracket against the wall. Use a pencil to mark screw holes clearly. Double-check the position and level before drilling. Correct marks make installation easier and keep the doorbell steady.

Credit: www.youtube.com
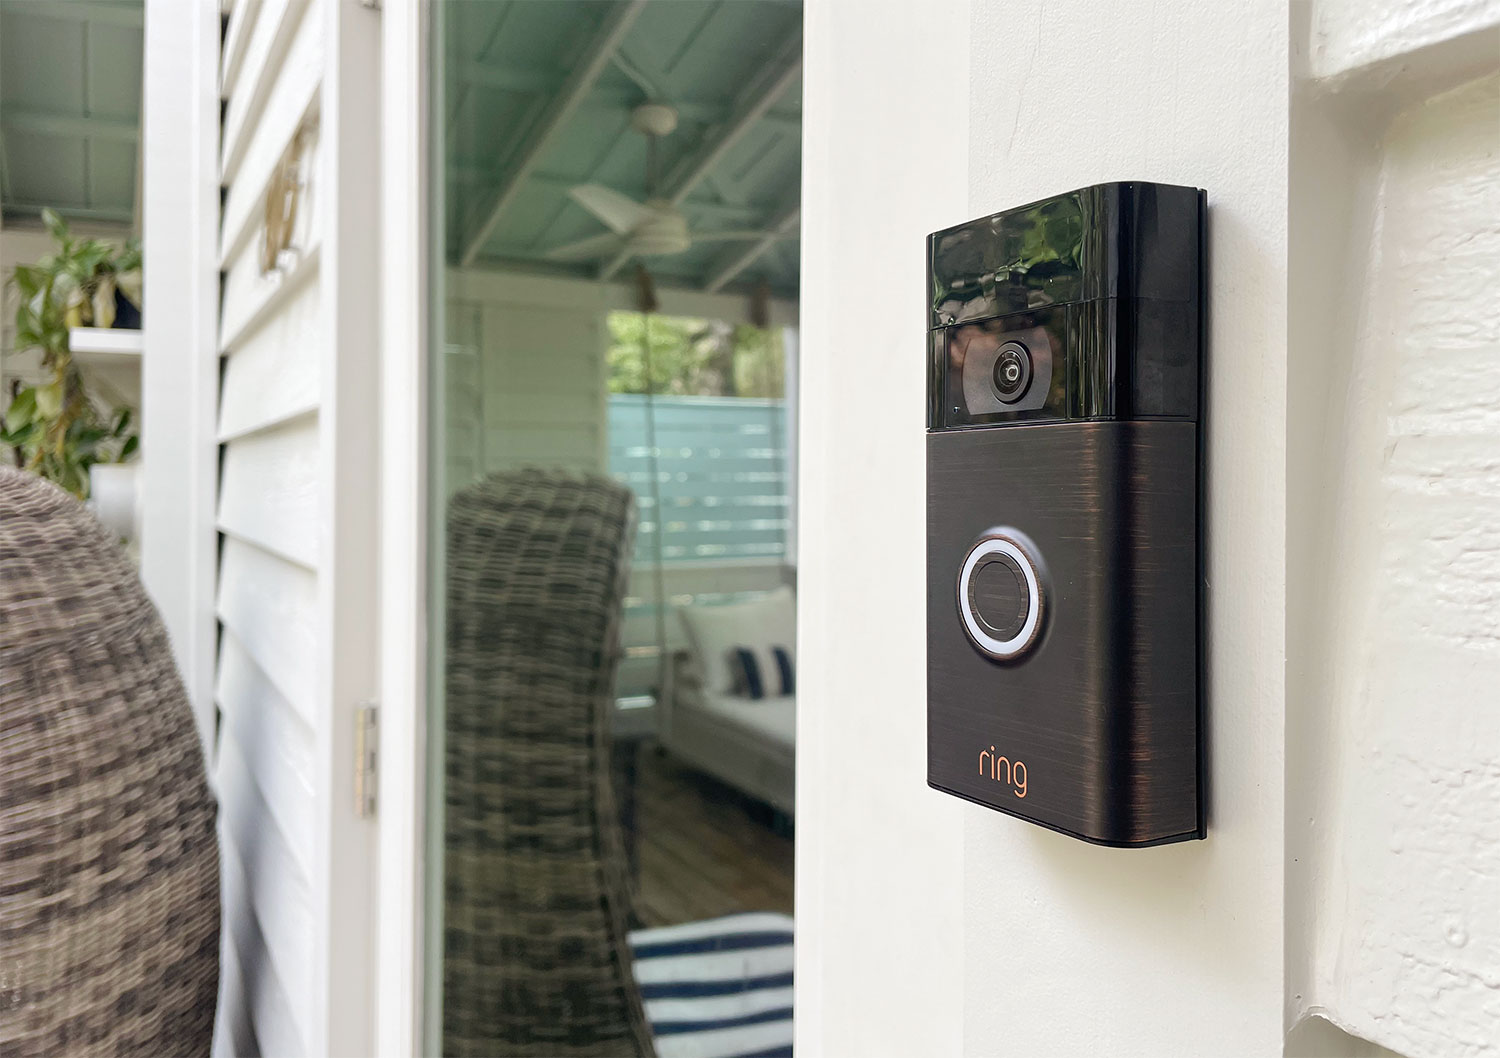
Mounting The Video Doorbell
Mounting the video doorbell is a key step for a secure and clear view. It ensures the device stays in place and works well. This part of installation is simple and quick with the right tools. Follow these steps to mount your video doorbell correctly.
Attaching The Mounting Bracket
First, choose the spot near your door. The bracket holds the doorbell firmly. Use the screws that come with the doorbell. Hold the bracket against the wall. Mark the holes with a pencil. Drill small holes if needed. Screw the bracket tightly to the wall. Make sure it does not move.
Securing The Doorbell Unit
Next, attach the doorbell to the bracket. Align it carefully with the bracket hooks or slots. Press the doorbell until it clicks or fits snugly. Some models use extra screws to lock the unit. Use a screwdriver to secure these screws. Check if the doorbell is stable. It should not wiggle or fall off.
Connecting To Power
Connecting a video doorbell to power is a key step in its installation. This connection allows the device to function properly and stay active for live video and alerts. There are two common power options: wired connection and battery power. Each type has its own simple process to follow.
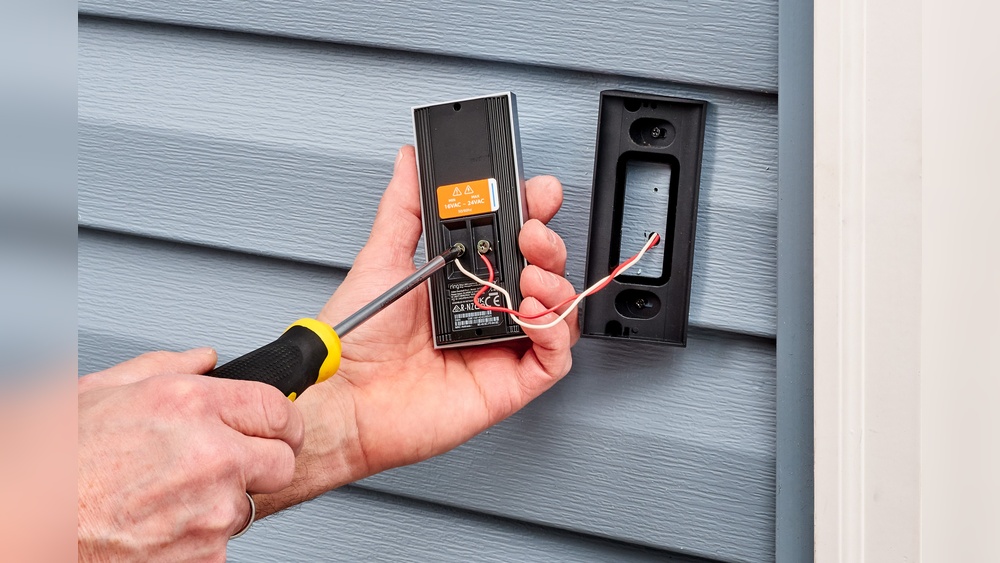
Wired Connection Steps
First, turn off the power at the circuit breaker for safety. Locate the existing doorbell wires on your home’s wall. Remove the old doorbell carefully to access the wires. Connect the video doorbell wires to the existing wires using the provided screws or connectors. Secure the doorbell to the wall with screws. Turn the power back on and test the video doorbell to ensure it powers up. Check the app or device screen to confirm the connection works well.
Battery Installation Tips
Start by opening the battery compartment on the back of the video doorbell. Insert the battery correctly, matching the positive and negative ends. Some batteries need charging before use; check the manual for this. Close the compartment securely to protect from weather. Battery-powered doorbells offer flexibility in placement. Remember to charge or replace batteries regularly for uninterrupted service.
Setting Up The Software
Setting up the software is a key step in installing a video doorbell. It allows the device to connect with your smartphone. This connection lets you see and talk to visitors from anywhere. The software setup is simple and quick. Follow these steps for a smooth start.
Downloading The App
First, download the video doorbell app from your phone’s app store. Search using the doorbell brand name. The app controls the doorbell and sends notifications. Install it and open the app to begin setup.
Connecting To Wi-fi
Next, connect the doorbell to your home Wi-Fi network. The app will guide you through this step. Enter your Wi-Fi name and password carefully. A strong Wi-Fi signal ensures good video quality.
Configuring Settings
Finally, customize the settings in the app. Set motion detection, alerts, and sound preferences. You can also add family members to share access. Adjust settings to fit your needs and lifestyle.
Testing The Doorbell
Testing the video doorbell is an important step after installation. It ensures the device works correctly. This process helps confirm the video and audio quality and the notification system. Proper testing avoids future issues and keeps your home secure.
Checking Video And Audio
Start by looking at the video feed on your phone or device. The picture should be clear and bright. Check the camera view in different lighting conditions. Speak into the doorbell microphone. Listen to the sound from the speaker. Both audio directions need to be clear and loud enough. Adjust settings if the video or audio is poor.
Verifying Notifications
Press the doorbell button to test alerts. Your phone should get a notification quickly. The alert sound must be loud and noticeable. Check notifications on all connected devices. Confirm alerts trigger when motion is detected. This step confirms you won’t miss any visitors or deliveries.
Credit: www.younghouselove.com
Troubleshooting Common Issues
Video doorbells are useful but sometimes face common problems. Troubleshooting these issues helps keep your device working well. This section covers simple fixes for common problems.
Connectivity Problems
Video doorbells need a strong Wi-Fi signal to work. Check your router and move it closer if needed. Restart your router to refresh the connection. Make sure your doorbell is within Wi-Fi range. Use the app to test signal strength. Reset the doorbell if it still won’t connect.
Power Issues
Power problems stop the doorbell from working. Confirm the doorbell’s power source is on. For battery models, charge or replace batteries. For wired models, check the wiring and fuse. Use a voltage tester to see if power flows. Replace faulty wires or call an electrician if unsure.
App Glitches
The doorbell app controls many functions. Restart the app if it freezes or crashes. Update the app to the latest version. Clear the app cache in your phone’s settings. Reinstall the app if problems continue. Check your phone’s internet connection too.
:strip_icc()/BHG-how-to-install-video-doorbell-6833360-part-02-step-05-418dcd0ead7b415181d36f311ff079be.jpg)
Credit: kdfoundation.org
Frequently Asked Questions
How Do Video Doorbells Connect To Wi-fi?
Video doorbells connect wirelessly to your home’s Wi-Fi. This enables real-time video streaming and notifications on your phone. A stable Wi-Fi signal ensures smooth video and audio communication during use.
What Tools Are Needed For Video Doorbell Installation?
Common tools include a drill, screwdriver, and level. Some models may require a voltage tester or wire stripper. Always check the manufacturer’s instructions for specific tool requirements.
Can I Install A Video Doorbell Without Professional Help?
Yes, many video doorbells offer easy DIY installation. Most come with clear instructions and mounting hardware. Basic electrical knowledge helps but is not always necessary.
How Do Video Doorbells Work With Existing Doorbell Wiring?
Most video doorbells can replace your current doorbell. They often use existing wiring for power. Some models also offer battery-powered options for wire-free installation.
Conclusion
Installing a video doorbell is simple and quick. You only need a few tools and clear steps. Most models come with easy guides to follow. Mount the device, connect it to Wi-Fi, and test the camera. This small effort adds big security to your home.
Anyone can do it with patience and care. Start enjoying the convenience and safety it brings today.