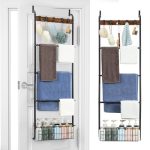

Are you tired of towels cluttering your bathroom or kitchen? A wooden towel rack can be the perfect solution to keep your space organized and stylish.
Imagine having a sturdy, beautiful rack that fits your needs perfectly—built by your own hands. In this guide, you’ll discover simple steps to make a wooden towel rack that looks great and lasts long. Whether you’re a beginner or just want a quick project, this easy-to-follow plan will help you create something useful and unique.
Ready to transform your space with a touch of wood? Let’s get started!

Credit: www.youtube.com
Materials And Tools Needed
Creating a wooden towel rack requires the right materials and tools. Choosing good wood and the correct tools makes the project easier. This section covers everything you need to start building your towel rack. Prepare well to ensure a smooth and fun build process.
Selecting The Right Wood
Pick wood that is strong and water-resistant. Cedar and teak are good choices for bathrooms. Pine is cheaper but needs sealing to resist moisture. Make sure the wood is smooth and free of cracks. Choose a size that fits your space and towel needs.
Essential Tools List
You need some basic tools to build your towel rack. A saw will help cut the wood pieces. A drill and screws are needed to join parts. Sandpaper smooths rough edges for a clean finish. A measuring tape ensures all parts fit well. A pencil helps mark cut lines accurately.
Optional Supplies
Paint or wood stain adds color and protects the wood. Wood glue can strengthen joints along with screws. Hooks or rods can be added for extra hanging space. A level helps keep the rack straight on the wall. Rubber pads protect your wall from scratches.

Credit: www.youtube.com
Design And Measurements
Design and measurements are key steps in making a wooden towel rack. They help you build a rack that fits your space and needs. Careful planning saves time and materials. It also ensures your rack looks good and works well.
Choosing The Rack Style
Decide on the style of your towel rack first. Do you want a wall-mounted rack or a freestanding one? Simple bars, hooks, or shelves? Think about your bathroom space and how many towels you want to hold. A neat style matches your room’s look and feels easy to use.
Taking Accurate Measurements
Measure the space where the rack will go. Check width, height, and depth carefully. Use a tape measure and write down the numbers. Measure your towels too, to know how much space they need. Accurate measurements stop mistakes during cutting and assembly.
Sketching The Plan
Draw a simple plan of your towel rack. Show the shape and size clearly. Mark the measurements on the sketch. Include all parts like bars, sides, and supports. A clear drawing guides you step-by-step while building. It helps avoid confusion and saves time.
Cutting The Wood
Cutting the wood is the first step to shape your wooden towel rack. Accurate cuts give your project a clean look. Take your time and prepare well. Use the right tools and follow safety rules. This step sets the base for the whole build.
Marking Cut Lines
Start by measuring the wood pieces carefully. Use a pencil to mark where you need to cut. Draw straight lines with a ruler or square. Clear marks help you cut straight and avoid mistakes. Double-check your measurements before cutting.
Safe Cutting Techniques
Wear safety goggles to protect your eyes. Use clamps to hold the wood steady. Cut slowly and follow the marked lines. Keep your fingers away from the blade. Use a saw that fits the wood thickness. Safety is very important for a good result.
Sanding The Pieces
After cutting, smooth the edges with sandpaper. Sand to remove splinters and rough spots. Use fine-grit sandpaper for a clean finish. Smooth wood feels better and looks nicer. Wipe away dust before assembling the rack.

Credit: www.diypete.com
Assembling The Rack
Assembling the wooden towel rack is the step where your project starts to take shape. This process joins all the pieces together to create a strong and useful rack. Careful assembly ensures your towel rack will hold up well and look great in your bathroom or kitchen.
Joining The Parts
Start by laying out all the wooden parts on a flat surface. Match each piece according to the plan. Connect the horizontal bars to the vertical supports. Use clamps to hold parts steady. Check that all edges line up evenly. This step sets the base for a firm rack.
Using Wood Glue And Screws
Apply wood glue to the joining surfaces for extra strength. Spread the glue evenly to cover all contact points. Press the parts together firmly. Insert screws into pre-drilled holes to keep the pieces secure. Screws add durability and keep the rack stable. Wipe away any excess glue before it dries.
Ensuring Stability
Check the rack for any wobbling. Tighten screws if parts feel loose. Use a level to make sure the rack is straight. Reinforce weak spots with extra screws or brackets. Test by gently pressing on the rack. A stable towel rack will hold towels without tipping or bending.
Finishing Touches
Finishing touches give your wooden towel rack a polished look. They protect the wood and make the rack last longer. These final steps add style and function. Focus on stain or paint, sealing, and adding hooks or bars.
Applying Stain Or Paint
Choose a stain or paint that matches your bathroom decor. Stain shows the wood grain and gives a natural look. Paint adds color and hides the wood texture. Use a brush or cloth to apply evenly. Let each coat dry before adding another. This step brightens and protects the wood surface.
Sealing For Durability
Seal the rack to protect it from water and wear. Use a clear wood sealer or varnish. Apply thin coats with a clean brush. Allow each coat to dry fully. Sealing helps stop water damage and keeps the wood smooth. It also makes cleaning easier.
Adding Hooks Or Bars
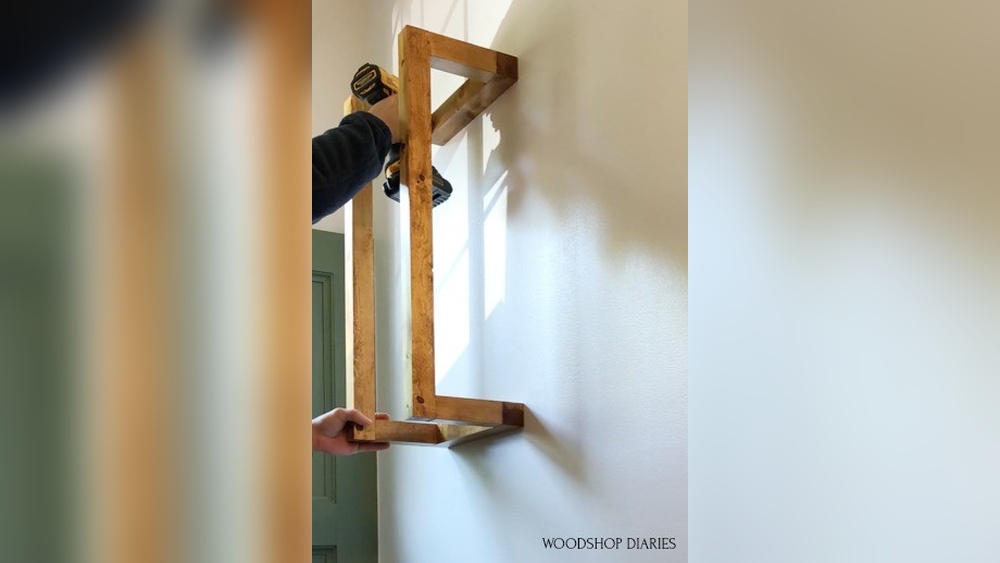
Add hooks or bars to hang towels easily. Choose sturdy metal or wooden hooks that match your style. Measure and mark spots evenly on the rack. Attach hooks with screws or nails. Bars can be fixed horizontally for towel hanging. This step improves the rack’s use and looks.
Mounting And Placement
Mounting and placement of your wooden towel rack are key to its function and look. Proper installation keeps towels secure and easy to reach. Thoughtful placement enhances bathroom space and style.
Wall Mounting Tips
Use a stud finder to locate wall studs for strong support. Mark the spots where you will drill holes. Drill pilot holes to prevent wood from splitting. Use screws that fit your towel rack’s mounting holes. Check the rack’s level with a spirit level. Tighten screws firmly but avoid over-tightening.
Choosing The Perfect Spot
Pick a spot near the shower or sink for easy access. Avoid placing the rack where it blocks doors or drawers. Choose a height comfortable for all users. Make sure the rack will not get wet from splashing water. Consider wall space that fits your towel rack size.
Maintenance Advice
Clean the wooden rack regularly with a soft, dry cloth. Avoid harsh chemicals that can damage wood finish. Check screws and brackets every few months to keep them tight. Apply a wood sealant to protect against moisture. Dry towels before hanging to prevent mold growth.
Frequently Asked Questions
What Materials Are Needed To Make A Wooden Towel Rack?
You need wood planks, screws, sandpaper, wood glue, a drill, and paint or varnish. Choose durable wood like pine or oak for strength and longevity.
How Do You Assemble A Wooden Towel Rack?
Cut wood to size, sand edges smooth, then drill pilot holes. Use wood glue and screws to join pieces securely. Finish with paint or varnish for protection and style.
Can I Customize The Size Of My Towel Rack?
Yes, you can easily adjust the length and height to fit your space. Measure your area first to ensure the rack will hold your towels properly.
How Do I Finish A Wooden Towel Rack For Durability?
Apply a coat of paint, stain, or varnish. This protects the wood from moisture and wear. Allow drying completely before use to ensure a lasting finish.
Conclusion
Building a wooden towel rack can be simple and fun. You only need basic tools and wood. Follow clear steps to cut, assemble, and finish your rack. This project adds charm and helps keep towels organized. It also saves money compared to store-bought racks.
Try making one yourself and enjoy a useful, handmade item. Small projects like this boost your skills and creativity. Give it a try—you might be surprised how easy it is!