
Trying to remove a towel rack but can’t find a set screw? You’re not alone.
Many towel racks are designed without visible screws, making the removal process confusing and frustrating. But don’t worry—removing your towel rack without a set screw is easier than you think. You’ll discover simple, step-by-step methods to get the job done quickly and without damage.
Keep reading, and you’ll have your bathroom ready for a new look in no time.
Tools You’ll Need
Removing a towel rack without a set screw needs the right tools. Using proper tools helps avoid damage to walls and the rack itself. Prepare all tools before starting the task. This makes the job faster and safer.
Basic Hand Tools
A screwdriver is essential. Choose one with a flat or Phillips head. A utility knife helps cut paint or caulk around the rack. A putty knife can gently pry the rack away from the wall. A tape measure checks the rack’s size and placement. A small hammer may be needed for light taps.
Specialty Items
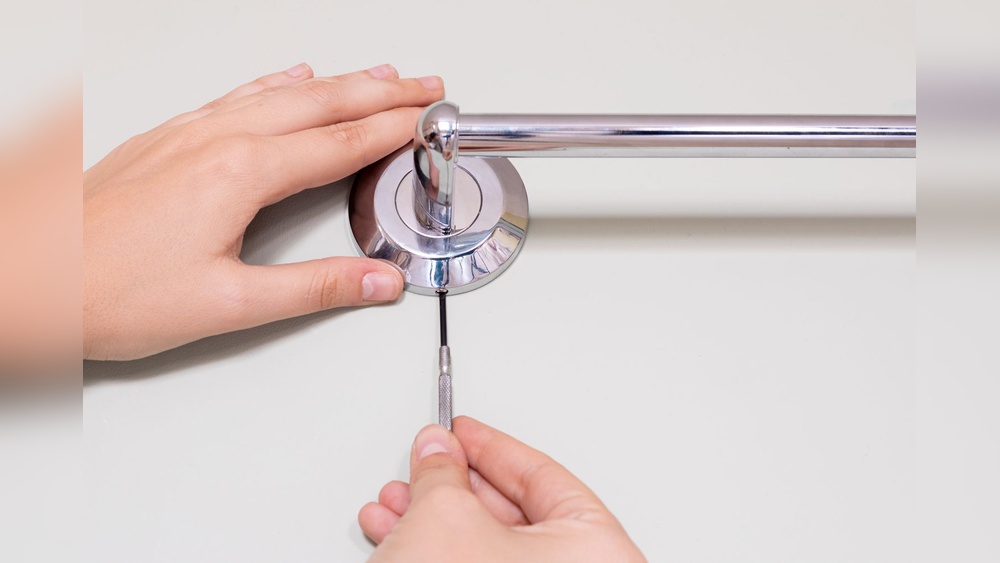
A suction cup with a handle helps pull the rack if it is stuck. A plastic pry tool can protect walls while removing the rack. If the rack has hidden clips, a thin pick or dental tool can release them. A cordless drill with a small bit can remove hidden screws. Use gloves for safety and better grip.
Identify The Mounting Type
Removing a towel rack without a set screw first needs knowing how it is mounted. Identifying the mounting type helps you avoid damage to walls and the rack itself. Some racks look simple but hide tricky mounting methods. Understanding these types makes removal easier and safer.
Hidden Brackets
Some towel racks use hidden brackets for a clean look. The rack slides onto a bracket fixed to the wall. No screws show on the outside. To remove, find a small gap or slot. Gently lift or slide the rack away from the wall. This frees the rack from the bracket without tools.
Adhesive Mounts
Adhesive mounts stick the rack directly to the wall. No screws or brackets hold it. These racks peel off by hand or with a tool. Use heat from a hairdryer to soften the glue. Slowly pull the rack or adhesive strip away. This method works well on smooth surfaces.
Screwless Designs
Screwless towel racks use pressure or clips to hold on. They fit tightly between two wall points or grip edges. To remove, press or push the rack gently. Some snap off with a bit of force. Check for clips or tabs that release the rack easily.
Prepare The Area
Preparing the area is an important first step before removing a towel rack without a set screw. This step helps keep the space safe and clean. It also protects walls and nearby objects from damage. Taking time to prepare makes the task easier and safer.
Clear Surroundings
Remove all items around the towel rack. Take off towels, toiletries, and any decorations nearby. Clear the countertop and shelves close to the rack. This space lets you move freely and avoid accidents. It also prevents anything from falling or breaking during removal.
Protect Surfaces
Cover the floor and countertop near the towel rack. Use a drop cloth, old towel, or plastic sheet. This protects surfaces from dust, dirt, and scratches. Place painter’s tape on the wall edges around the rack. The tape stops paint or wall damage during removal. Protecting surfaces saves time and effort in cleaning later.
Loosen The Rack
Loosening a towel rack without a set screw requires a careful approach. The rack is often held tightly to the wall with hidden fasteners or adhesive. Taking time to gently loosen it helps avoid damage to the wall or the rack itself.
Start by applying pressure in the right spots. This helps to shift the rack enough for removal. Using tools carefully can make the process smoother and safer.
Apply Gentle Pressure
Place your hands firmly on the towel rack. Push or pull gently to test if it moves. Avoid using force. The goal is to find any slight movement.
Try rocking the rack back and forth slowly. This can loosen any adhesive or hidden clips. Stop if you feel strong resistance. Moving too fast might break the rack.
Use A Pry Tool Carefully
Choose a flat pry tool like a plastic putty knife. Avoid metal tools that can scratch the wall or rack. Insert the tool between the rack base and the wall.
Work the tool gently around the edges. Small, steady movements help lift the rack. Do not pry too hard in one spot. This spreads pressure evenly and reduces damage.
Check progress frequently. Remove the tool and try to move the rack by hand again. Repeat until the rack loosens enough to pull off.
Remove Adhesive Residue
After removing a towel rack without a set screw, some adhesive residue may remain on the wall. This sticky leftover can look messy and attract dirt. Removing it carefully protects your wall’s paint and texture. Use gentle methods to clean the residue without causing damage.
Heat Method
Apply heat to soften the adhesive. Use a hairdryer on medium heat. Hold it close to the residue for 30 seconds. The warmth makes the glue easier to peel away. Gently scrape the residue with a plastic card or putty knife. Avoid metal tools to prevent wall scratches. Repeat heating and scraping as needed until the surface is clean.
Solvent Application
Use a mild solvent to dissolve sticky residue. Rubbing alcohol or nail polish remover works well. Dab a small amount on a cloth. Test on a hidden wall spot first. Rub the residue gently in circular motions. Let the solvent sit for a few minutes. Wipe away softened glue with a clean cloth. Rinse the area with water to remove solvent traces.

Credit: www.doityourself.com
Fix Wall Damage
Removing a towel rack can leave marks and holes on your wall. Fixing this damage makes your wall look clean and smooth again. You need to fill holes and smooth rough patches for a fresh finish. This step helps prepare the wall for painting or new fixtures.
Fill Small Holes
Use spackle or wall filler for tiny holes. Apply a small amount with a putty knife. Press it gently into the hole to fill it completely. Let the filler dry as per the product instructions. After drying, check if the hole is fully covered. Add more filler if needed and let it dry again.
Smooth Rough Areas
Rough spots can ruin the wall’s smooth look. Use sandpaper to gently smooth these areas. Sand in a circular motion for even results. Be careful not to damage the surrounding paint. Wipe away dust with a dry cloth after sanding. This step helps paint stick better and look neat.
Install New Rack Options
After removing your old towel rack, you need to install a new one. There are many options to choose from. Some racks do not require screws, while others use the traditional mounting method. Both types have benefits and work well in different spaces.
Screwless Alternatives
Screwless towel racks are easy to install. They use strong adhesive or suction cups to hold them in place. This method avoids drilling holes in the wall. Perfect for renters or those who want a quick update. Just clean the wall surface well before applying. These racks are usually removable without damage.
Some models use magnetic strips or tension rods for support. They work best on smooth surfaces like tiles or glass. Note the weight limit, as heavy towels might need stronger support. Screwless racks offer a neat look and keep your walls intact.
Traditional Mounted Racks
Traditional towel racks use screws and anchors for a secure hold. This option is very sturdy and supports heavier towels. You need basic tools like a drill, screwdriver, and level. Mark the spots carefully to keep the rack straight. Anchors help hold the screws firmly in drywall or plaster.
This method is ideal for long-term use and heavy towels. It works on almost any wall type. You can find racks in many styles and finishes. Choose one that matches your bathroom decor for a polished look.

Credit: diy.stackexchange.com
/how-to-remove-towel-bar-5221017-hero-01-c6a21614aaeb4e9ca8071b79bd398ef6.jpg)
Credit: www.thespruce.com
Frequently Asked Questions
How Do I Remove A Towel Rack Without A Set Screw?
To remove a towel rack without a set screw, gently pry off the decorative cover. Then, unscrew the mounting bracket hidden underneath. Use a flathead screwdriver or putty knife carefully to avoid wall damage.
What Tools Are Needed To Remove A Towel Rack?
You will need a flathead screwdriver, putty knife, and possibly a drill. These tools help pry off covers and unscrew mounting brackets safely.
Can I Remove A Towel Rack Without Damaging The Wall?
Yes, by carefully prying off covers and unscrewing brackets, you minimize wall damage. Use gentle pressure and proper tools to avoid holes or paint chipping.
Why Doesn’t My Towel Rack Have A Visible Set Screw?
Some towel racks hide set screws under decorative covers or use adhesive mounts. This design keeps screws invisible for aesthetic reasons.
Conclusion
Removing a towel rack without a set screw can be simple. Start by checking for hidden clips or covers. Use gentle force to avoid wall damage. Keep tools handy like a flathead screwdriver or a putty knife. Take your time to avoid breaking the rack or hurting the wall.
With patience, you can remove the rack cleanly. Now, you can easily replace or repair your towel rack. This small task saves money and improves your bathroom’s look. Try these steps next time you need to remove a rack without screws.