
Are you staring at that builder-installed towel rack and wondering how to get it off without damaging your walls? Removing it might seem tricky, but with the right steps, you can do it quickly and cleanly.
Whether you want to upgrade your bathroom or just need a fresh start, this guide will walk you through the simple process. Keep reading to discover easy tips and tricks that will save you time, effort, and frustration—so you can enjoy your bathroom makeover sooner than you think.
Tools Needed
Removing a builder-installed towel rack requires a few simple tools. Having the right tools makes the job easier and faster. This section lists the tools you need for a smooth removal process.
Screwdriver
A screwdriver is essential for removing screws from the towel rack. Most racks use either a flathead or Phillips head screw. Choose the correct screwdriver to avoid damaging the screws or the wall.
Utility Knife
A utility knife helps cut through caulk or paint around the towel rack. This prevents damage to the wall when you pull the rack away. Be careful to cut only the caulk or paint, not the wall surface.
Pry Bar Or Putty Knife
A pry bar or putty knife assists in gently lifting the towel rack from the wall. These tools help separate the rack without causing too much damage. Use slow, steady pressure to avoid cracking the wall.
Stud Finder
A stud finder locates the wall studs behind the towel rack. Knowing stud placement helps when removing screws or planning new mounting points. This tool ensures you do not drill into empty drywall.
Safety Gear
Safety glasses protect your eyes from dust and debris. Work gloves protect your hands from sharp edges or splinters. Wear both to stay safe during the removal process.
Prepare The Area
Clear the area around the towel rack to work safely and easily. Gather tools like a screwdriver and a cloth to protect the wall. Cover the floor with a drop cloth to catch dust and debris.
Clear The Workspace
Start by removing all items near the towel rack. Move towels, toiletries, and decorations away. This prevents damage and gives you room to work safely.
Protect Surfaces
Cover the floor and nearby walls with a drop cloth or old towel. This stops scratches and collects dust or debris. Protecting these areas keeps your bathroom clean.
Gather Necessary Tools
Collect tools like a screwdriver, putty knife, and a drill if needed. Having tools ready saves time. Check each tool works properly before starting.
Turn Off Power Nearby
If the towel rack is near electrical outlets or lights, switch off the power. Safety first. This reduces risk of electric shock during removal.
Turn Off Water Supply
Before removing a builder-installed towel rack, turning off the water supply is essential. This step prevents leaks and water damage during the process. Even if the towel rack does not look connected to water pipes, nearby plumbing may be affected.
Shutting off the water supply keeps the area dry and safe. It also makes the removal process easier and cleaner. Always check for water valves near the towel rack.
Locate The Main Water Valve
Find the main water valve in your home. It is often near the water meter or where the water line enters the house. Turn the valve clockwise to shut off the water. This stops water flow to the entire house.
Turn Off The Local Water Valve
Look for a local valve near the towel rack. This valve controls water to the specific area. Turn it clockwise until it stops. This cuts water supply only to the bathroom or area with the towel rack.
Drain The Pipes
Open the faucet closest to the towel rack. Let water drain out completely. This step removes pressure in the pipes. It reduces the chance of water spills while removing the rack.
Check For Water Flow
Turn on the faucet to check if water is off. No water means the supply is successfully shut. If water still flows, recheck valves and turn them off tighter. Never skip this step before starting removal.
Locate Mounting Hardware
Locating the mounting hardware is the first step to remove a builder-installed towel rack. This step helps you find the screws or anchors holding the rack to the wall. Knowing where the hardware is makes removal easier and prevents wall damage.
Most towel racks have visible screws on the ends or under small caps. Sometimes, the hardware hides behind plastic covers that snap off. Take a close look at the rack to spot these details.
Check For Screw Covers
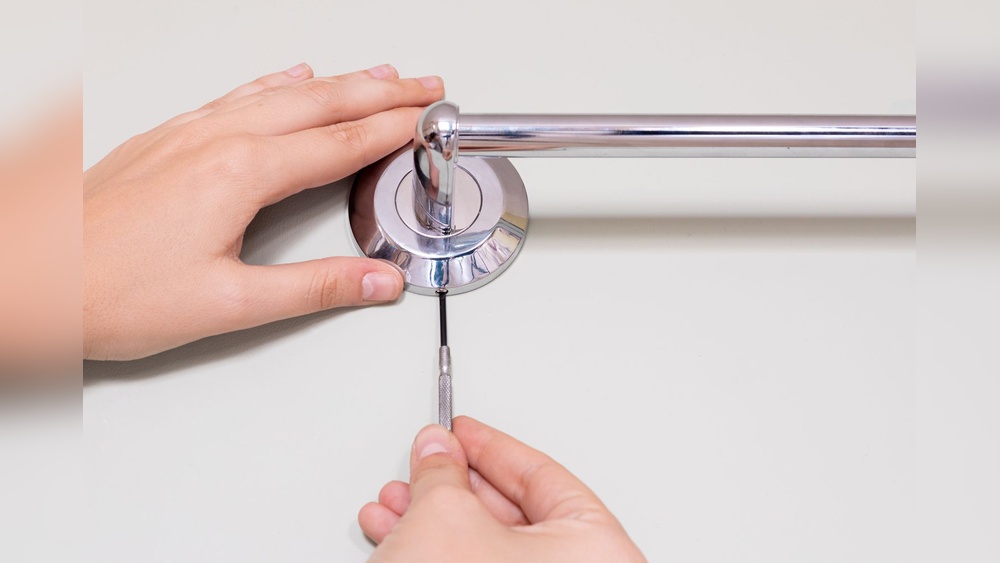
Look closely at the ends of the towel rack. Many racks have small plastic or metal covers hiding the screws. Use a flat tool to gently pry off these covers. This reveals the screws underneath.
Use A Flashlight For Better Visibility
A flashlight helps you see small screws or hidden brackets. Shine the light along the rack’s base and ends. This makes it easier to find all mounting points.
Feel For Loose Parts
Gently wiggle the rack to spot loose sections. Loose parts often indicate where screws or anchors are. This method helps find hidden hardware without damage.
Remove Screws And Brackets
Removing the screws and brackets is the key step in taking down a builder-installed towel rack. This part needs care to avoid wall damage. Use the right tools and follow clear steps for a smooth process.
Focus on the screws first. These hold the towel rack and brackets tightly to the wall. You need to loosen them carefully.
Gather The Right Tools
Start by collecting a screwdriver that fits the screws well. Usually, a Phillips head screwdriver works best. You might also need a flathead screwdriver for some brackets. Keep a small container nearby to hold the screws safely.
Locate And Remove All Screws
Look closely at the towel rack to find all screws. Some can hide under covers or end caps. Gently pry off these covers with a flathead screwdriver. Use the screwdriver to turn each screw counterclockwise. Take your time to avoid stripping the screws.
Detach The Brackets From The Wall
Once screws are out, the brackets may still stick to the wall. Pull them gently to detach. If they resist, wiggle slightly to loosen. Use a putty knife to help lift the bracket if needed. Watch out for any wall anchors behind the brackets.
:max_bytes(150000):strip_icc()/how-to-remove-towel-bar-5221017-hero-01-c6a21614aaeb4e9ca8071b79bd398ef6.jpg)
Credit: www.thespruce.com
Handle Wall Anchors
Removing a builder-installed towel rack often means dealing with wall anchors. These anchors hold the rack firmly to the wall. They keep the screws tight and the rack steady. Handling these anchors carefully prevents wall damage.
Wall anchors come in many types. Some are plastic, some metal. Each type needs a slightly different removal method. Knowing how to handle them helps keep your walls smooth and ready for new fixtures.
Identify The Type Of Wall Anchor
Look closely at the anchor after removing the towel rack. Plastic anchors are common in drywall. Metal anchors may look like small sleeves or springs. Recognizing the type helps choose the right tool and method.
Remove Plastic Wall Anchors
Try to pull out plastic anchors with pliers. If they resist, push them inside the wall gently. Use a screwdriver to widen the hole if needed. This avoids tearing the drywall around the anchor.
Remove Metal Wall Anchors
Metal anchors often twist or back out with a screwdriver. Turn slowly and steadily. If the anchor won’t budge, push it into the wall carefully. Avoid forcing it to stop wall damage.
Fill And Repair The Holes
After removing anchors, small holes stay behind. Fill them with spackling paste or wall filler. Smooth the surface with a putty knife. Let it dry and sand lightly for a clean finish.
Patch And Repair Wall
After removing a builder-installed towel rack, the wall usually looks rough. Holes, scratches, and marks often remain. Patching and repairing the wall brings it back to a smooth, clean state. This step is important before painting or decorating the space.
Repairing the wall is simple with the right tools. Filling holes, sanding the surface, and touching up paint will make the wall look new. Follow these easy steps for a clean finish.
Fill Holes
Start by cleaning loose debris from the holes. Use a putty knife to apply wall filler or spackle. Press the filler firmly into each hole. Smooth the surface with the knife to make it even. Let the filler dry fully as the instructions say.
Sand Surface
Once the filler is dry, sand the patched areas gently. Use fine-grit sandpaper for a smooth finish. Sand until the surface feels even with the rest of the wall. Wipe away dust with a dry cloth before painting.
Paint Touch-up
Match your wall paint color closely for the best look. Use a small brush to apply paint over the patched spots. Feather the paint edges to blend with the wall. Let the paint dry completely, then check for any spots that need another coat.
Credit: www.drivenbydecor.com
Clean Up Debris
After removing a builder-installed towel rack, cleaning up debris is essential. Dust, small nails, and broken wall pieces often remain. This mess can cause injury or damage if left unattended. A clean workspace makes the next steps easier and safer.
Gather Cleaning Supplies
Start by collecting a broom, dustpan, and vacuum cleaner. A damp cloth helps to wipe fine dust from surfaces. Gloves protect your hands from sharp debris. Prepare a trash bag for all waste materials.
Sweep Loose Debris
Use the broom to gather large dust and wall fragments. Sweep carefully around the area to collect hidden pieces. Dispose of the debris in the trash bag immediately. This prevents debris from spreading to other rooms.
Vacuum Remaining Dust
Vacuum the floor and nearby surfaces to remove fine dust. Use a brush attachment for corners and crevices. Repeat vacuuming until no dust remains. This step improves air quality and cleanliness.
Wipe Surfaces Clean
Use a damp cloth to wipe walls and counters near the towel rack spot. Remove any remaining dust or smudges. Dry the surfaces with a clean towel. A clean surface helps with painting or installing new fixtures.

Credit: www.youtube.com
Frequently Asked Questions
How Do I Safely Remove A Builder-installed Towel Rack?
First, locate the screws holding the towel rack. Use a screwdriver to carefully unscrew them. Gently pull the rack away from the wall. Avoid forcing it to prevent wall damage. If anchors remain, remove or fill holes before repainting.
What Tools Are Needed To Remove A Towel Rack?
You typically need a screwdriver, possibly a drill, and a putty knife. A level and wall filler may also be useful. These tools help safely detach the rack and repair wall holes efficiently. Preparing tools beforehand ensures a smooth removal process.
Can Removing A Towel Rack Damage My Bathroom Wall?
If done carefully, removal won’t cause major damage. However, holes or anchor marks may remain. Use spackle or wall filler to repair small holes. Sand and repaint the area for a clean finish. Proper technique minimizes wall damage effectively.
How Do I Fill Holes After Removing A Towel Rack?
Use wall filler or spackle to fill screw holes. Apply with a putty knife and smooth the surface. Let it dry completely, then sand lightly. Repaint the area to match the wall color. This restores a flawless wall appearance quickly.
Conclusion
Removing a builder-installed towel rack can be simple and quick. Use the right tools and work carefully to avoid damage. Take your time to loosen screws and nails gently. Once removed, clean the wall for a smooth finish. You can now install a new rack or leave the space empty.
This small project saves money and improves your bathroom’s look. Try it yourself and enjoy the satisfaction of a job done well. Simple steps, great results.

