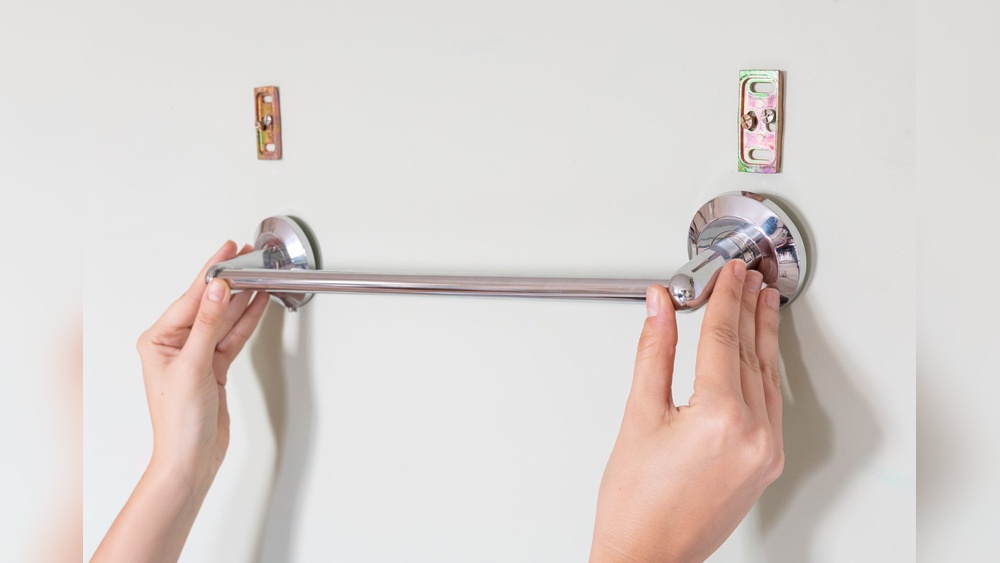

Are you looking to remove that old metal towel rack in your bathroom but don’t know where to start? You’re not alone.
Removing a metal towel rack might seem tricky, but with the right steps, it can be quick and hassle-free. Imagine clearing your wall without damage and getting ready for a fresh new look. In this guide, you’ll discover simple, clear instructions that anyone can follow.
Keep reading, and you’ll have that rack down in no time—ready for whatever upgrade you have in mind.
Tools Needed
Removing a metal towel rack needs the right tools. Having the proper tools makes the job easier and safer. This section lists the tools and safety gear you need.
Essential Tools List
Start with a screwdriver set. A Phillips and flathead screwdriver are common types. You may also need a drill with screwdriver bits.
A utility knife helps cut any caulk or paint around the rack. A putty knife can lift edges carefully.
A wrench or pliers might be necessary to loosen bolts or nuts. Tape measure helps to check the size of screws or anchors.
Keep a bucket or container nearby to store screws and small parts.
Safety Equipment
Wear safety glasses to protect your eyes from dust and debris. Gloves protect your hands from sharp metal edges.
Wear a dust mask if you expect dust or particles. Use knee pads if you work on the floor for a long time.
Keep a first aid kit nearby, just in case of minor cuts or scrapes.

Credit: www.reddit.com
Preparing The Area
Preparing the area is the first step to safely remove a metal towel rack. It helps protect your walls and keeps your workspace tidy. Taking time to prepare makes the process smoother and prevents damage.
Clearing The Space
Clear the area around the towel rack. Remove towels and any items nearby. This gives you room to work without obstacles. A clean space reduces the chance of accidents or scratches.
Protecting Walls And Surfaces
Cover nearby walls with painter’s tape or a soft cloth. This guards against scratches and marks. Place a drop cloth on the floor to catch dust or debris. Protect surfaces to keep your home neat and damage-free.
Removing The Towel Rack
Removing the towel rack is a simple task anyone can do with the right steps. Start by finding the parts that hold the rack to the wall. These are usually screws or fasteners. Knowing where they are helps you take the rack down safely without damage.
Locating Screws And Fasteners
Look closely at the towel rack ends. Screws often hide behind small caps or covers. Gently pry these off with a flat tool. Sometimes, fasteners are visible on the metal brackets. Check both sides of the rack for any hidden screws or bolts.
Unscrewing The Rack
Use a screwdriver that fits the screws well. Turn the screws counterclockwise to loosen them. Keep the screws in a safe place. If the rack has bolts, use a wrench to loosen them. Removing all screws releases the rack from the wall.
Handling Stubborn Fixtures
Some towel racks stick tightly to the wall. Spray a little lubricant on the screws to help loosen them. Use extra force carefully to avoid breaking the wall. If screws won’t budge, try using pliers or a power drill. Be patient and work slowly to avoid damage.
Dealing With Wall Damage
Removing a metal towel rack often leaves marks or holes on your wall. Dealing with wall damage is important to keep your room looking neat. Fixing these issues quickly helps prepare the wall for painting or new fixtures. Proper repairs also prevent further damage over time.
Identifying Common Issues
Look closely at the wall where the rack was mounted. Small holes from screws or anchors are common. Sometimes, the paint around the holes peels or cracks. In some cases, drywall may be chipped or dented near the holes. Spotting all these problems helps you plan the right repairs.
Patching Holes And Cracks
Start by cleaning the damaged area with a dry cloth. Use a putty knife to apply spackling paste or wall filler into holes and cracks. Press the filler firmly to fill the gaps completely. Let it dry according to the product instructions. After drying, sand the surface smooth with fine sandpaper. Wipe away dust before painting or adding new fixtures. This simple process restores the wall’s smooth look.
Cleaning Up
Cleaning up after removing a metal towel rack is important. It helps prepare the wall for new fixtures or paint. A tidy space makes the next steps easier and faster. Take time to remove all old parts and mess left behind.
Removing Debris
Start by picking up screws, anchors, and metal pieces. Use a vacuum or brush to clear dust and small bits. Check the wall surface for leftover glue or residue. Clean these spots with a damp cloth or mild cleaner. Make sure the wall is dry before moving on.
Preparing For New Fixtures
Inspect holes or marks left by the towel rack. Fill large holes with spackle or wall filler. Smooth the surface with sandpaper once dry. Wipe the wall clean again to remove dust. This creates a smooth base for new hooks or racks.
Credit: www.hometalk.com
Tips For Installing A New Rack
Installing a new towel rack is a simple task that improves your bathroom’s look and function. Careful planning helps the rack last longer and hold towels well. Follow these tips to place the rack in the best spot and mount it securely. A well-installed rack keeps towels dry and easy to reach.
Choosing The Right Spot
Pick a place near the sink or shower for easy access. Avoid spots too close to water streams to prevent rust. Check the wall space for enough room so towels do not touch the floor. Make sure the rack is at a comfortable height for all users. Measure the space before drilling to avoid mistakes.
Ensuring Secure Mounting
Use a stud finder to locate wall studs for strong support. If no studs are available, use wall anchors made for heavy loads. Choose screws and anchors that fit your wall type, like drywall or tile. Drill holes carefully to avoid cracking tiles or damaging drywall. Tighten screws firmly but do not over-tighten to avoid damage.
:max_bytes(150000):strip_icc()/how-to-remove-towel-bar-5221017-01-500f8a5293db4d1eab79c70bb74f1dc5.jpg)
Credit: www.thespruce.com
Frequently Asked Questions
How Do I Safely Remove A Metal Towel Rack?
To safely remove a metal towel rack, first locate and unscrew the mounting brackets. Use a screwdriver or drill carefully. Gently pull the rack away from the wall. Avoid damaging the drywall by removing any anchors or filling holes afterward.
What Tools Are Needed To Remove Metal Towel Racks?
You will need a screwdriver, drill, and possibly pliers. A putty knife helps remove anchors. Optional tools include a level and wall filler for repairs. These tools ensure safe removal without wall damage.
Can I Remove A Metal Towel Rack Without Wall Damage?
Yes, by carefully unscrewing the mounting brackets and removing anchors slowly. Use a putty knife to pry off stubborn anchors. Patch holes immediately with wall filler to maintain a smooth surface.
How To Remove Metal Towel Racks From Drywall?
Unscrew mounting screws using a screwdriver. Gently pull the rack away. Remove drywall anchors with pliers or a putty knife. Fill holes with spackle and sand smooth for repainting.
Conclusion
Removing a metal towel rack is simpler than it seems. Gather basic tools and take your time. Start by loosening screws carefully. Keep track of small parts to avoid loss. Clean the wall after removal for a smooth finish. You can replace the rack or leave the space empty.
This task saves money and keeps your bathroom neat. Try it yourself—you will feel proud of the result. Small projects like this build confidence over time. Give it a go and enjoy your refreshed space.