
When it comes to designing a bathroom that truly works for you or a loved one with disabilities, every detail matters. You want a space that feels safe, comfortable, and easy to use—without stress or frustration.
Imagine stepping into a bathroom where wide doorways welcome your wheelchair, grab bars offer steady support, and the shower is effortless to enter and control. This isn’t just about meeting standards; it’s about creating a space that respects your independence and enhances your daily routine.
You’ll discover practical tips and smart design ideas that make disabled bathroom design both functional and inviting. Ready to transform your bathroom into a space that fits your needs perfectly? Let’s dive in.
Credit: liveinplacedesigns.com
Space And Layout
Designing a bathroom for disabled users requires careful attention to space and layout. Every inch must allow easy movement and access. The room should feel open and safe. Proper planning helps create a comfortable, functional space for everyone.
Entry And Doorways
Wide doorways help wheelchair users enter with ease. Doors should be at least 32 inches wide. Sliding or outward-opening doors save space and reduce obstacles. Handles must be easy to grip and use. Thresholds should be low or flush with the floor to prevent trips.
Turning Radius
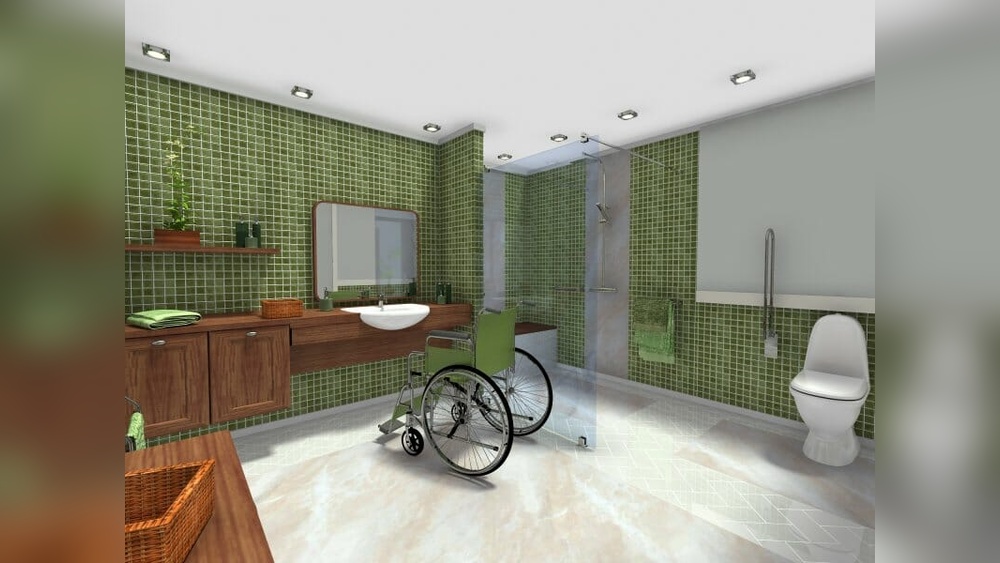
A clear turning radius is crucial for wheelchair mobility. A 60-inch diameter circle allows full turns. This space must be free of clutter and obstructions. Fixtures like toilets and sinks should not block the turning area. Proper layout ensures smooth navigation in tight spaces.
Flooring Choices
Non-slip flooring reduces the risk of falls. Materials like textured vinyl or rubber work well. Avoid thick carpets or slippery tiles. Floors should be easy to clean and maintain. A curbless, walk-in shower with level flooring prevents tripping hazards.
Shower And Bathtub
The shower and bathtub are key parts of a disabled bathroom design. They must offer safety and ease of use. Proper design helps people with limited mobility maintain independence. Accessibility features reduce the risk of falls and injuries. Thoughtful layouts and fixtures improve comfort and convenience.
Curbless And Roll-in Showers
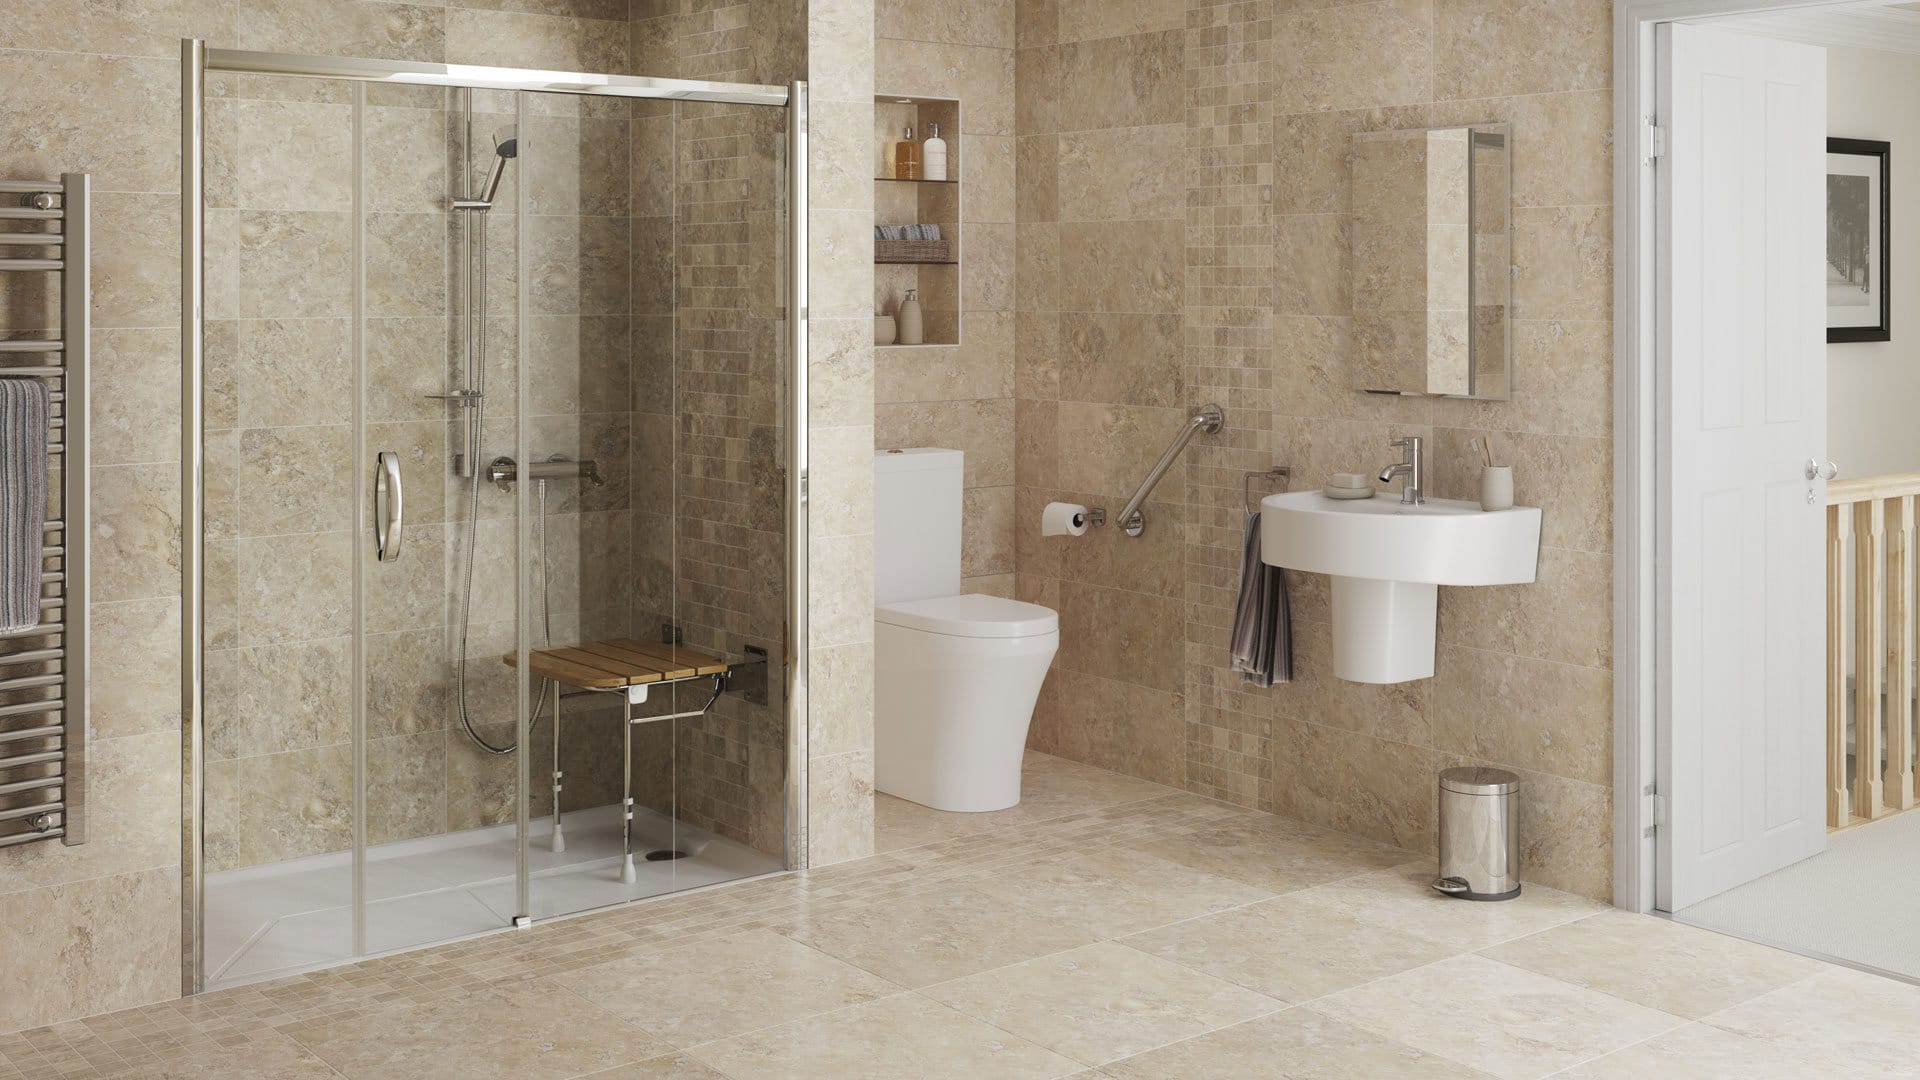
Curbless showers have no step or threshold. This design allows easy access for wheelchairs and walkers. Roll-in showers are wide and flat, fitting mobility aids smoothly. These showers prevent tripping and provide more freedom of movement. A non-slip floor surface is essential for safety. Large, open spaces inside the shower make transfers easier.
Shower Controls
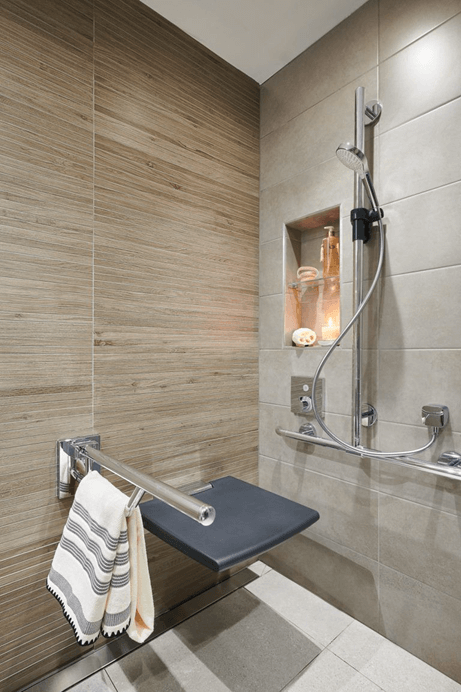
Shower controls should be simple and reachable from a seated position. Lever handles work best as they are easy to grip and turn. Thermostatic controls keep water temperature steady and prevent scalding. Controls placed near the shower entrance allow users to adjust settings before entering. Handheld showerheads with long hoses add flexibility and ease of use.
Grab Bars And Accessories
Grab bars provide support and balance inside the shower or bathtub. They must be securely anchored and placed where help is needed most. Vertical and horizontal bars give different types of assistance. Accessories like fold-down seats and soap dishes within reach add convenience. Non-slip mats or textured flooring complement grab bars for safer bathing.
Toilet Features
The toilet area in a disabled bathroom must ensure safety and ease of use. Thoughtful design in this space allows for independence and comfort. Key features include the right placement of grab bars, accessible flush controls, and modern bidet options. These elements support users with varying needs and enhance bathroom usability.
Grab Bars Placement
Grab bars provide crucial support near the toilet. Place them on the side wall closest to the toilet and behind it. This placement helps users to sit down and stand up safely. Bars should be sturdy and installed at a height between 33 and 36 inches from the floor. Use materials that resist slipping and are easy to clean.
Flush Controls
Flush controls must be simple to reach and operate. Lever-style or automatic flush systems work best. Position the control on the open side of the toilet within easy reach. Controls should require minimal force to activate, aiding users with limited hand strength. Clear visual indicators on the controls help all users.
Bidet And Washlet Options
Bidets and washlets improve hygiene and comfort. Many models offer adjustable water pressure and temperature. Controls can be remote or side-mounted for easy access. Heated seats and dryers add extra convenience. Choose designs that fit well in small spaces and support users with limited mobility.

Credit: www.crystalbathrooms.com.au
Sink And Vanity
The sink and vanity play a key role in a disabled bathroom design. They must be easy to reach and use for people with different abilities. Proper planning ensures comfort and independence for users. The design should consider space, height, and storage needs. A well-designed sink area improves the overall bathroom experience.
Clearance And Height
Clear space under the sink is essential for wheelchair users. It allows them to get closer and use the sink comfortably. The recommended height for the sink rim is between 29 and 34 inches. Avoid cabinets or vanities that block knee space. The area around the sink should be at least 30 by 48 inches for easy access.
Faucet Types
Lever handles work best for ease of use. They require less strength and dexterity. Touchless faucets offer a hands-free option, enhancing hygiene and convenience. Single-handle faucets are also good for quick adjustments. Position faucets within easy reach, ideally no more than 24 inches from the front edge of the sink.
Accessible Storage
Storage should be easy to reach from a seated position. Open shelves or pull-out drawers work well. Avoid high cabinets that require stretching or standing. Use clear containers or labels for quick identification. Keep everyday items within 48 inches from the floor to ensure accessibility.
Lighting And Safety
Lighting and safety are key in disabled bathroom design. Proper light helps users see clearly and avoid accidents. A safe bathroom supports independence and confidence for all users.
Enhanced Lighting
Bright, even lighting reduces shadows and glare. Use LED lights for clear, consistent illumination. Place lights near mirrors and sinks to improve visibility. Motion sensor lights add convenience and safety at night.
Accessible Outlets And Switches
Position outlets and switches at reachable heights for wheelchair users. Use rocker switches that are easy to press. Consider outlets with safety covers to prevent accidents. Well-placed controls enhance usability and comfort.
Additional Grab Bars
Install grab bars near toilets, showers, and tubs. Choose bars with a sturdy, non-slip grip. Place them at different heights to support various needs. Grab bars reduce falls and increase user confidence.
Hardware Choices
Select lever-style handles for faucets and doors. They require less strength to operate. Use contrasting colors for hardware to improve visibility. Smooth, rounded edges prevent injuries and improve comfort.
Credit: www.bathingsolutions.co.uk
Stylish Accessibility
Stylish accessibility in disabled bathroom design means combining ease of use with modern looks. Bathrooms can be both functional and attractive. Thoughtful design makes daily routines easier for everyone.
Accessible bathrooms do not need to look clinical or dull. Designers use materials, colors, and fixtures that add style and comfort. This approach creates spaces that feel welcoming and safe.
Material Selection
Choosing the right materials is key to stylish accessibility. Surfaces should be durable and slip-resistant. Textured tiles or matte finishes help prevent falls. Materials like natural stone and wood add warmth.
Easy-to-clean materials also improve hygiene. Waterproof options protect against moisture damage. Using a mix of materials can create visual interest without sacrificing safety.
Color And Texture
Colors influence the mood and usability of a bathroom. Light, neutral tones open up the space and boost brightness. Contrasting colors highlight important features like grab bars or switches.
Textures add depth and prevent slips. Rough or patterned flooring guides movement safely. Soft wall textures make the room feel cozy and inviting. Careful color choices improve visibility and comfort.
Modern Fixtures
Modern fixtures blend functionality with sleek design. Wall-mounted sinks with clear space underneath support wheelchair users. Higher toilets with ergonomic shapes enhance comfort.
Touchless faucets and easy-to-reach controls add convenience. Grab bars come in elegant designs that match the overall decor. Showers with handheld heads and adjustable heights suit varied needs.
Technology Integration
Technology plays a key role in designing accessible bathrooms. It helps create safer, easier-to-use spaces for people with disabilities. Smart features improve comfort and reduce physical effort. These innovations make bathrooms more independent and convenient for users.
Touchless Controls
Touchless controls reduce the need to press buttons or handles. Sensors activate faucets, toilets, and soap dispensers automatically. This lowers the risk of spreading germs and makes use easier for people with limited hand strength. Touchless technology also helps maintain hygiene in shared bathrooms.
Smart Lighting
Smart lighting adjusts brightness and color for better visibility. Motion sensors turn lights on or off as someone enters or leaves. This feature prevents fumbling with switches. Soft, even light reduces glare and shadows, aiding those with vision impairments. Smart lighting creates a welcoming, safe environment in disabled bathrooms.
Assistive Devices
Assistive devices support users in daily tasks. Voice-activated systems allow control of fixtures and appliances without physical effort. Adjustable-height sinks and toilets adapt to different needs. Grab bars with built-in sensors can alert caregivers in emergencies. These devices enhance independence and safety in the bathroom space.
Frequently Asked Questions
How To Design A Bathroom For A Disabled Person?
Design a bathroom for disabled users by installing wide doorways, curbless showers, grab bars, and a higher toilet. Use non-slip flooring and accessible sinks with clear knee space. Ensure controls and accessories are reachable. Provide enough turning radius for wheelchair mobility and use lever-style faucets for ease.
Does Medicare Pay For A Handicap Bathroom Remodel?
Medicare usually does not cover handicap bathroom remodels. Coverage applies only if modifications are medically necessary and prescribed by a doctor. Check Medicare Advantage plans for possible benefits. Always verify specific plan details and eligibility before starting remodel projects.
What Is The Golden Rule For Bathroom Layouts?
The golden rule for bathroom layouts ensures accessibility, space efficiency, and safety. Prioritize wide doorways, non-slip flooring, and easy-to-reach fixtures. Include curbless showers, grab bars, and adequate turning radius for wheelchair users. Design for comfort and convenience with accessible sinks, toilets, and controls.
What Is The Difference Between An Accessible Toilet And A Disabled Toilet?
An accessible toilet meets general mobility needs with features like grab bars and wide doors. A disabled toilet specifically caters to wheelchair users, offering more space and specialized fixtures for ease of use.
Conclusion
Designing a disabled bathroom means focusing on safety and ease of use. Wide doorways and curbless showers help users move freely. Grab bars and accessible fixtures add important support. Non-slip flooring reduces the risk of falls. Thoughtful layouts create enough space for wheelchairs to turn comfortably.
Simple changes improve daily life and independence. Every detail counts in making bathrooms welcoming for all. Keep these key points in mind for effective bathroom design.