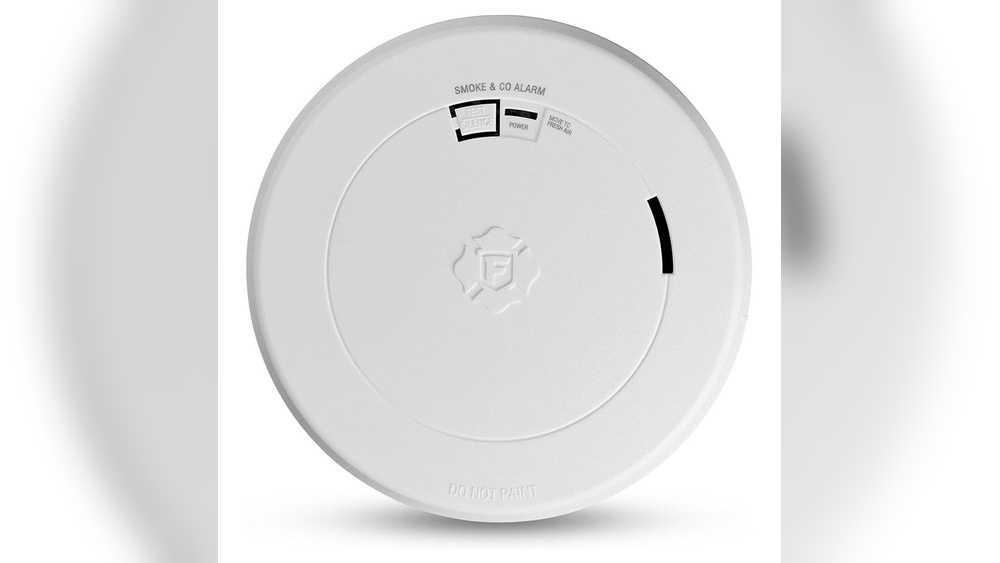

Your safety at home starts with the right tools, and installing a First Alert Smoke and Carbon Monoxide Detector is one of the smartest steps you can take. But how do you make sure it’s set up correctly to protect you and your loved ones?
This guide will walk you through each simple step, so you can feel confident that your home is safer from hidden dangers. Keep reading to learn how to install your detector quickly and easily—your peace of mind depends on it.
Choosing The Right Detector
Choosing the right First Alert smoke and carbon monoxide detector is key to keeping your home safe. The right detector fits your needs and home layout. It helps you spot dangers early and react fast. Knowing the types, features, and power options makes your choice easier.
Types Of First Alert Detectors
First Alert offers several types of detectors. Smoke alarms detect smoke from fires. Carbon monoxide alarms sense invisible, deadly gas. Combo alarms do both jobs in one device. Some models have voice alerts to guide you. Choose based on what risks you want to protect against.
Features To Consider
Look for features that match your lifestyle. Some detectors have digital displays to show levels. Others beep loudly or use flashing lights for alerts. Interconnectivity lets all alarms sound if one detects danger. Test and silence buttons add ease of use. These features boost safety and convenience.
Battery Vs. Hardwired Models
Battery-powered detectors are easy to install and move. They work during power outages but need regular battery changes. Hardwired models connect to home power and often include battery backup. They offer constant protection without battery worries. Choose based on your home’s wiring and maintenance preferences.

Credit: www.youtube.com
Gathering Necessary Tools
Before installing a First Alert smoke and carbon monoxide detector, gather all the tools needed. Having the right tools helps make the job easier and faster. It also ensures a safe and proper installation. Take a few minutes to prepare everything. This preparation saves time and avoids interruptions.
Tools Required For Installation
You will need a few simple tools. A drill with a small drill bit is important for making holes. A screwdriver, usually Phillips head, is needed to secure screws. Tape measure helps to place the detector in the correct spot. A pencil is useful for marking holes on the wall or ceiling. A ladder or step stool might be necessary to reach high places. Keep batteries ready if your model requires them.
Safety Precautions
Safety is key during installation. Turn off power if the detector connects to your home’s wiring. Avoid drilling near electrical wires or pipes. Use a sturdy ladder and have someone nearby if possible. Wear safety glasses to protect your eyes from dust. Read the detector’s instructions carefully before starting. These steps help prevent accidents and damage.
Selecting The Installation Location
Selecting the right location for your First Alert smoke and carbon monoxide detector is key. Proper placement ensures the device works well and keeps your home safe. Avoid spots that may cause false alarms or miss dangers.
Different detectors need different locations. Smoke detectors sense smoke particles. Carbon monoxide detectors sense this invisible, odorless gas. Each requires careful thought for installation.
Ideal Spots For Smoke Detection
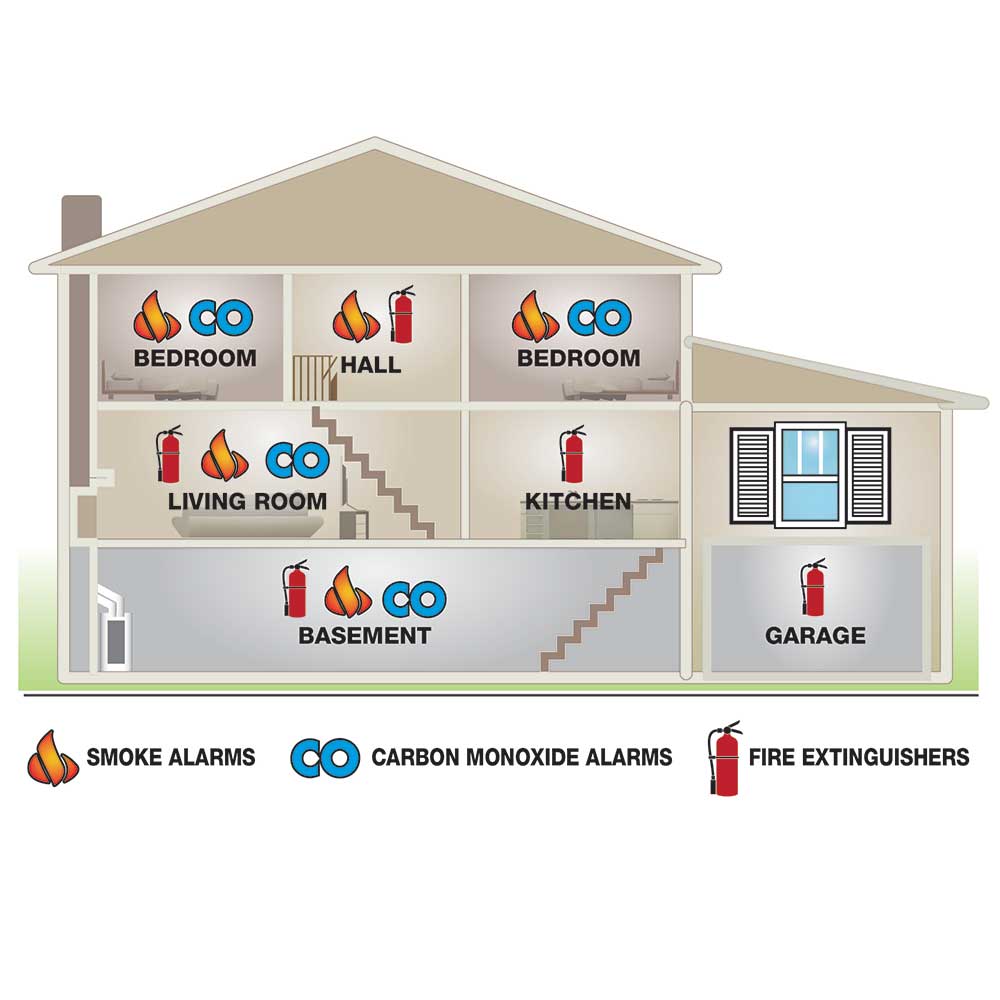
Install smoke detectors on ceilings or high on walls. Smoke rises, so higher spots catch smoke early. Place detectors near bedrooms and living areas. This helps alert people while sleeping.
Avoid corners and places near windows or fans. Drafts can move smoke away from detectors. Keep detectors at least 10 feet from cooking appliances. This reduces false alarms from cooking smoke.
Best Places For Carbon Monoxide Detection
Carbon monoxide detectors work best near sleeping areas. Install them at knee or eye level. CO mixes with air, so height is less critical than for smoke. Place detectors near fuel-burning appliances like heaters or fireplaces.
Do not install CO detectors in garages or near windows. Fresh air can dilute gas and delay detection. Check local rules for extra placement advice.
Avoiding Common Placement Mistakes
Do not install detectors in bathrooms or kitchens. Steam and cooking fumes can cause false alarms. Avoid placing detectors near vents, fans, or windows. Airflow can stop detectors from sensing smoke or gas.
Do not place detectors too close to lights or ceiling fans. Heat and air movement affect sensor performance. Follow manufacturer instructions for distance from walls and ceilings.
Preparing The Detector
Preparing the First Alert smoke and carbon monoxide detector is the first step to ensure safety. This process helps the device work correctly. It includes checking the contents, installing batteries, and testing the unit. Each step is simple but important.
Unboxing And Inspecting
Open the box carefully. Check the detector and all parts. Look for damage or missing items. The package should include the detector, mounting bracket, screws, and batteries. If something is missing, do not use the device. Contact the seller for support.
Installing Batteries
Open the battery compartment on the back of the detector. Insert the batteries with the right polarity (+ and -). Use the batteries that come with the device or recommended types. Close the compartment firmly. Without power, the detector will not work.
Testing The Unit
Press the test button on the front of the detector. Hold it for a few seconds. Listen for a loud beep or alarm sound. This sound means the device is working. If no sound comes, check the batteries or try again. Testing ensures the detector is ready to protect your home.
Mounting The Detector
Mounting the First Alert smoke and carbon monoxide detector correctly is key for reliable safety. The detector must be stable and in the right place. This section explains how to mount it step-by-step. Follow each step carefully to ensure the detector works well.
Marking Drill Points
Start by holding the mounting bracket on the ceiling or wall. Choose a spot near the center of the room or hallway. Use a pencil to mark the screw holes on the surface. Check that the marks are level and spaced correctly. Accurate marks help the detector fit tightly and stay secure.
Drilling And Securing Mounting Bracket
Use a drill to make holes on the marked points. Select a drill bit size that matches the screws. Insert wall anchors if mounting on drywall or plaster. Push the anchors fully into the holes. Align the bracket with the holes, then screw it tightly to the surface. A firm bracket keeps the detector from falling or shifting.
Attaching The Detector To The Bracket
Line up the detector’s slots with the bracket tabs. Press the detector onto the bracket and turn it clockwise. You should feel it click or lock in place. Make sure the detector is secure but not forced. Test by gently pulling it to confirm it stays fixed.

Credit: www.youtube.com
Connecting Hardwired Units
Connecting hardwired First Alert smoke and carbon monoxide detectors ensures continuous power and interconnectivity. This setup helps all alarms sound if one detects danger. Proper wiring is critical for safety and function. Follow each step carefully to install your device correctly.
Turning Off Power
Start by turning off the power to the circuit you will work on. Locate your home’s main electrical panel. Switch off the breaker that controls the smoke detector circuit. Confirm power is off by testing the wires with a voltage tester. Safety first. Never work on live wires.
Wiring Instructions
Match the wires from the detector to the house wiring. Connect black wires to black (hot) wires. Join white wires to white (neutral) wires. Connect the red wire from the detector to the interconnect wire in your home. Use wire nuts to secure all connections tightly. Tuck wires neatly inside the electrical box. Attach the detector to its mounting bracket.
Resetting Circuit Breaker
After wiring, return to the electrical panel. Flip the breaker switch back to the ON position. Check if the detector powers up. Press the test button on the unit to confirm it works. If the alarm does not sound, double-check all connections. Resetting the breaker restores power and activates the system.
Final Testing And Maintenance
Final testing and maintenance are vital for your First Alert smoke and carbon monoxide detector. These steps ensure the device works properly to keep your home safe. Regular checks help find problems early and keep the unit ready to alert you.
Running Initial Tests
After installation, test the alarm to confirm it works. Press the test button until you hear a loud beep. This sound means the detector is active and ready. If there is no sound, check the batteries or installation. Testing helps catch issues before they become serious.
Regular Maintenance Tips
Clean the detector every month. Dust and dirt can block sensors and stop alerts. Use a soft brush or vacuum cleaner on low power. Avoid using water or cleaners on the device. Keep the area around the detector free from obstacles. This ensures smoke and gas reach the sensors easily.
Replacing Batteries And Units
Change batteries at least once a year. Some models beep when batteries run low. Do not ignore this warning. Replace batteries with the type recommended by the manufacturer. Replace the entire unit every 7 to 10 years. Old detectors may fail to detect smoke or carbon monoxide. Always check the expiration date on the detector.
Credit: www.firstalertstore.com
Frequently Asked Questions
How Do I Install A First Alert Smoke Detector?
To install, first choose a ceiling or high wall location. Mount the bracket with screws. Connect the detector to power or insert batteries. Attach the detector to the bracket until it clicks. Test the unit to ensure proper function.
Where Should I Place The First Alert Co Detector?
Place the CO detector near sleeping areas and on every floor. Avoid kitchens or bathrooms to reduce false alarms. Install at least 5 feet above the floor for optimal sensor performance and early detection.
How Often Should I Test The Detector?
Test your First Alert detector monthly. Press the test button until the alarm sounds. This ensures the unit is functioning correctly and batteries are working.
When Should I Replace My First Alert Detector?
Replace smoke detectors every 10 years and CO detectors every 5-7 years. Check the manufacturer’s instructions for exact lifespan. Old detectors may fail to detect hazards accurately.
Conclusion
Installing the First Alert smoke and carbon monoxide detector is simple and important. Follow the steps carefully for safety. Test the device after installation to ensure it works well. Place it in the right spots around your home. Change batteries regularly to keep it active.
A working detector helps protect your family from danger. Stay safe by maintaining your detector often. Taking these small steps can save lives. Safety starts with you.