
Are you tired of that old plastic towel rack ruining the look of your bathroom? Removing it might seem tricky, but you can do it yourself—quickly and without damage.
Whether you want to replace it or just need some extra space, this guide will walk you through the simple steps to get it done right. Keep reading, and you’ll discover how easy it is to remove your plastic towel rack safely and efficiently.
Your bathroom makeover starts here!
Tools Needed
Removing a plastic towel rack requires some basic tools. Having the right tools makes the job easier and faster. This section lists the essential tools you need for this task. Each tool has a clear purpose in the removal process.
Screwdriver
A screwdriver is the main tool to remove screws holding the rack. Most towel racks use Phillips or flathead screws. Choose a screwdriver that fits well to avoid stripping the screws.
Utility Knife
A utility knife helps cut through paint or caulk around the rack. This prevents damage to the wall during removal. Use the knife carefully to avoid scratches or holes.
Pry Bar Or Putty Knife
Use a pry bar or putty knife to gently lift the rack off the wall. These tools help separate the rack without breaking it. Insert the tool slowly between the rack and wall.
Cleaning Cloth
A cleaning cloth is useful to wipe away dust or debris after removal. It also helps clean any leftover adhesive or caulk. Keep the area tidy for easier repair or new installation.

Credit: www.youtube.com
Prepare The Area
Preparing the area is an important first step before removing a plastic towel rack. It helps keep the space clean and protects your walls and floor. Taking time to get ready makes the task easier and safer.
Clear The Surrounding Space
Remove any items near the towel rack. Take away towels, toiletries, and decorations. This clears the working area and prevents damage to your belongings.
Protect The Wall And Floor
Place a drop cloth or old towel under the rack. Cover the floor to catch dust and debris. Use painter’s tape around the rack edges to protect the paint.
Gather Necessary Tools
Collect tools like a screwdriver, putty knife, and cleaning cloth. Having everything ready saves time and avoids interruptions.
Turn Off The Water Supply
This step is important if the towel rack is near plumbing. Shut off the water to avoid leaks or water damage during removal.
Locate Mounting Points
Locating the mounting points is the first step in removing a plastic towel rack. These points hold the rack firmly on the wall. Knowing their location helps you remove the rack without damage.
Plastic towel racks usually attach with screws or adhesive pads. Finding the exact spots lets you plan the right removal method. This prevents extra work and keeps the wall safe.
Check For Visible Screws
Look closely at the rack. Screws often hide under plastic covers or end caps. Gently pry these covers off with a flat tool. Visible screws are the easiest mounting points to remove.
Feel For Hidden Fasteners
Run your fingers along the rack edges. Some racks use hidden clips or brackets. Press gently to find loose parts. These indicate where the rack mounts to the wall.
Use A Flashlight For Better View
Shine a flashlight along the rack and wall junction. Light reveals small screws or adhesive strips. Spotting these helps avoid guessing and unnecessary damage.
Inspect Behind The Rack
Try to lift the rack slightly. Some mounts are behind the rack itself. This reveals hidden screws or anchors. Always handle carefully to avoid breaking the rack.
:max_bytes(150000):strip_icc()/how-to-remove-towel-bar-5221017-hero-01-c6a21614aaeb4e9ca8071b79bd398ef6.jpg)
Credit: www.reichard.de
Remove Screws Or Adhesive
Removing a plastic towel rack starts with taking off the screws or adhesive holding it in place. This step is key for a smooth removal without damage. Knowing how to handle both types of attachments makes the task easier. Follow the right method depending on your towel rack’s setup.
Unscrew Mounting Hardware
Look for screws at the ends or base of the towel rack. Use a screwdriver that fits the screw heads well. Turn the screws counterclockwise to loosen them. Keep the screws safe if you plan to reuse the rack. Sometimes screws are hidden under plastic covers. Pry these covers gently with a flat tool. Avoid forcing anything to prevent breaking the rack or wall.
Peel Off Adhesive Strips
Some towel racks use sticky adhesive strips instead of screws. Start by pulling the rack away from the wall slightly. Look for a tab or edge of the adhesive strip. Pull the strip slowly and steadily at a low angle. This helps the adhesive release without tearing. Use heat from a hair dryer to soften strong adhesive. Warm it for about 30 seconds before peeling. Clean off leftover sticky residue with rubbing alcohol or soapy water.
Handle Stubborn Racks
Removing a plastic towel rack can be tricky when it feels stuck. Stubborn racks need gentle but firm methods to avoid damage. Patience and the right tools help loosen the rack safely. Two effective ways to handle this are using a putty knife and applying heat to soften the adhesive.
Use A Putty Knife
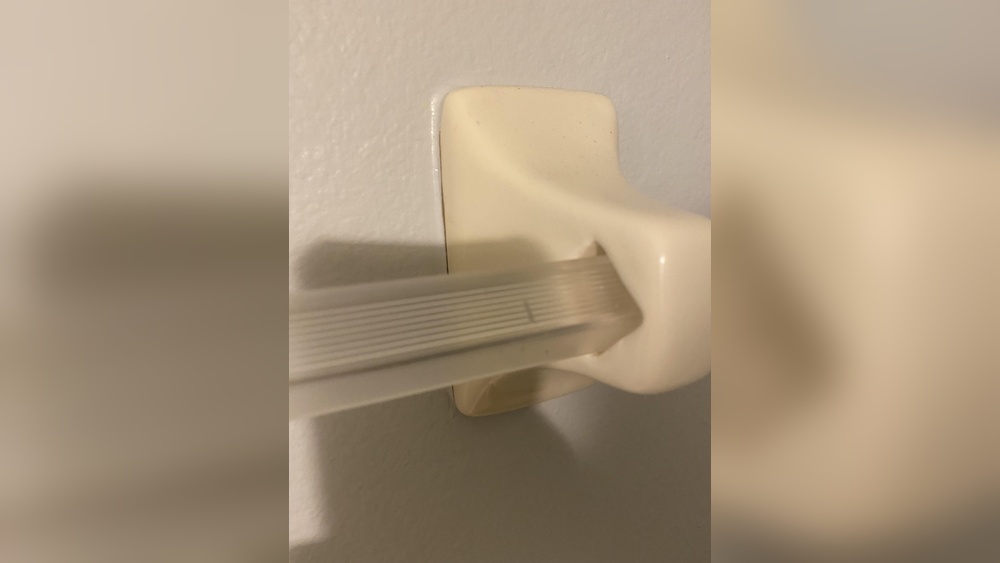
Slide a putty knife gently under the edge of the rack. Work it slowly to avoid scratching the wall. Move the knife back and forth to weaken the hold. This tool helps lift the rack without breaking the plastic. Take your time and apply steady pressure.
Apply Heat For Adhesive
Heat softens the glue holding the towel rack in place. Use a hairdryer on low heat and point it at the base. Warm the area for a few minutes to loosen the adhesive. Test the rack’s movement by gently pulling it. Repeat heating if the rack still feels tight.
Clean The Surface
After removing a plastic towel rack, the wall surface often needs cleaning. Dirt, adhesive, and small damages can stay behind. Cleaning the surface prepares the wall for repainting or new fixtures. A clean wall looks fresh and smooth.
Remove Residue
Sticky glue or tape residue can remain on the wall. Use a soft cloth with warm, soapy water to wipe the area. For stubborn spots, try rubbing alcohol or a commercial adhesive remover. Test on a small spot first to avoid damage. Gently scrub until the residue disappears. Avoid harsh scrubbing that can harm the paint or wall.
Repair Wall Damage
Removing the towel rack may leave small holes or scratches. Fill holes with spackle or wall putty using a putty knife. Let it dry completely, then sand smooth with fine-grit sandpaper. Wipe dust away before painting. Smooth walls make new paint or wallpaper stick better. Fixing damage improves the overall look of your bathroom.
Tips For Reinstalling Or Replacing
Removing a plastic towel rack creates a chance to improve your bathroom. Reinstalling or replacing it correctly makes a big difference. Small steps lead to strong results. Careful planning keeps the wall safe and the rack steady.
Follow simple tips to get the job done right. Choose the best tools and materials. Check the wall before drilling. These actions prevent damage and make the rack last longer.
Check The Wall Condition Before Installation
Look closely at the wall where the rack will go. Fix cracks or holes first. A smooth surface helps the rack stick well. Use putty or filler for damage. Let it dry fully before continuing.
Use Proper Anchors For Stability
Pick anchors made for your wall type. Drywall needs different anchors than tile or plaster. Strong anchors stop the rack from falling. Match anchor size to screw size. This ensures a tight fit.
Measure And Mark The Mounting Spots
Measure twice, mark once. Use a pencil to mark holes. Keep the rack level for a neat look. Use a level tool or a smartphone app. Correct marks avoid crooked racks.
Choose The Right Tools For Installation
Use a drill with suitable bits for your wall. Screwdrivers must fit screws well. Have a tape measure and level handy. The right tools make work easier and faster.
Secure The Rack Firmly Without Over-tightening
Screw in the rack firmly but gently. Over-tightening can crack plastic or damage walls. Stop once the rack feels stable. Check for wobbling and adjust if needed.

Credit: www.youtube.com
Frequently Asked Questions
How Do I Remove A Plastic Towel Rack Safely?
To remove a plastic towel rack safely, first locate and unscrew the mounting screws. Gently pull the rack away from the wall. Use a putty knife to loosen any adhesive without damaging the wall.
What Tools Are Needed To Remove A Plastic Towel Rack?
You will need a screwdriver, putty knife, and possibly pliers. A drill may help if screws are tightly fixed. These tools ensure you remove the rack without harming the wall or fixtures.
Can Adhesive Damage The Wall When Removing A Towel Rack?
Yes, adhesive can damage the wall if removed improperly. Use a putty knife to carefully separate the rack. Apply gentle heat or adhesive remover if needed to minimize wall damage.
How To Fix Holes After Removing A Plastic Towel Rack?
Fill holes with spackle or wall filler, then sand smooth. Apply primer and paint to match the wall. This restores the wall’s appearance quickly and effectively after removal.
Conclusion
Removing a plastic towel rack is easier than you might think. Take your time and follow each step carefully. Use the right tools to avoid damage to your walls. Clean the area after removal to keep it neat. Now, you can replace or repair the space as needed.
Simple tasks like this make home care feel rewarding. Try it yourself and see how smooth the process can be.