
Have you ever stood in front of your bathroom towel rack, wondering how to unscrew it without causing damage? Whether you’re replacing an old rack or simply need to fix a loose one, knowing the right steps can save you time and frustration.
You’ll discover simple, clear instructions to help you remove your towel rack quickly and safely. Keep reading to make sure you get the job done right the first time.
Tools Needed
To unscrew a towel rack, having the right tools is important. The right tools make the job easier and safer. This section lists the tools you need before starting.
Screwdrivers And Drills
A screwdriver is the main tool for this task. Most towel racks use screws you can remove with a flathead or Phillips screwdriver. A drill with a screwdriver bit speeds up the work. Choose the right bit size to avoid damage. Keep both tools ready for quick use.
Safety Gear
Safety should come first. Wear gloves to protect your hands from sharp edges. Safety glasses protect your eyes from dust or debris. Use a dust mask if you are drilling into walls. These simple items keep you safe during the task.
Additional Supplies
Keep a small container for screws so they don’t get lost. A flashlight helps if the area is dark. A step stool or ladder may be needed for high racks. Have a towel or cloth handy to clean any dust. These extra supplies help the work go smoothly.
:max_bytes(150000):strip_icc()/how-to-remove-towel-bar-5221017-hero-01-c6a21614aaeb4e9ca8071b79bd398ef6.jpg)
Credit: www.thespruce.com
Prepare The Area
Preparing the area before unscrewing a towel rack is important. It helps keep the space safe and clean. Taking a few simple steps can make the task easier and prevent damage.
Clear Surrounding Space
Remove any items near the towel rack. Clear shelves, counters, and nearby hooks. This frees up space to work comfortably. It also prevents things from falling or breaking. A tidy area reduces distractions and helps you focus.
Protect Walls And Fixtures
Place a drop cloth or old towel under the rack. This catches dust, dirt, and small screws. Use painter’s tape on the wall around the rack. It protects paint from scratches or marks. Take care with tools near other fixtures like mirrors or lights.
Locate Screws
Locating the screws is the first step to unscrew a towel rack. Screws hold the rack firmly on the wall. Finding them helps you know how to remove the rack safely. Some screws are easy to spot. Others hide behind covers or brackets. Knowing where to look saves time and effort.
Check For Visible Screws
Start by looking closely at the towel rack. Many racks have screws showing on the sides or ends. These screws are usually easy to spot and unscrew. Use a flashlight if the area is dark. Visible screws often have small caps that you can pop off. Removing these caps reveals the screws underneath.
Hidden Mounting Brackets
Some towel racks use hidden mounting brackets. These brackets hide screws behind a metal or plastic cover. Look for a small gap or lip near the rack base. Gently pry the cover off with a flat tool. Inside, you will find the screws holding the rack. These screws may need a screwdriver or Allen key to remove.

Credit: www.reddit.com
Remove Screws
Removing screws is the key step to take the towel rack off the wall. Screws hold the rack tight. Taking them out lets you remove the rack without damage.
Use the right tools and methods to remove screws safely. Some screws come out easy. Others need a bit more care and patience.
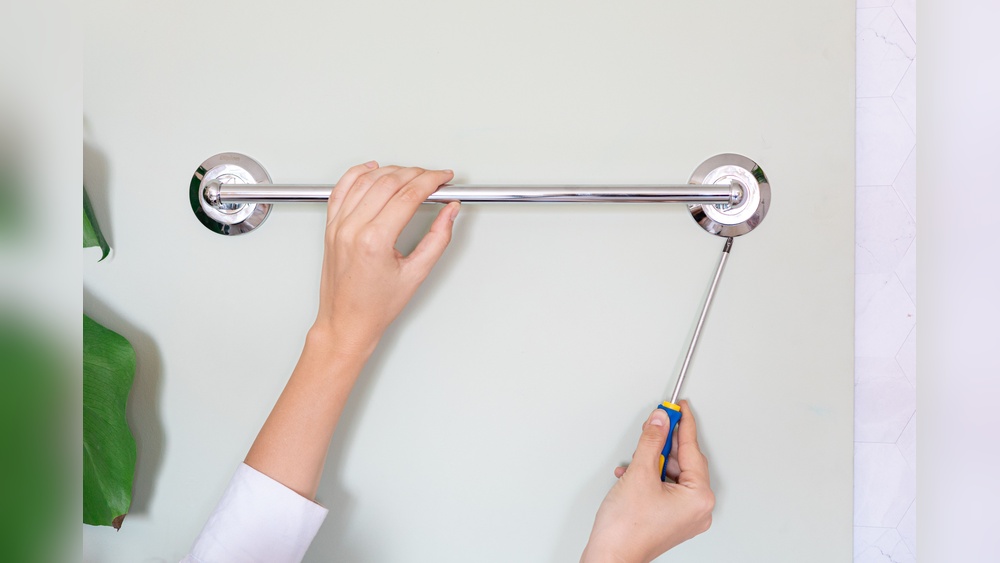
Using A Screwdriver
Choose a screwdriver that fits the screw head well. A wrong size can strip the screw. Hold the screwdriver firmly.
Turn the screwdriver slowly in a counterclockwise direction. Keep steady pressure. The screw will start to loosen and come out.
For a smooth process, keep the screwdriver straight. This reduces the chance of slipping or damage.
Handling Stubborn Screws
Stubborn screws may be rusty or stuck tight. Spray a little lubricant on the screw first. Let it sit for a few minutes.
Use a screwdriver with a better grip or a rubber band for extra hold. Tap the screwdriver gently with a hammer to loosen stuck screws.
If the screw still won’t move, try pushing down harder while turning. Avoid forcing too much to prevent damage.
Detach The Rack
Detaching the towel rack is a key step in removing it safely. This process needs careful handling to keep the wall intact. It also helps to avoid damage to the rack itself.
Lifting And Pulling Techniques
First, check if the rack is loose by gently lifting it upward. Use both hands to hold the rack firmly. Pull it straight away from the wall slowly. Avoid sudden or strong force to prevent breaking the rack. Sometimes, a slight wiggle helps to loosen it. Keep your movements steady and controlled.
Avoiding Wall Damage
Use a flat tool to protect the wall edge when pulling. Place a putty knife or a thin spatula between the rack and wall. This reduces pressure and stops paint from peeling. If screws remain, unscrew them fully before pulling. Clean the area carefully after removal. This prevents holes from getting bigger or walls from cracking.

Credit: www.youtube.com
Fix Wall Damage
Removing a towel rack can leave holes and marks on your wall. Fixing these damages helps keep your walls smooth and clean. A well-done repair makes your wall ready for painting or new decorations. Follow simple steps to fill holes and prepare the wall surface.
Filling Holes
Start by cleaning the holes and removing loose debris. Use a putty knife to apply spackling paste or wall filler. Press the filler into the holes fully, then smooth the surface. Let the filler dry according to the instructions. Apply a second layer if the holes are deep. Wait until the wall is completely dry before moving on.
Sanding And Painting Tips
Sand the dried filler with fine-grit sandpaper to make it smooth. Wipe off dust with a dry cloth. Choose paint that matches your wall color. Use a small brush or roller to paint over the patched area. Apply thin layers for even coverage. Let each layer dry before adding another. This method hides the repair and refreshes your wall.
Alternative Removal Methods
Sometimes, removing a towel rack is not simple. Screws might be stuck or damaged. Alternative removal methods help solve these problems quickly. These methods save time and reduce frustration.
Dealing With Rusted Screws
Rusted screws are hard to turn. Use a rust remover spray on the screws. Let it sit for 10 to 15 minutes. This softens the rust and makes screws easier to remove.
Tap the screw head gently with a hammer. This breaks rust bonds. Then try unscrewing with a screwdriver. Use firm, steady pressure to avoid stripping the screw.
Using Specialty Tools
Sometimes, basic tools do not work. Specialty tools help remove stuck screws. One tool is a screw extractor. It grips and pulls out damaged screws easily.
Another tool is an impact driver. It delivers strong, sudden force. This loosens screws stuck by rust or paint. Use these tools carefully to avoid damage.
Frequently Asked Questions
How Do I Safely Unscrew A Towel Rack?
Use a screwdriver matching the screw type. Hold the rack firmly. Turn screws counterclockwise until loose. Avoid forcing to prevent damage.
What Tools Are Needed To Remove A Towel Rack?
Typically, a Phillips or flathead screwdriver is required. A drill with screwdriver bits may help. A towel or cloth can protect surfaces during removal.
Can I Reuse Screws When Reinstalling A Towel Rack?
Yes, if screws are undamaged and rust-free. Otherwise, replace them with similar size and type for secure mounting.
How To Prevent Wall Damage When Unscrewing Towel Racks?
Use a screwdriver that fits screws well. Apply steady pressure. Remove screws slowly. Patch holes with spackle if needed after removal.
Conclusion
Unscrewing a towel rack can be simple with the right steps. Take your time and follow the instructions carefully. Use the correct tools to avoid damage. Keep screws and parts safe for reassembly or replacement. This task can save money and improve your space.
Remember, safety first—work gently and steadily. Now, your towel rack is ready for repair or removal. Easy and quick, just like that!