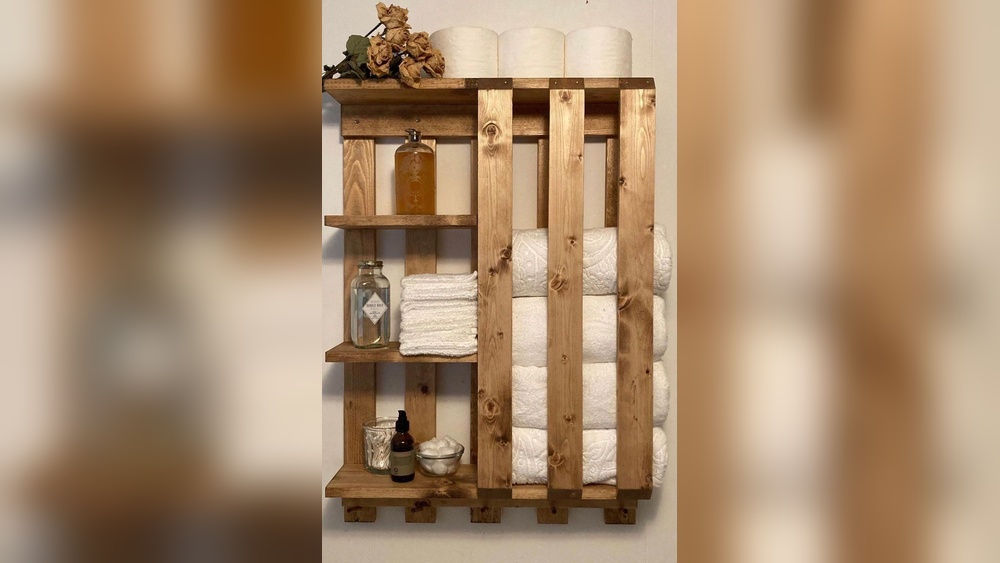
Looking for a simple, stylish way to organize your towels? A pallet towel rack could be just what you need.
It’s easy to make, budget-friendly, and adds a rustic charm to any room. Imagine having a unique towel rack that you built yourself—one that fits perfectly in your space and shows off your creativity. Keep reading, and you’ll discover step-by-step how to turn a basic wooden pallet into a practical and attractive towel rack you’ll be proud to use every day.
Your bathroom makeover starts here!

Credit: www.lazygeniusmom.com
Choosing The Right Pallet
Choosing the right pallet is a key step in making a pallet towel rack. The type and condition of the pallet affect the rack’s strength and look. Selecting a good pallet saves time and effort. It also makes your project safer and more durable.
Types Of Pallets For Projects
Wood pallets are the most common for DIY projects. They come in many sizes and wood types. Pine and oak pallets work well for towel racks. They are sturdy and easy to paint or stain.
Plastic pallets are lighter but less natural in look. They suit modern or minimalist styles. Metal pallets are rare and mostly used in industrial designs. For a rustic towel rack, wood pallets are the best choice.
Inspecting Pallet Condition
Check pallets carefully before starting your project. Look for cracks, splinters, and missing boards. Avoid pallets with signs of rot or mold. These can weaken your towel rack and cause damage.
Make sure the pallet is clean and free of chemicals. Some pallets carry harmful treatments or stains. Sand the wood to smooth rough areas and remove dirt. A good pallet gives your rack a strong base and a nice finish.
Gathering Materials And Tools
Gathering the right materials and tools is the first step to build a pallet towel rack. This step sets the foundation for a smooth and safe project. Having everything ready helps avoid stops and starts. It saves time and keeps the process enjoyable. Below is a clear list to prepare you well.
Essential Tools Checklist
- Saw – for cutting wood to size
- Hammer – to drive nails securely
- Drill – for making holes and screwing parts
- Measuring tape – to measure pieces accurately
- Screwdriver – to tighten screws
- Sandpaper or electric sander – to smooth the wood
- Clamps – to hold pieces together firmly
- Safety goggles – to protect your eyes
- Work gloves – to protect your hands
Additional Supplies Needed
- Pallet wood – the main material for the rack
- Wood screws or nails – to join parts
- Wood glue – for extra strength
- Wood stain or paint – to finish and protect
- Brushes or rags – for applying stain or paint
- Hooks or rods – to hang towels
Preparing The Pallet
Preparing the pallet is the first step in making a towel rack. It sets the base for your project. Take time to clean and shape the wood. This makes sure your rack looks good and lasts long.
Start by removing dirt and rough spots. Then, cut the pallet pieces to the right size. These tasks help create a smooth and neat towel rack.
Cleaning And Sanding
Remove nails and staples from the pallet wood. Use a brush to clear away dust and dirt. Wipe the wood with a damp cloth to clean it well.
Sand the wood using medium-grit sandpaper. Focus on rough edges and splinters. Sand again with fine-grit paper for a smooth finish. This makes the wood safe to touch.
Cutting To Size
Measure the wood pieces for your towel rack design. Mark the cutting lines with a pencil. Use a saw to cut along the marks carefully.
Choose pieces that match your rack’s size and shape. Cut extra pieces for hooks or shelves if needed. Keep cuts straight for a neat look.
Designing Your Towel Rack
Designing your pallet towel rack is the fun part. It lets you choose how it looks and works. The design depends on your space, style, and towel needs. Simple or complex, the design must hold towels well and fit your room.
Think about the size and shape of the pallet. Decide how many towels you want to hang. Your design should be strong and easy to use. Let’s explore some layout ideas and ways to add hooks or rods.
Layout Options
Start by planning the layout of your pallet. You can keep it vertical or horizontal. Vertical racks save floor space but hold fewer towels. Horizontal racks hold more towels and look wider on the wall.
Use the pallet’s natural slats to hang towels. Space them evenly for a neat look. Leave gaps between towels to help them dry faster. Think about adding shelves if you want space for folded towels or small items.
Adding Hooks Or Rods
Hooks or rods make your towel rack more useful. Hooks are easy to install on the pallet slats. Use strong metal hooks to hold heavy, wet towels. Place hooks at different heights for hand towels and bath towels.
Rods let towels hang flat and dry better. Attach metal or wooden rods across the pallet slats. Measure the space so towels don’t overlap too much. Secure rods firmly for safety and durability.
Assembling The Rack
Assembling the pallet towel rack is the step where all parts come together. This process shapes your project and gives it form. It requires focus and care to build a sturdy rack. Follow clear steps to attach each piece correctly. A well-assembled rack lasts longer and holds towels better.
Attaching Components
Start by lining up the pallet pieces. Match the sides and shelves carefully. Use screws to join the parts firmly. Drill pilot holes first to avoid splitting the wood. Tighten screws steadily but do not overdo it. Make sure all parts fit without gaps or wobble.
Securing For Stability
Check the rack for any loose spots. Add corner braces or extra screws if needed. Use wood glue on joints for stronger bonds. Place the rack on a flat surface to test balance. Adjust screws or supports to keep it steady. A stable rack holds towels safely and looks neat.

Credit: gmdckalakote.in
Finishing Touches
Finishing touches make your pallet towel rack stand out. They protect the wood and give it a nice look. These steps help your rack last longer and fit your style. A few simple choices can change the whole feel of your project.
Painting Or Staining
Choose paint or stain based on your decor style. Paint covers the wood fully and adds color. Stain soaks into the wood, showing its natural grain. Both options need a dry, clean surface to work well. Apply thin coats for an even finish. Let each coat dry before adding the next. This step gives your rack personality and charm.
Sealing For Durability
Sealing protects the wood from water and wear. Use a clear sealer after painting or staining. This layer keeps the finish fresh and strong. Apply with a brush or spray for smooth coverage. Let it dry completely before using the rack. Sealing helps your towel rack stay beautiful for years.
Mounting The Towel Rack
Mounting the pallet towel rack is an important step to make sure it stays secure and looks great. Proper mounting keeps towels within easy reach and adds charm to your bathroom or kitchen. This part of the project needs care and attention to detail.
Choosing The Right Location
Pick a wall space that is easy to access. Near the sink or shower works best. Avoid placing it where water splashes often. The rack needs to stay dry to last longer. Check the wall type before mounting. Drywall, tile, or wood need different screws and anchors. The right spot makes daily use simple and keeps towels neat.
Installation Tips
Mark the wall with a pencil where the screws will go. Use a level to keep the rack straight. Drill pilot holes to prevent the wall from cracking. Use anchors if the wall is drywall. Screw the rack tightly but do not over-tighten. Check stability by gently pulling the rack. Fix any loose parts before hanging towels. These steps ensure your rack stays safe and steady.

Credit: www.impconsultores.com
Maintenance And Care
Keeping your pallet towel rack in good shape needs regular care. This helps the wood last longer and stay strong. Small actions can stop damage and keep the rack looking nice. Follow easy steps for cleaning and fixing minor issues.
Cleaning Tips
Dust the rack often to stop dirt build-up. Use a soft cloth or brush for gentle cleaning. Wipe the surface with a damp cloth and mild soap. Avoid soaking the wood to stop warping. Dry the rack fully after cleaning to keep it safe from moisture.
Repairing Minor Damages
Check for small cracks or loose nails regularly. Use wood glue for tiny splits and clamp the wood until dry. Replace any nails that are bent or missing. Sand rough spots gently to smooth the surface. Apply a fresh coat of sealant or paint to protect the wood.
Frequently Asked Questions
What Materials Are Needed To Make A Pallet Towel Rack?
You need a wooden pallet, sandpaper, screws, a drill, wood stain, and hooks. These are essential for a sturdy, attractive towel rack.
How Do I Prepare The Pallet Wood For The Towel Rack?
Start by sanding the pallet wood to smooth rough surfaces. Clean it to remove dust and dirt before staining or painting.
Can I Customize The Pallet Towel Rack Size?
Yes, you can cut the pallet wood to your desired dimensions. Customize based on wall space and towel sizes.
How Do I Attach Hooks To The Pallet Towel Rack?
Use a drill to make pilot holes, then screw in hooks. Space hooks evenly for better towel hanging.
Conclusion
Creating a pallet towel rack is simple and fun. You just need a few tools and materials. This project adds charm and function to any space. It also saves money compared to buying a new rack. Try different designs to fit your style.
Enjoy the satisfaction of making something useful. Your bathroom or kitchen will look nicer too. Start today and see how easy it can be. You will feel proud of your work. Give it a try!