Are you tired of constantly opening the door for your pet? Installing a pet door in your door can give your furry friend the freedom they deserve — and make your life a whole lot easier.
Imagine your pet coming and going whenever they want, without you having to get up every time. In this guide, you’ll discover simple steps to install a pet door yourself, even if you’ve never done a project like this before.
By the end, you’ll have the confidence and know-how to create a pet-friendly entrance that fits perfectly in your door. Keep reading to learn how to make your home more convenient for both you and your pet!
Credit: www.homedepot.com
Choosing The Right Pet Door
Choosing the right pet door is key to your pet’s comfort and safety. The perfect door fits your pet’s size and suits your home’s door type. This section guides you through picking the best pet door for your needs.
Types Of Pet Doors
Pet doors come in many types. Manual doors open when your pet pushes them. Electronic doors open only for your pet, using a collar sensor. Flap doors are simple and common. Sliding glass door inserts fit into patio doors. Choose a type that fits your lifestyle and your pet’s habits.
Measuring Your Pet
Measure your pet before buying a door. Measure height from the floor to the top of the shoulder. Measure width across the widest part of the body. Add a few inches for easy movement. Proper size keeps your pet safe and makes using the door easy.
Selecting Door Material Compatibility
Check your door’s material before installation. Pet doors fit wood, metal, and fiberglass doors differently. Some doors need special kits or tools. Make sure the pet door matches your door’s thickness. This ensures a secure fit and prevents drafts or leaks.
Gathering Tools And Materials
Before installing a pet door in a door, gather all necessary tools and materials. This step saves time and prevents interruptions during installation. Having everything ready ensures a smooth, easy process. Below is a list of essential tools and optional accessories to prepare.
Essential Tools Needed
- Measuring tape to check door dimensions
- Pencil for marking cut lines
- Drill with drill bits for making starter holes
- Jigsaw or handsaw to cut the door
- Screwdriver to secure the pet door frame
- Sandpaper to smooth rough edges
- Safety goggles to protect your eyes
- Work gloves to protect your hands
Optional Accessories
- Weather stripping to seal gaps around the pet door
- Caulk for waterproofing edges
- Paint or finish to match the door
- Template or stencil for precise cutting
- Vacuum cleaner to clean up dust and debris
Preparing The Door
Preparing the door is a key step before installing a pet door. It helps ensure the pet door fits well and works properly. Taking time to prepare the door carefully saves effort later.
Proper preparation also keeps the door safe and damage-free. Follow these steps to get the door ready for installation.
Marking The Cutout Area
Start by measuring your pet’s size. Measure height and width for a good fit. Use the pet door template that comes with the kit.
Place the template on the door at the right height. Usually, the bottom of the pet door should be level with your pet’s belly. Mark the outline clearly with a pencil.
Double-check the marks before cutting. Make sure the lines are straight and even. This helps avoid mistakes during cutting.
Safety Precautions
Wear safety goggles and gloves to protect yourself. Use a mask if you work with dusty materials. Ensure the door is stable and will not move while cutting.
Use the right tools for the job. A jigsaw or handsaw works well for cutting. Keep fingers away from the blade and cut slowly.
Turn off power tools when not in use. Clean the area after cutting to avoid slips or injuries. Safety comes first during every step.

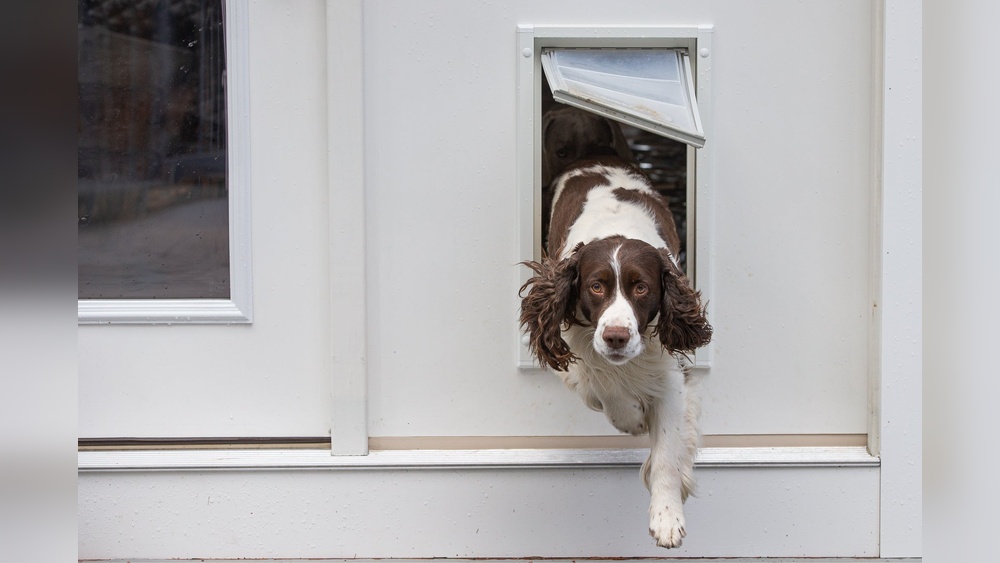
Credit: www.petdoors.com
Cutting The Door
Cutting the door is a crucial step in installing a pet door. It requires care and precision to create the right opening. Mistakes here can lead to a poor fit or damage to the door. Follow simple steps to ensure a clean, accurate cut for your pet door.
Using The Right Saw
Select a saw that suits your door material. A jigsaw works well on wood and hollow doors. Use a fine-toothed blade to avoid splintering. For metal doors, a reciprocating saw or metal-cutting blade is best. Always wear safety goggles and gloves to protect yourself during cutting.
Ensuring Clean Cuts
Mark the cut lines clearly with a pencil and ruler. Tape around the cutting area to reduce chipping. Cut slowly and steadily, following the marked lines closely. After cutting, sand the edges smooth to prevent splinters and ensure the pet door fits perfectly. Clean cuts make installation easier and look better.
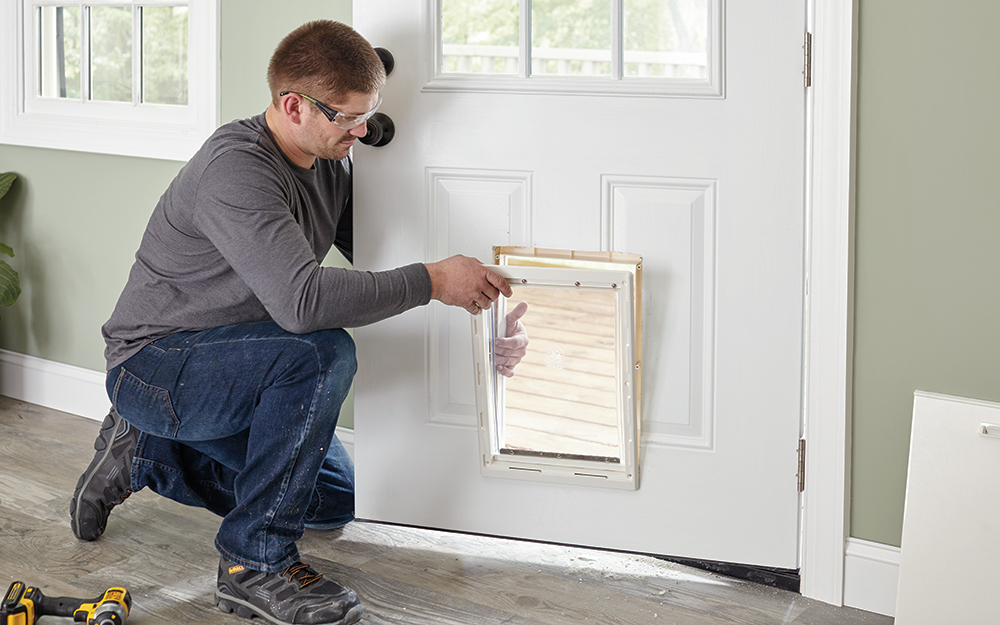
Installing The Pet Door Frame
Installing the pet door frame is a key step to create a safe passage for your pet. The frame holds the flap and fits into the cut-out space in your door. A proper fit keeps the door stable and prevents drafts. Taking time to place the frame correctly ensures a smooth installation.
Fitting The Frame
Start by placing the pet door frame into the cut hole on your door. Check that it fits snugly without gaps. Adjust the position until the frame sits evenly on all sides. Use a level tool to make sure it is straight. A well-fitted frame helps the flap open and close smoothly.
Securing With Screws
Once the frame fits well, secure it using screws supplied with the pet door. Drill pilot holes to avoid splitting the door material. Tighten the screws evenly to hold the frame firmly in place. Avoid over-tightening, which can crack the frame or door. Check the frame for stability before moving to the next step.
Credit: www.homedepot.com
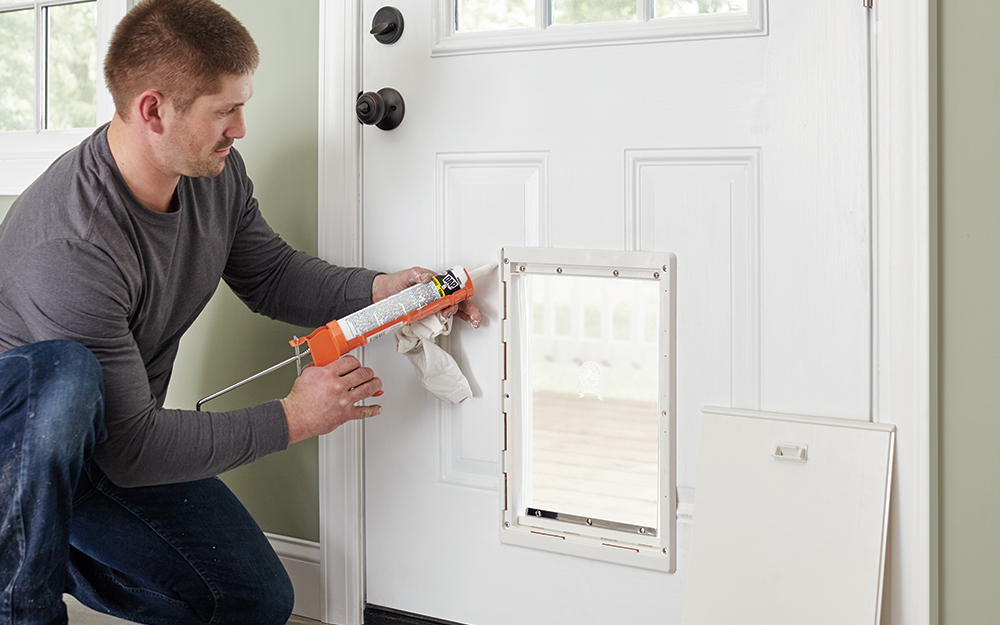
Sealing And Finishing Touches
Sealing and finishing touches are key to a pet door installation. These steps protect your home from drafts and moisture. They also help the door work smoothly. Take time to do this right. Your pet door will last longer and stay secure.
Weatherproofing
Start by applying weatherstripping around the pet door frame. This blocks wind and rain. Use silicone caulk to seal any small gaps. Check the edges inside and outside the door. Make sure no space is left open. Proper weatherproofing keeps your home warm and dry.
Checking Door Functionality
Open and close the pet door several times. It should move easily without sticking. Check the flap or panel for smooth operation. Ensure it closes fully to keep out cold air and pests. Adjust hinges or seals if needed. Your pet door must work well every day.
Training Your Pet To Use The Door
Training your pet to use the new door takes patience and care. Pets need time to understand this new way to go outside. Teaching them step-by-step helps them feel safe and confident. This section guides you through simple methods to help your pet learn quickly.
Introducing The Door
Start by showing the pet door while it is closed. Let your pet sniff and explore it. Use a calm voice and gentle touch. Place treats near the door to create positive feelings. Open the flap and let it move freely. Encourage your pet to pass through the open door slowly.
Keep sessions short and fun. Repeat daily until your pet seems curious and relaxed. Avoid forcing your pet through the door. Let curiosity lead the way. This builds trust and reduces fear.
Encouraging Use
Once your pet is comfortable near the door, encourage actual use. Use treats or toys on the other side. Call your pet gently and praise every attempt. Practice both going outside and coming inside. Be patient with mistakes or hesitation.
Use simple commands like “door” or “go out.” Reward your pet immediately after using the door. Gradually reduce treats as your pet learns. Keep training consistent to build a routine. Soon, your pet will use the door easily on its own.
Frequently Asked Questions
What Tools Are Needed To Install A Pet Door In A Door?
You need a drill, jigsaw, measuring tape, screwdriver, and pencil. Safety glasses and a level also help ensure accuracy and protection.
How Do I Measure For A Pet Door Installation?
Measure your pet’s height and width at the shoulders. Mark these dimensions on the door to ensure a perfect fit.
Can I Install A Pet Door On Any Door Type?
Most interior and exterior doors work, including wood and metal. Check the pet door specifications for compatibility with your door material.
How Do I Secure The Pet Door To Prevent Drafts?
Use weatherstripping around the pet door frame. Apply sealant if necessary to block air leaks and improve insulation.
Conclusion
Installing a pet door in your door can make life easier for both you and your pet. The steps are simple and do not take much time. Measure carefully and follow the instructions closely. A well-installed pet door lets your pet come and go freely.
It also keeps your home safe and energy efficient. Take your time and enjoy the convenience it brings. Your pet will thank you for the freedom and comfort. A pet door adds joy to your daily routine.