Are you thinking about upgrading your home security with a video doorbell? Installing one might seem tricky, but it’s easier than you think.
Imagine being able to see and talk to visitors right from your phone, no matter where you are. In this guide, you’ll get simple, step-by-step instructions that anyone can follow. By the end, you’ll have your video doorbell up and running, giving you peace of mind and convenience every day.
Ready to get started? Let’s dive in!
Choosing The Right Video Doorbell
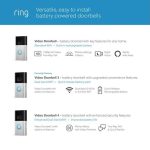
Choosing the right video doorbell is an important step before installation. The right choice makes your home safer and keeps you connected. Several factors affect your decision. These include the type of model, its features, and system compatibility. Understanding these will help you pick a doorbell that fits your needs and home setup.
Wired Vs. Wireless Models
Wired video doorbells connect to your home’s electrical system. They often provide a steady power supply. This means fewer battery changes. Installation may take more time and skill. Wireless models run on batteries. They are easier to install and move around. Battery life varies by use and model. Choose wired for reliability or wireless for flexibility.
Features To Consider
Look for features like video quality and night vision. High-definition video shows clearer images. Night vision helps see visitors in the dark. Two-way audio allows talking through the doorbell. Motion detection alerts you of activity. Some models store video in the cloud. Others save it locally on a memory card. Pick features that match your safety needs.
Compatibility With Home Systems
Check if the doorbell works with your home network. Most video doorbells connect via Wi-Fi. Ensure your Wi-Fi signal reaches the doorbell location. Some models link with smart home devices. This includes assistants like Alexa or Google Home. Confirm compatibility to use all functions smoothly. This prevents issues after installation.
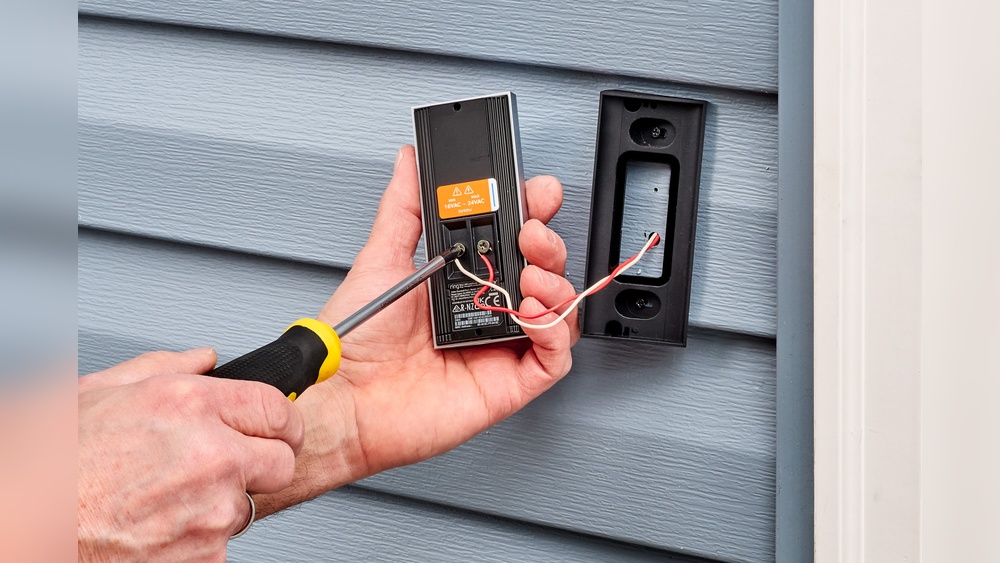
Credit: www.younghouselove.com
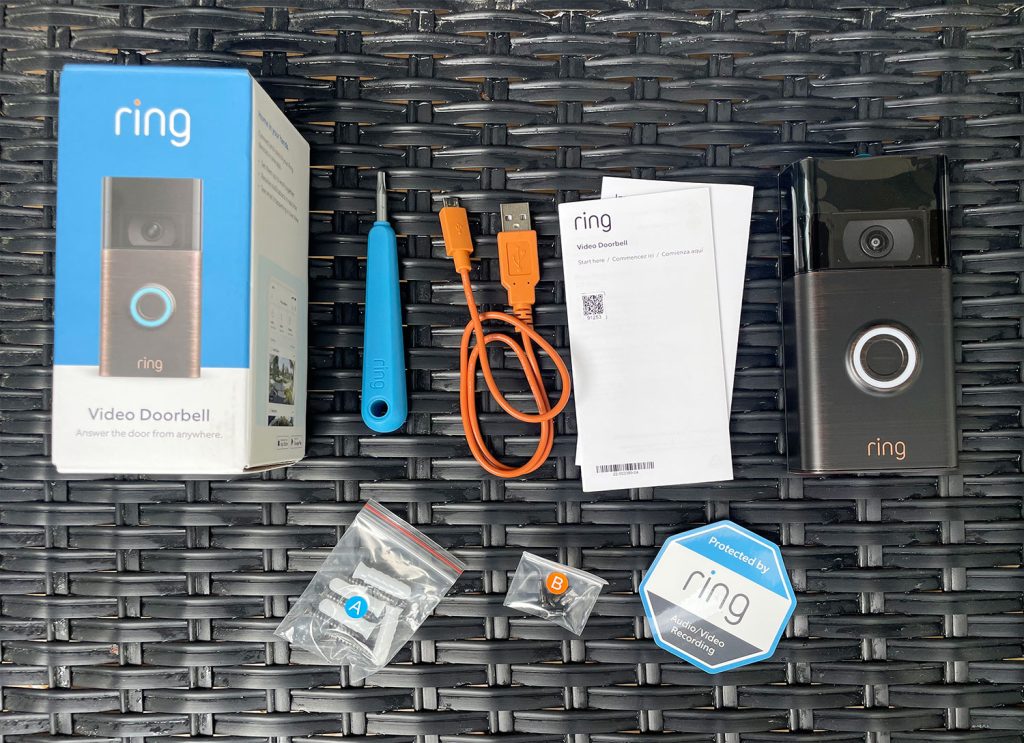
Tools And Materials Needed
Installing a video doorbell needs certain tools and materials. Having the right items makes the job easier and safer. This section lists the tools you need to install your video doorbell properly.
Basic Tools
A screwdriver is essential for most doorbell installations. A drill helps make holes in hard surfaces like brick or wood. Use a level to keep the doorbell straight. A tape measure ensures correct placement. Wire strippers help prepare wires for connection.
Additional Supplies
Mounting brackets usually come with the doorbell but check first. You might need extra screws or anchors for strong support. Electrical tape can protect wire connections. A pencil is useful to mark drill spots. Some doorbells need a power adapter or batteries.
Safety Gear
Wear safety glasses to protect your eyes during drilling. Gloves protect your hands from sharp objects. Use a ladder if the doorbell is high on the wall. Make sure the ladder is stable and on even ground. Turn off power before handling wires to avoid shocks.
Preparing The Installation Site
Preparing the installation site is the first step for a smooth video doorbell setup. It ensures the device works well and lasts long. Careful planning avoids problems later. Follow these key points before you start.
Selecting The Ideal Location
Choose a spot near your front door. Make sure the doorbell can see visitors clearly. Avoid places with direct sunlight or heavy rain exposure. The camera should cover the main entry area. Pick a height about 4 to 5 feet from the ground. This height captures faces well.
Checking Power Sources
Find a power source for your video doorbell. Some models use battery power, others need wiring. If wiring, check if existing doorbell wires work. The voltage must match the doorbell’s needs. Use a voltage tester to check. For battery models, make sure you can easily remove batteries for charging.
Ensuring Wi-fi Coverage
Video doorbells need strong Wi-Fi for live video and alerts. Test Wi-Fi signal strength at the chosen spot. Use a phone or Wi-Fi tester. If signal is weak, move your router closer or add a Wi-Fi extender. Without good Wi-Fi, the doorbell may lag or lose connection.

Credit: www.youtube.com
Mounting The Video Doorbell
Mounting the video doorbell is a key step to ensure it works well. Proper mounting keeps the doorbell secure and helps the camera capture clear views. Follow simple steps for a safe and steady setup.
Marking Drill Points
Start by holding the mounting bracket against your wall. Align it where you want the doorbell to go. Use a pencil to mark the spots for drilling holes. These marks guide you to drill in the right place.
Drilling And Anchoring
Use a drill with the right bit size for your wall type. Drill holes where you marked. If you have a brick or concrete wall, insert anchors into the holes. Anchors keep screws tight and prevent the doorbell from falling.
Attaching The Doorbell
Place the mounting bracket over the drilled holes. Screw it firmly to the wall using the anchors. Attach the video doorbell to the bracket by snapping or screwing it in place. Check that it feels stable and secure.
Wiring And Power Connection
Connecting a video doorbell to power is a key step in installation. The power source affects how the device works. Some models use the home’s existing doorbell wiring. Others run on batteries. Choosing the right option depends on your setup and preference.
Understanding wiring and power helps avoid errors. It also ensures the doorbell stays functional and reliable. Let’s explore how to connect the doorbell to power safely and easily.
Connecting To Existing Doorbell Wiring
Locate the old doorbell wires behind the wall or doorframe. Turn off power at the circuit breaker. This prevents electric shocks and damage.
Attach the video doorbell’s wires to the existing wires. Usually, two wires connect to two terminals on the doorbell. Use a screwdriver to secure them tightly.
Check the voltage of your current doorbell system. Most video doorbells need 16-24 volts AC. Use a multimeter to measure the voltage if unsure.
After wiring, restore power and test the doorbell. The device should power on and connect to your Wi-Fi.
Using Battery Power
Many video doorbells come with rechargeable batteries. This option avoids wiring and makes installation easy. Just insert the battery into the doorbell.
Charge the battery fully before installation. This ensures the longest usage time. Battery life depends on usage and settings.
Battery-powered doorbells need occasional recharging. Monitor battery levels via the doorbell’s app. Replace or recharge when the battery is low.
Troubleshooting Power Issues
Check the power source if the doorbell doesn’t turn on. For wired models, ensure the circuit breaker is on. Loose wire connections can cause power loss.
Inspect wires for damage or corrosion. Replace damaged wires to maintain good contact. Reset the doorbell by removing and reinserting the battery or power connection.
For battery-powered models, verify the battery is charged. Replace old batteries if the device still won’t power on. Contact support if problems persist after these steps.
Setting Up The Software
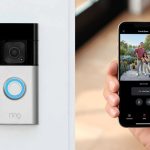
Setting up the software for your video doorbell is a key step to make it work properly. It involves installing an app, connecting the device to your Wi-Fi, and adjusting settings to suit your needs. This process is simple and helps you control the doorbell from your phone.
Downloading The App
Start by downloading the official app for your video doorbell. Find it in the App Store or Google Play. Use your phone to search for the brand name of your doorbell. Download and install the app to begin setup. The app allows you to view live video and receive alerts.
Connecting To Wi-fi
Open the app and follow the instructions to connect your doorbell to Wi-Fi. Choose your home Wi-Fi network from the list. Enter your Wi-Fi password carefully. The doorbell needs a strong Wi-Fi signal to work well. Connection may take a minute or two.
Configuring Settings
After connecting, customize your doorbell settings in the app. Set motion detection sensitivity to avoid false alerts. Choose notification preferences for when someone presses the doorbell. Adjust video quality and sound options. These settings help you get the best experience.
Testing And Adjustments
Testing and adjusting your video doorbell is a key step after installation. It ensures the device works well and fits your needs. You can catch problems early and fix them fast. This makes your doorbell reliable and easy to use daily.
Checking Video And Audio Quality
Start by checking the video feed on your phone or tablet. Look for a clear picture without blurs or dark spots. Speak to the doorbell and listen to the sound on your device. Make sure the voice is clear and loud enough. Good video and audio quality help you see and hear visitors well.
Adjusting Camera Angle
Next, adjust the camera angle. Move it to cover your front door and porch fully. Avoid pointing at the ground or bright lights. A proper angle captures faces clearly and avoids glare. Small changes can improve your view a lot.
Setting Motion Detection Zones
Set the motion detection zones to control alerts. Mark areas where you want to detect movement, like the walkway. Exclude spots with frequent passing cars or trees. This cuts down false alarms and saves battery life. Tailor zones to your home’s layout for best results.

Credit: www.youtube.com
Enhancing Security Features
Installing a video doorbell adds more than just convenience. It helps protect your home by enhancing security features. These features keep you informed and aware of activity near your door. You can take steps to monitor and control access better. The right setup makes your home safer and smarter.
Enabling Alerts And Notifications
Set up alerts to get instant notifications on your phone. These alerts inform you when someone is at the door. You can see live video or recorded clips right away. This helps you respond quickly to visitors or potential threats. Customize alert settings for motion, sound, or specific times of day.
Integrating With Smart Home Devices
Connect your video doorbell with other smart home gadgets. Link it to smart lights, locks, and security systems. This lets you control multiple devices from one app. For example, lights can turn on when the doorbell detects motion. Smart locks allow you to open the door remotely. Integration improves your home’s overall security and ease of use.
Regular Maintenance Tips
Keep your video doorbell working well with simple upkeep. Clean the camera lens regularly to keep the video clear. Check the battery or power source to avoid interruptions. Update the device software to get the latest security patches. Test alerts and connections to ensure everything functions properly.
Frequently Asked Questions
How Do You Prepare For Video Doorbell Installation?
Start by turning off the power to your existing doorbell. Gather necessary tools like a drill, screwdriver, and wire stripper. Read the manufacturer’s instructions carefully. Check Wi-Fi strength at your door for smooth video streaming.
Can I Install A Video Doorbell Without Wiring?
Yes, many models offer battery-powered options. They are easier to install but require regular charging. Wireless video doorbells connect via Wi-Fi, making installation flexible and less invasive.
How Do You Connect A Video Doorbell To Wi-fi?
Follow the app instructions provided by the manufacturer. Typically, you select your Wi-Fi network and enter the password. Ensure your network signal is strong at the doorbell location for reliable connection.
What Tools Are Needed For Video Doorbell Installation?
You will need a drill, screwdriver, wire stripper, and level. Some models may require a voltage tester or additional mounting brackets. Always use tools recommended by the doorbell manufacturer.
Conclusion
Installing a video doorbell is simple with clear steps. Choose the right spot near your door. Gather basic tools like a drill and screwdriver. Follow the instructions carefully to avoid mistakes. Test the device to ensure it works well. Enjoy improved home security and convenience now.
Stay safe and connected with your visitors easily.