Imagine looking into your mirror and seeing more than just your reflection. What if your mirror could show you the weather, your daily schedule, or even the latest news—all while you get ready?
Making a smart mirror might sound complicated, but with the right steps, you can create one yourself. In this guide, you’ll discover simple, clear instructions that anyone can follow. Ready to transform your mirror into a powerful tool that makes your mornings easier and more fun?
Let’s dive in and start building your very own smart mirror today!
Choosing The Right Materials
Choosing the right materials is key to building a smart mirror. The materials affect how well the mirror works and how long it lasts. Each part has a role in the final product. Selecting good materials makes the project easier and the mirror better.
Selecting The Mirror
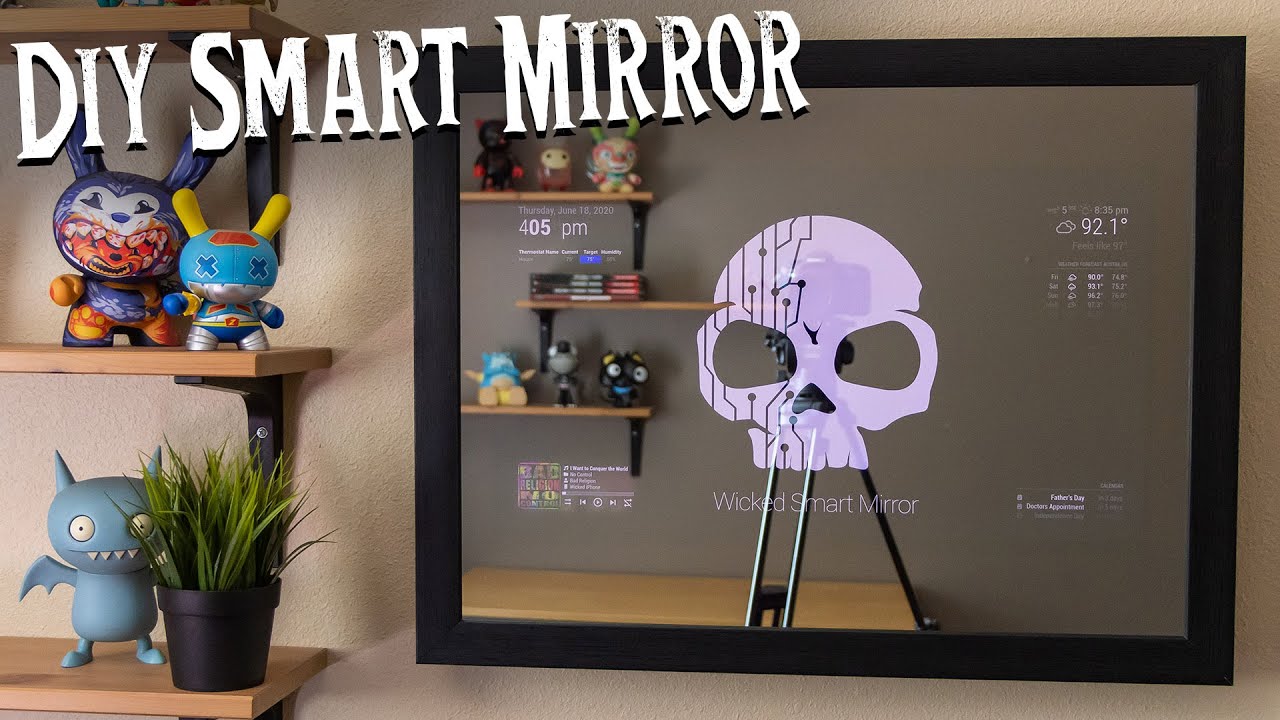
Pick a two-way mirror for your smart mirror. This type of glass shows a reflection but also lets light pass through. It allows the display behind it to be visible. Acrylic mirrors are lighter and safer than glass. Choose the size that fits your space and screen.
Picking A Display Screen
A clear, bright screen is important. LCD screens are common and work well. OLED screens offer better colors but cost more. Choose a screen size that matches your mirror. The screen should be thin to keep the mirror slim. Check for HDMI or other input options.
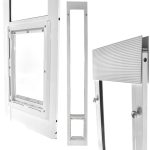
Choosing A Frame
The frame holds your mirror and screen in place. Wood frames add a classic look and are easy to work with. Metal frames are strong and sleek but harder to modify. Plastic frames are lightweight and affordable. Pick a frame that suits your room’s style and size.
Gathering Essential Tools
Gathering essential tools is the first step in building a smart mirror. Having the right tools makes the process easier and faster. Prepare everything before starting to avoid interruptions. This section covers the basic tools and optional accessories you might need. Choose tools that fit your budget and skills.
Basic Tools Needed
Start with a screwdriver set for assembling parts. A utility knife helps cut materials cleanly. A tape measure ensures precise measurements. A drill is useful for making holes in the frame or wall. Wire cutters and strippers prepare cables for connection. A hot glue gun or double-sided tape fixes components securely. These tools form the core kit for most smart mirror projects.
Optional Accessories
Consider a soldering iron for stronger electrical connections. A multimeter checks voltage and current to avoid mistakes. LED strip lights add extra brightness and style. A small fan helps cool the mirror’s electronics. Screen cleaning cloths keep surfaces clear and shiny. These accessories enhance the build but are not always necessary. Use them to improve quality and performance.
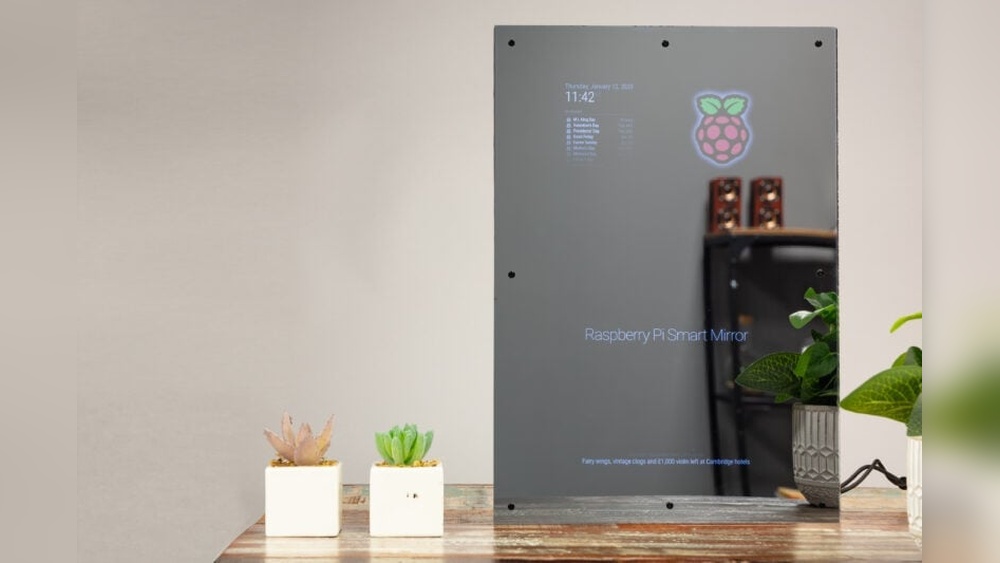
Setting Up The Display
Setting up the display is a key step in building a smart mirror. The display shows useful information like time, weather, and news. It must be clear and easy to read through the mirror glass.
This part explains how to install the screen behind the mirror and connect it to a computer. Proper setup ensures the smart mirror works smoothly and looks neat.
Installing The Screen Behind The Mirror
Choose a screen that fits the mirror size. A flat LCD or LED screen works best. Remove the frame or back cover carefully.
Place the screen directly behind the two-way mirror. The display should face the mirror’s reflective side. Secure the screen with brackets or double-sided tape.
Make sure the screen sits flush with the mirror surface. Avoid gaps that cause shadows or distortion. Check the screen’s brightness and angle for clear visibility.
Connecting The Display To A Computer
Use a small computer like a Raspberry Pi to power the display. Connect the screen to the computer using HDMI or other compatible cables.
Secure the computer near the mirror, hidden from view. Connect power to both the screen and the computer. Use cable clips to manage wires neatly.
Turn on the computer and test the display. Adjust settings for resolution and brightness. Install smart mirror software to start displaying useful data.
Installing Software
Installing software on a smart mirror is a key step in making it functional. This software controls what you see on the mirror screen. It shows time, weather, news, and more. Choosing the right software helps the mirror fit your needs. Setting it up correctly makes the mirror easy to use and useful every day.
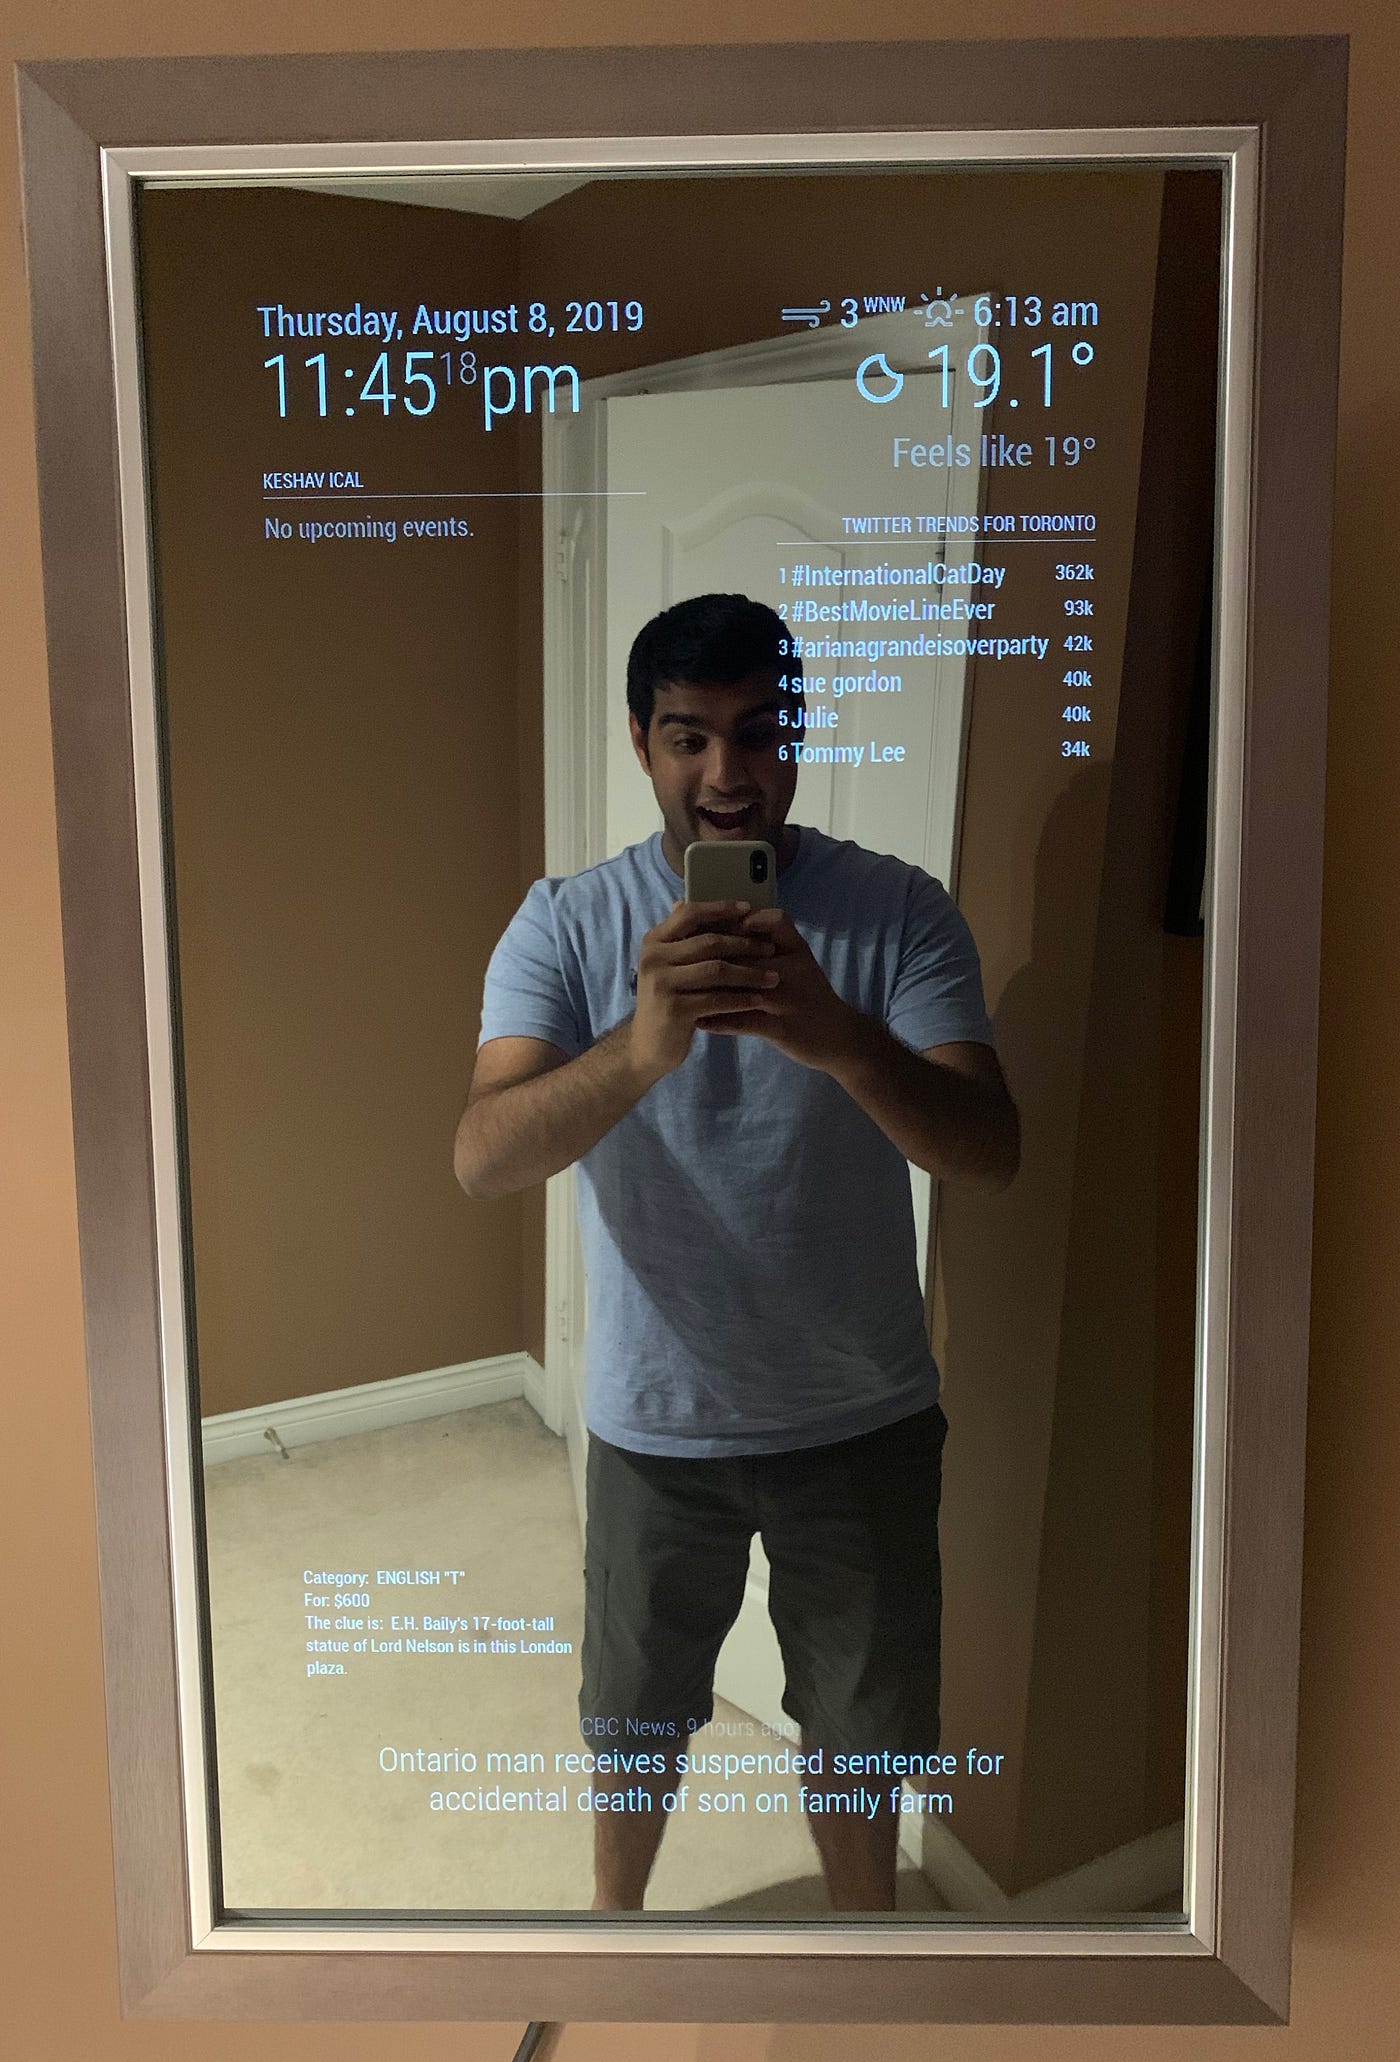
Popular Smart Mirror Software Options
Several software options work well for smart mirrors. MagicMirror² is one of the most popular. It is open-source and easy to customize. Another choice is Dakboard, which focuses on calendars and photos. HomeMirror is simpler and good for basic use. Each option offers different features and styles. Choose one based on what you want your mirror to do.
Configuring The Interface
After installing software, you need to set up the interface. This means arranging the widgets and information on the screen. Most software lets you move items by editing a config file. You can add or remove widgets like weather, news, or clock. Make sure the text is big enough to read in your mirror. Keep the layout clean to avoid clutter. Testing the interface helps find the best setup for daily use.
Programming Custom Features
Programming custom features lets you personalize your smart mirror. It makes your mirror not just a reflection tool but also a helpful assistant. You can add useful information and controls to fit your daily routine. This section explains how to add weather updates, news feeds, and voice commands.
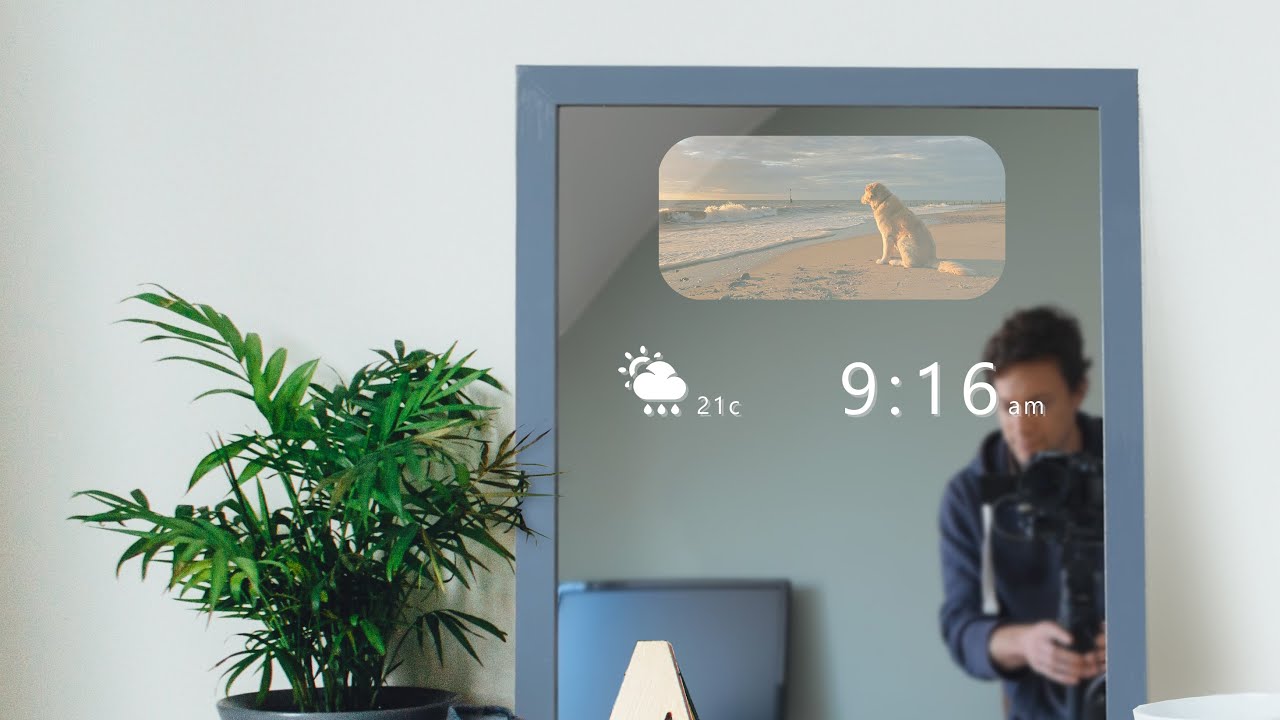
Adding Weather Updates
Show current weather on your smart mirror to plan your day better. Use a weather API like OpenWeatherMap. Fetch data such as temperature, humidity, and conditions. Display this information clearly on the mirror screen. Update the weather regularly to keep it accurate.
Incorporating News Feeds
Keep updated with the latest news while you get ready. Use RSS feeds from trusted news sources. Parse the feed to show headlines and short summaries. Set the news to refresh every few minutes. Customize the news topics based on your interests.
Integrating Voice Commands
Control your mirror hands-free with voice commands. Use libraries like Google Assistant SDK or Amazon Alexa Voice Service. Program commands to check weather, news, or control smart home devices. Ensure the voice system responds quickly and clearly. This feature adds convenience and improves user experience.
Credit: www.youtube.com
Assembling The Smart Mirror
Assembling the smart mirror is a key step in your project. It brings all parts together into a working unit. Taking care during this stage ensures your mirror looks good and works well. Follow simple steps to secure parts and manage cables neatly. This helps your smart mirror last longer and stay safe.
Mounting Components Securely
Start by fixing the display behind the two-way glass. Use screws or brackets that fit your frame. Tighten them just enough to hold the screen without damage. Next, attach the computer or Raspberry Pi to the back. Use Velcro or small mounts for easy access. Secure sensors and cameras in place. Check if all parts are stable and do not move.
Cable Management Tips
Keep cables tidy to avoid tangles and damage. Use zip ties or small clips to bundle wires together. Route cables along the mirror frame edges for a clean look. Avoid sharp bends or tight loops that can break wires. Leave some slack for adjusting parts later. Label cables if needed for easy identification. Proper cable management makes maintenance easier and safer.
Testing And Troubleshooting
Testing and troubleshooting are key steps to ensure your smart mirror works well. This phase helps find problems early and fix them fast. Testing confirms the display shows the right info. Troubleshooting solves issues that block the mirror’s functions.
Checking Display Functionality
First, check the display screen. Make sure it turns on and shows clear images. Test the brightness and contrast levels. Look for dead pixels or flickering. Verify the touch screen works if your mirror has one. Use simple test patterns or apps. Confirm the display responds to commands smoothly. This step ensures the mirror shows data correctly.
Fixing Common Issues
Common issues include no display, frozen screen, or slow response. Restart the device to clear temporary bugs. Check all cables and connections are tight. Update the software to the latest version. Reset settings if the mirror behaves oddly. Clean the screen to remove smudges or dust. Replace faulty parts like the display or sensors. These fixes help restore your smart mirror’s function quickly.
Enhancing Your Smart Mirror
Enhancing your smart mirror can make it more useful and fun. Small changes improve its look and function. These upgrades bring a personal touch to your daily routine.
Focus on sensors and appearance. Both add value and make your mirror stand out.
Adding Sensors
Sensors help your smart mirror react to your presence. Motion sensors turn on the display when you approach. Light sensors adjust the screen brightness based on room light.
Temperature sensors show room heat. They add useful info for your day. Sensors make your mirror smarter without extra effort.
Personalizing Appearance
Change themes and colors to match your style. Choose fonts that are easy to read. Use backgrounds that suit your room’s design.
Customize widgets to show what matters most. Weather, news, or calendar—pick your favorites. Personal touches make your smart mirror unique and pleasant.
Safety And Maintenance Tips
Smart mirrors blend technology and style. Proper care keeps them working well and safe. Follow simple safety and maintenance tips to protect your device. These tips help avoid damage and extend your mirror’s life.
Handling Electronics Safely
Turn off the smart mirror before touching any electronics. Avoid water near power cords and plugs. Use a dry hand when handling cables and connectors. Do not force connections or remove parts roughly. Keep the mirror away from heat and direct sunlight. Place the mirror on a stable surface to prevent falls.
Cleaning And Upkeep
Use a soft, dry cloth to clean the mirror surface. Avoid harsh chemicals that can damage the screen or glass. Gently wipe smudges and dust without pressing hard. Clean the frame and electronics with care to avoid moisture. Regularly check cables for wear or loose connections. Schedule periodic inspections to ensure all parts work correctly.
Credit: medium.com
Credit: www.youtube.com
Frequently Asked Questions
What Materials Are Needed To Make A Smart Mirror?
You need a two-way mirror, an LCD screen, a Raspberry Pi, and basic electronic components. These materials create the smart display and reflective surface.
How Does A Smart Mirror Display Information?
A smart mirror uses an LCD screen behind a two-way mirror to show data. The mirror reflects your image while displaying weather, time, and notifications.
Can I Program Custom Features On My Smart Mirror?
Yes, smart mirrors are customizable with software like MagicMirror². You can add modules for news, calendar, weather, and more using simple coding.
How Difficult Is It To Build A Smart Mirror?
Building a smart mirror requires basic programming and hardware skills. Following tutorials can simplify assembly and setup, making it accessible for beginners.
Conclusion
Building a smart mirror is easier than it seems. You only need basic tools and clear steps. This project adds fun and function to your home. Enjoy customizing your mirror with apps and features. Take your time and follow the instructions carefully.
Soon, you will have a useful, modern mirror. Try it out and see the difference yourself. Smart mirrors blend technology with daily life. Simple, smart, and practical—just what you need.