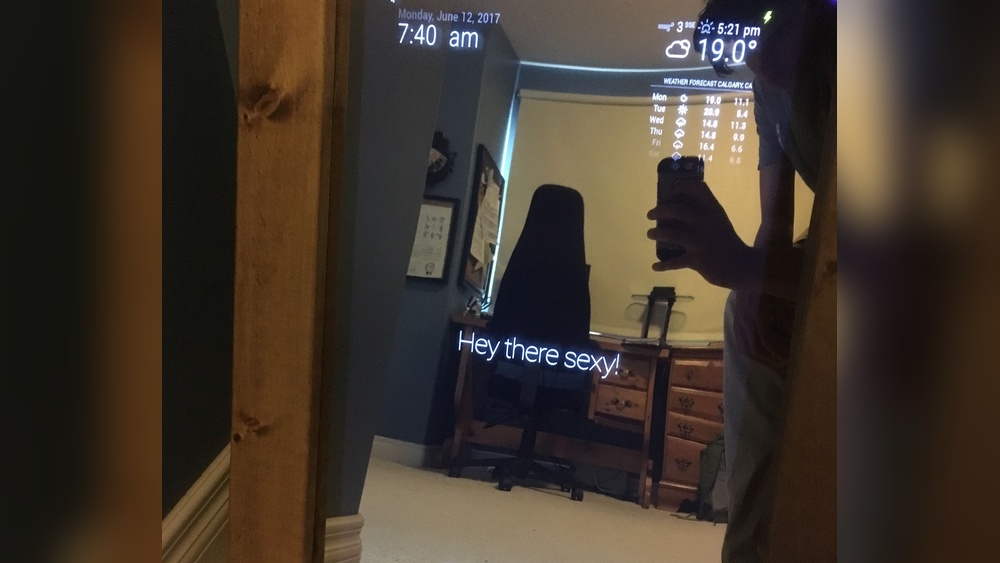
Imagine looking into your mirror every morning and seeing more than just your reflection. What if your mirror could show you the weather, news, or your daily schedule while you get ready?
You can make this happen by coding your own smart mirror. It’s easier than you think, and you don’t need to be a tech expert to start. In this guide, you’ll discover simple steps to create a smart mirror that fits your needs and style.
Ready to turn your ordinary mirror into a powerful tool that makes your daily routine smarter? Let’s dive in and make it happen together.
Choosing The Right Hardware
Choosing the right hardware is key to building a smart mirror that works well. The hardware affects how your mirror looks and performs. Picking parts that match your needs saves time and money. Focus on quality and compatibility. This section guides you through the main hardware choices.
Selecting The Display
The display is the heart of your smart mirror. A good screen shows clear and bright images. Use an LCD or LED monitor between 15 to 27 inches. Bigger screens show more information but cost more. Choose a screen with HDMI or VGA input for easy connection. Touchscreen displays add interactivity but increase price.
Picking A Suitable Frame
The frame holds your display and mirror glass. Choose one that fits your room style. Wood frames offer a classic look. Metal frames provide a modern feel. Make sure the frame is deep enough for the display and electronics. Lightweight frames are easier to hang. Check frame dimensions carefully before buying.
Choosing A Microcontroller Or Computer
Your smart mirror needs a brain. Use a microcontroller like Raspberry Pi or an Arduino board. Raspberry Pi runs full operating systems and supports many apps. Arduino works well for simple controls and sensors. Pick a device with Wi-Fi for updates and data syncing. Choose enough memory and processing power for your software.
Essential Sensors And Accessories
Sensors help your smart mirror respond to you. Motion sensors detect when you approach. Temperature sensors show room or weather data. Light sensors adjust screen brightness automatically. Add a microphone for voice commands. Accessories like speakers and cameras expand features. Select sensors that match your goals and budget.
Setting Up The Software
Setting up the software for your smart mirror is a key step. It makes your mirror smart and useful. You will install the operating system, pick a platform, adjust display settings, and add modules. Each part helps your mirror show the right information and work well.
Installing The Operating System
Start by installing the operating system on your smart mirror’s computer. Raspberry Pi OS is a popular choice. Download the OS image and write it to an SD card. Insert the card into your device and power it on. Follow the on-screen instructions to complete the setup. This gives your mirror a base to run all software.
Choosing A Smart Mirror Platform
Select a smart mirror platform to build your interface. MagicMirror² is widely used. It is open-source and easy to customize. Download the platform files from its official site. Install the platform on your device using simple commands. This platform lets you add and manage the information shown on your mirror.
Configuring The Display Settings
Adjust the display settings for the best view. Set the screen resolution to match your monitor. Use the device’s settings or config files to do this. Correct brightness and contrast improve readability. Proper display setup ensures the mirror looks clear and sharp.
Adding Modules And Plugins
Modules add extra features to your smart mirror. Weather, news, clock, and calendar are common modules. Find modules online or create your own. Install them by placing files in the modules folder. Edit the config file to activate and arrange modules. Plugins expand functionality and make your mirror more helpful.
Designing The User Interface
Designing the user interface is a key step in coding a smart mirror. It shapes how users interact with the mirror. The interface must be clear and simple to read. It should display useful information without clutter. A well-designed interface improves the overall experience and makes the mirror more helpful.
Focus on easy navigation and quick access to features. The layout should fit the mirror’s screen size perfectly. Choosing the right colors and fonts also helps with visibility. Let’s explore some important parts of the user interface.
Customizing The Layout
Start by arranging the main sections on the screen. Use a grid or flexible boxes for neat alignment. Place important information at the top or center for quick glance. Keep enough space between elements to avoid confusion. Use simple icons and labels to guide users. Test different layouts to find the best fit.
Incorporating Weather And News
Weather updates are a popular feature on smart mirrors. Show current temperature, conditions, and forecasts. Use icons like sun or rain for quick understanding. For news, display headlines or summaries in a scrolling area. Choose reliable sources for accurate information. Update the data regularly to keep it fresh.
Adding Calendar And Reminders
Include a calendar to show daily events and appointments. Use clear fonts and highlight the current date. Add reminders with short texts and alert icons. Allow users to mark tasks as done. Sync the calendar with online services for real-time updates. Keep this section simple to avoid overload.
Integrating Voice Control
Voice control makes the smart mirror hands-free. Add a microphone icon to indicate listening mode. Use clear prompts and feedback for voice commands. Program commands for checking weather, news, and calendar. Ensure the voice system recognizes common phrases easily. Test voice control in a quiet environment for accuracy.
Building The Mirror Frame
Building the mirror frame is a key step in creating a smart mirror. The frame holds all parts together and gives the mirror a clean look. It must be strong and fit the display perfectly. A good frame also helps with lighting and makes the mirror easy to use.
Choosing the right materials and assembling the frame carefully will improve your smart mirror’s quality and durability.
Selecting Materials
Choose wood, metal, or plastic for the frame. Wood is easy to work with and looks nice. Metal is strong but harder to cut. Plastic is light and cheap but less durable. Pick a material that suits your skills and style.
Make sure the material can hold the display and other parts safely.
Cutting And Assembling The Frame
Measure the display size before cutting the frame pieces. Use a saw or cutter suitable for your material. Cut slowly to get smooth edges. Assemble the pieces using screws or strong glue. Check that the frame is square and stable.
Take your time to make the frame fit well around the display.
Mounting The Display
Place the display inside the frame carefully. Secure it with brackets or tape to avoid movement. Ensure the screen faces out evenly and stays visible. Leave space behind for cables and ventilation. Double-check the display is firm and safe.
Ensuring Proper Lighting
Good lighting makes the smart mirror easier to read. Use LED strips or soft lights around the frame edges. Avoid lights that shine directly on the screen. Choose warm or neutral light colors for comfort. Test lighting in different rooms to find the best setup.
Coding Custom Features
Coding custom features lets you shape your smart mirror’s behavior. You decide what it shows and how it works. This section breaks down the steps to add your own scripts, connect online services, build interactive parts, and fix issues.
Writing Basic Scripts
Start by writing small programs to control your mirror. Use JavaScript for simple tasks like displaying time or weather. Keep scripts clear and organized. Test each script separately to ensure it works well.
Integrating Apis
APIs bring live data to your mirror. Connect weather, news, or calendar services using their APIs. Use fetch or XMLHttpRequest in JavaScript to get data. Show this data on your mirror in a clear way.
Creating Interactive Elements
Add buttons or touch areas to make your mirror interactive. Use event listeners to detect user actions. For example, tap to change the display or swipe to switch screens. Keep interactions simple and easy to use.
Debugging And Testing
Check your code for errors regularly. Use browser developer tools to find bugs. Test all features on your mirror to confirm they work. Fix issues step by step to keep your mirror stable and smooth.
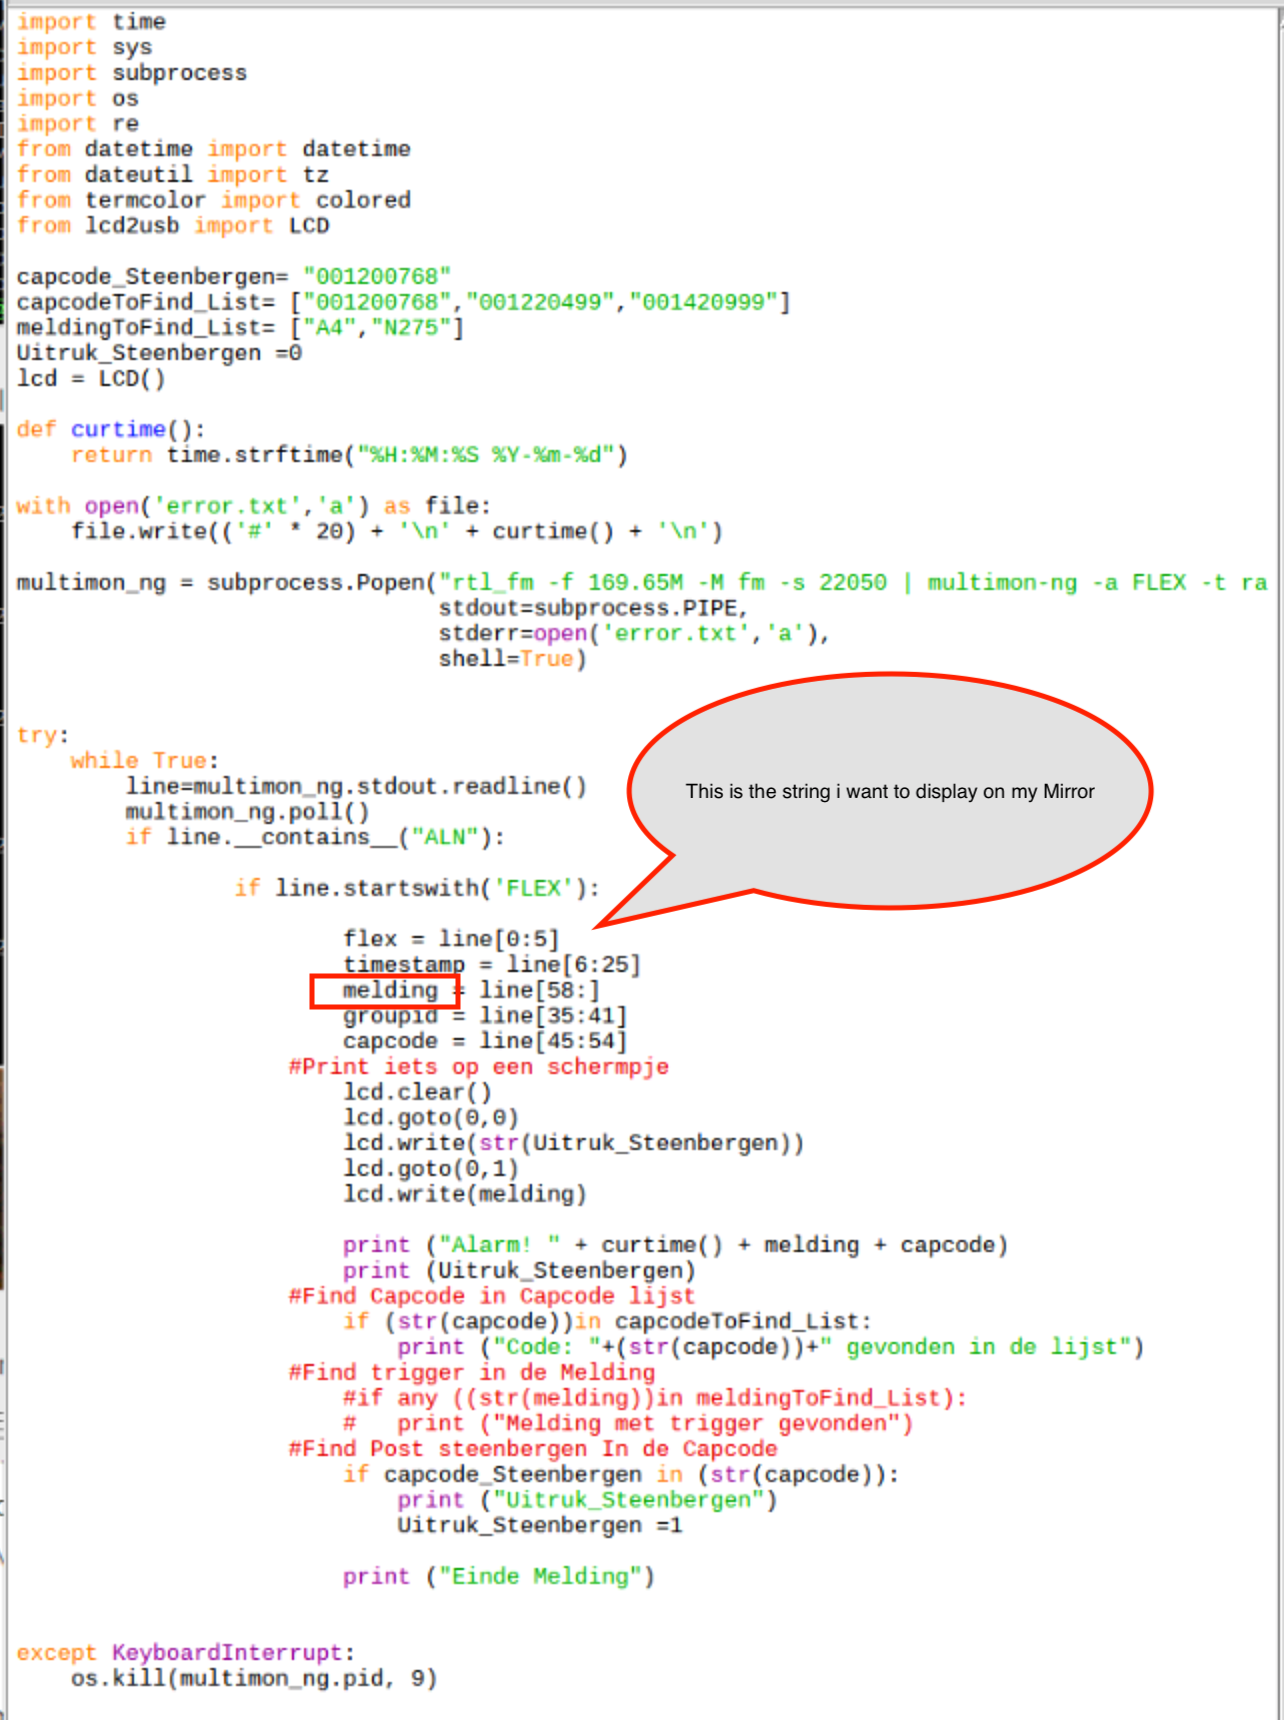
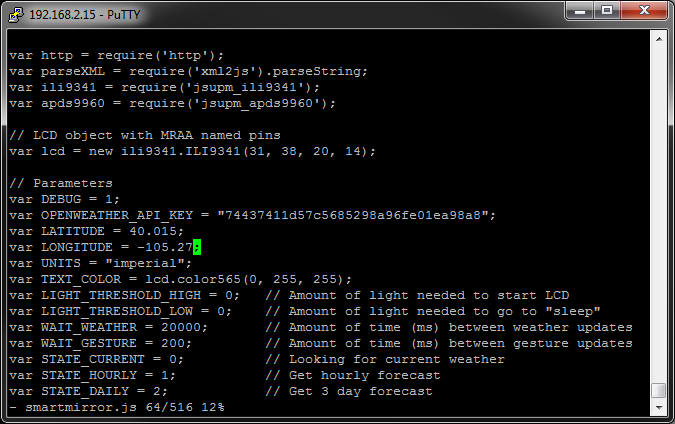
Credit: forum.magicmirror.builders
Final Assembly And Installation
Final assembly and installation bring your smart mirror project to life. This phase needs care and attention to detail. It is where hardware and software come together. Proper mounting and cable management keep your mirror neat and functional.
Combining Hardware And Software
Start by connecting all hardware parts firmly. Attach the screen, computer, and sensors as planned. Next, load the software on your device. Test to confirm the display and sensors work correctly. Make small adjustments to improve performance and accuracy.
Securing Components
Use screws, brackets, or strong tape to fix parts securely. Ensure no loose wires or parts can move inside the frame. This prevents damage and keeps the mirror safe to use. Check the tightness of each component before finalizing.
Wall Mounting Tips
Choose a sturdy wall to hold your smart mirror. Use a level tool to keep it straight. Mark the drill points carefully for the mounting brackets. Drill holes and fix the brackets firmly. Hang the mirror and test its stability.
Power And Cable Management
Plan power sources near your mirror for easy access. Use cable clips or channels to hide wires. Keep cables tight and out of sight to avoid tangling. This creates a clean look and prevents accidents. Double-check all connections before turning on the mirror.
Troubleshooting Common Issues
Troubleshooting is a key skill for building a smart mirror. Problems can happen at any step. Knowing how to fix them saves time and frustration. This section covers common issues you might face.
Display Problems
The screen might stay black or show no image. Check the power connection first. Loose cables cause many display issues. Adjust the screen brightness if it looks dim. Sometimes, the display driver needs an update. Restart the device to reset the display settings.
Software Glitches
Apps may freeze or crash unexpectedly. Clear the app cache to fix slow responses. Reinstall the software if errors continue. Watch for updates that fix bugs. Running multiple apps can overload the system. Keep your code clean and test often.
Connectivity Issues
The smart mirror may fail to connect to Wi-Fi. Check the network password for accuracy. Restart your router and the mirror’s system. Move closer to the Wi-Fi source for better signal. Verify that the network supports your device. Disable any firewall blocking the connection.
Hardware Failures
Broken sensors or unresponsive buttons stop features from working. Inspect cables and connections for damage. Replace faulty components with exact parts. Overheating can cause hardware to fail. Keep the mirror in a cool, dry place. Regularly clean the device to avoid dust build-up.
Credit: learn.sparkfun.com
Enhancing Your Smart Mirror
Enhancing your smart mirror makes it more useful and fun. Small changes can bring big improvements. You can add features that suit your daily life. This section covers ways to upgrade your smart mirror.
Each option lets you customize the mirror for your needs. Choose what fits your style and tech comfort. Let’s explore some simple ways to boost your smart mirror’s power.
Adding Smart Home Integration
Connect your smart mirror to home devices like lights and thermostats. Control them with voice or touch through the mirror. Use popular systems like Alexa, Google Home, or Apple HomeKit. This lets you manage your home easily from one place.
Smart home integration makes your mirror part of a bigger system. It helps save time and effort in your daily routine.
Incorporating Ai Features
Use AI to add smart responses and learn your habits. AI can show weather updates, news, or reminders based on your schedule. Facial recognition can personalize information for each user. This makes your mirror feel smarter and more helpful.
AI features improve interaction and make the mirror more personal. They add a modern touch without much extra work.
Upgrading Hardware Components
Improve your mirror’s display with better screens or higher resolution. Add a faster processor for smoother performance. Install more sensors like motion detectors or temperature gauges. These hardware upgrades enhance speed and accuracy.
Better hardware supports new features and improves overall experience. It keeps your smart mirror up to date with modern tech.
Expanding Functionality With Apps
Install apps to add new tools and features. Weather, calendar, news, and fitness apps are popular choices. Some apps let you control music or watch videos. Choose apps that match your daily needs and interests.
Apps keep your smart mirror fresh and useful. They allow easy customization without changing the hardware.

Credit: learn.adafruit.com
Frequently Asked Questions
What Programming Languages Are Best For Smart Mirror Coding?
Python and JavaScript are the most popular languages for smart mirror projects. Python offers easy hardware integration. JavaScript enables dynamic web-based interfaces. Both have strong community support and extensive libraries, making them ideal for developing custom smart mirror features effectively.
How Do I Connect Sensors To A Smart Mirror?
Sensors connect to a smart mirror using microcontrollers like Raspberry Pi or Arduino. These devices read sensor data and send it to the mirror’s software. Common sensors include temperature, motion, and light sensors, enhancing mirror interactivity and personalized user experience.
Can I Add Voice Control To My Smart Mirror?
Yes, voice control can be added using APIs like Google Assistant or Amazon Alexa. Integrating voice recognition allows users to interact hands-free. This feature improves convenience and accessibility, making your smart mirror more user-friendly and advanced.
What Display Options Work For Smart Mirrors?
Two-way glass with an LCD or LED screen behind it is ideal. This setup lets the mirror display information while reflecting like a regular mirror. Choose high brightness displays for clear visibility in various lighting conditions.
Conclusion
Coding a smart mirror can be a fun and useful project. Start with simple steps and build your skills. Use clear code and test often to avoid errors. Add features that fit your needs and style. Enjoy seeing your mirror come to life with useful info.
Keep learning and improving your smart mirror over time. This project helps you practice coding and creativity. Give it a try and see what you create!