Imagine starting your day with a mirror that not only shows your reflection but also displays the weather, news, and your calendar—all at a glance. Installing a smart mirror might sound complicated, but with the right steps, you can easily transform your space into a high-tech hub.
If you want to add convenience and style to your home, this guide will walk you through everything you need to know. Keep reading, and by the end, you’ll be ready to install your very own smart mirror with confidence.
Choosing The Right Smart Mirror
Choosing the right smart mirror is the first step to a successful installation. The perfect mirror fits your needs and space. It also matches your style and budget. Understanding different types and features helps you pick the best option. Size and cost are key factors to weigh before buying.
Types Of Smart Mirrors
Smart mirrors come in various types. Some have built-in displays showing time, weather, and news. Others connect to your phone for music and calls. Some models include voice control for hands-free use. There are also mirrors with fitness tracking and health monitoring. Choose a type that suits your daily habits.
Key Features To Consider
Look for features that improve your experience. Touchscreen controls make navigation easy. Clear display brightness is important for visibility. Integration with smart home devices adds convenience. Waterproof or fog-resistant designs work well in bathrooms. Check if the mirror supports apps you want to use.
Budget And Size Options
Smart mirrors vary in price from affordable to premium. Smaller mirrors fit tight spaces and cost less. Larger mirrors offer more display area but need more room. Decide on a size that fits your wall space. Set a budget that matches the features you want. Balancing cost and size ensures satisfaction.
Gathering Necessary Tools And Materials
Starting a smart mirror project needs careful planning. Gathering the right tools and materials makes the process easier. It helps avoid delays and mistakes. This section lists everything needed before installation.
Essential Tools List
- Screwdriver set (Phillips and flathead)
- Power drill with drill bits
- Measuring tape
- Level tool
- Wire strippers
- Soldering iron (optional for wiring)
- Hot glue gun or mounting tape
- Safety goggles and gloves
- Stud finder for wall mounting
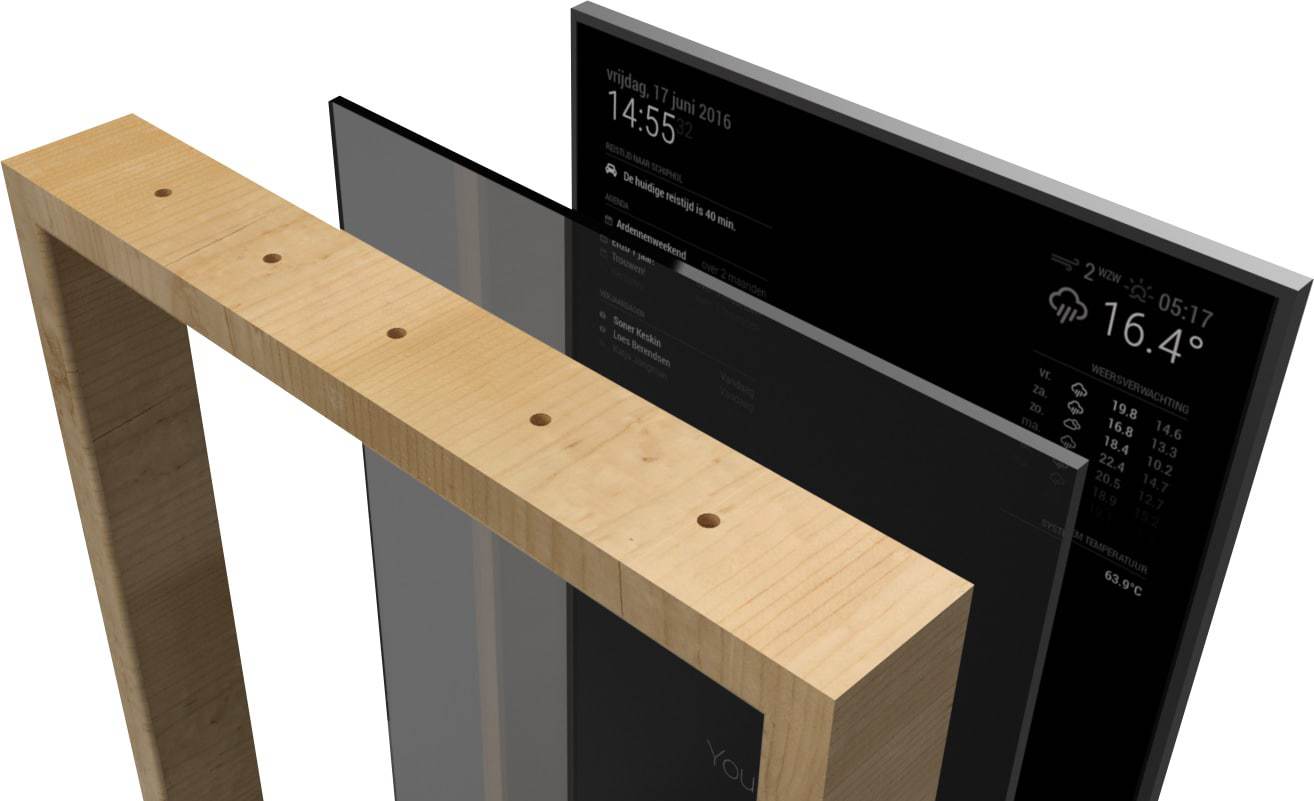
Smart Mirror Components
- Two-way mirror glass
- Monitor or tablet screen
- Frame or casing for the mirror
- Raspberry Pi or similar mini computer
- Power supply and cables
- Wi-Fi dongle or Ethernet cable
- Temperature and motion sensors (optional)
Additional Accessories
- USB keyboard and mouse for setup
- HDMI cables
- Heat sink or cooling fan for the computer
- Wall anchors and screws
- Cable management clips or sleeves
- Cleaning cloth for the mirror surface
Preparing The Installation Area
Preparing the installation area is the first step to install your smart mirror. A clean and well-measured space ensures a smooth setup. Taking time now saves effort later. Follow these simple steps to get ready.
Selecting The Location
Choose a wall with enough space for your smart mirror. Pick a spot where the mirror can be seen easily. Avoid places with direct sunlight to reduce glare. Ensure there is a nearby power outlet for the mirror’s plug. The location should be free from moisture and extreme temperatures.
Measuring And Marking
Measure the mirror’s size carefully before starting. Use a tape measure to get exact dimensions. Mark the wall with a pencil where the mirror’s edges will go. Check that marks are level using a spirit level. Double-check your marks to avoid mistakes.
Surface Preparation Tips
Clean the wall to remove dust and dirt. Use a damp cloth and let it dry fully. Repair any cracks or holes with filler. Sand the surface smooth if needed. A flat, clean wall helps the mirror stick well and stay secure.
Installing The Smart Mirror Hardware
Installing the smart mirror hardware is the next important step after gathering all parts. This process involves fixing the mirror to the wall and organizing the cables. Proper hardware installation ensures the mirror stays safe and looks clean.
Take your time with each step. A well-installed mirror works better and lasts longer.
Mounting Brackets Setup
Start by attaching the mounting brackets to the wall. Use a level to keep them straight. Mark the spots with a pencil before drilling holes. Choose screws that fit the wall type. Attach brackets firmly to hold the mirror’s weight.
Securing The Mirror
Lift the smart mirror carefully. Align it with the mounted brackets. Slide or hook it into place as per the design. Double-check that the mirror is stable. It should not wobble or shift after installation.
Cable Management
Organize the cables behind the mirror. Use cable clips or ties to bundle them neatly. Hide cables inside the wall if possible. Keep power cords away from water sources. Proper cable management improves safety and appearance.
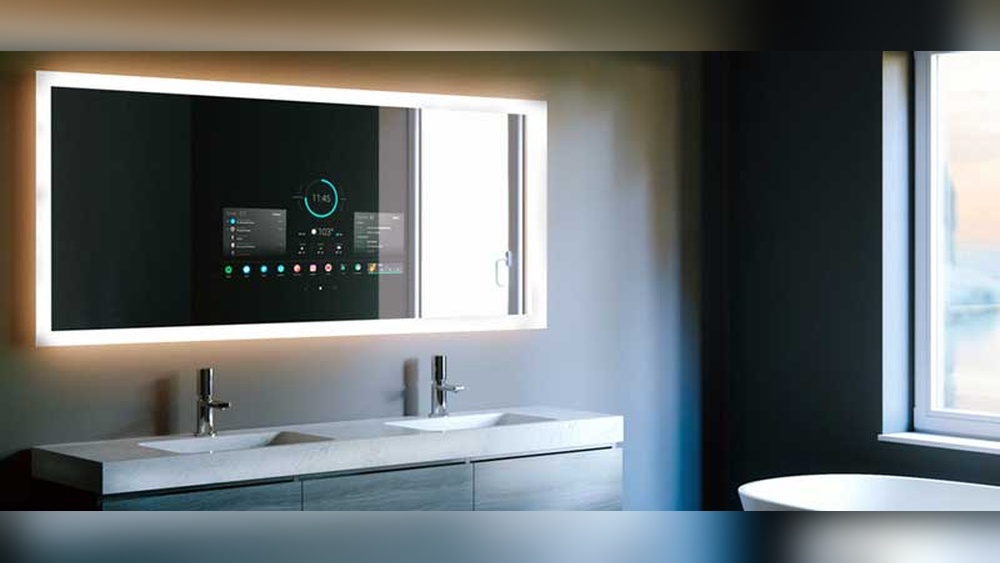
Connecting The Smart Features
Connecting the smart features is a key step in setting up your smart mirror. These features make your mirror interactive and useful. You will link it to power, connect it to networks, and sync it with your devices. Each step ensures smooth operation and full functionality.
Power Supply Setup
Start by plugging the power adapter into a wall outlet. Use the cable that comes with the smart mirror. Check the connection to the mirror’s power port. Make sure the power source is stable to avoid interruptions. Turn on the mirror to see if it lights up. This confirms the power setup works correctly.
Wi-fi And Bluetooth Configuration
Open the mirror’s settings menu on the touchscreen. Find the Wi-Fi option and select your network name. Enter your Wi-Fi password carefully to connect. Next, enable Bluetooth in the settings. This lets the mirror communicate with other devices. Keep both connections active for best performance.
Syncing With Devices
Use Bluetooth to pair your smartphone or tablet with the mirror. Follow the on-screen prompts to complete pairing. Sync apps like calendars, weather, and music for convenience. Check that notifications appear on the mirror’s display. This step links your devices and enhances your smart mirror’s use.

Credit: verconsmartmirror.com
Customizing Smart Mirror Settings
Customizing your smart mirror settings helps you create a personal experience. You can change how the display looks, add apps, and even use voice commands. These options make your smart mirror more useful every day.
Adjusting Display Preferences
Start by setting the brightness to match your room light. Choose a color theme that feels comfortable for your eyes. You can also select what information shows on the screen, like weather, news, or calendar events. This keeps your mirror clear and easy to read.
Installing Useful Apps
Apps add extra features to your smart mirror. Look for apps that show daily news, fitness trackers, or reminders. Install only the ones you need to keep the mirror fast and simple. Updating apps regularly helps them work well and stay secure.
Voice Control Integration
Voice control lets you use your mirror hands-free. Connect your mirror to a voice assistant like Alexa or Google Assistant. Practice simple commands to check the weather or play music. This makes the smart mirror easy to use while you get ready.
Troubleshooting Common Issues
Troubleshooting common issues is key for a smooth smart mirror experience. Problems may arise during or after installation. Identifying these issues early helps fix them fast. This guide covers common problems and easy solutions.
Connectivity Problems
Smart mirrors rely on Wi-Fi or Bluetooth to work well. Check your internet connection first. Restart the router and smart mirror to refresh the link. Make sure the device is within range of the network. Update the mirror’s software to fix bugs. Remove any interference from other electronics nearby. Reset network settings if the connection stays weak.
Display Malfunctions
The display might flicker, freeze, or show no image. Clean the screen gently to remove dust and smudges. Adjust brightness and contrast settings for clear viewing. Restart the mirror to clear temporary glitches. Check cables and connectors for loose or damaged parts. Replace the display panel if problems continue after simple fixes.
Power And Hardware Fixes
Power issues can cause the mirror to turn off or fail to start. Confirm the power source is working properly. Use a different outlet to test the power supply. Inspect the power cable for cuts or frays. Tighten loose connections inside the mirror frame. If hardware parts feel hot or smell burnt, stop use and seek professional help.
Credit: www.twowaymirrors.com
Maintaining Your Smart Mirror
Maintaining your smart mirror keeps it working well and looking great. Proper care helps avoid problems and extends its life. Follow simple steps to keep your smart mirror in top shape.
Cleaning Tips
Use a soft, dry cloth to clean the mirror surface. Avoid harsh chemicals that can damage the screen or glass. For stubborn spots, dampen the cloth slightly with water. Wipe gently in circular motions to prevent scratches. Clean regularly to keep the display clear and bright.
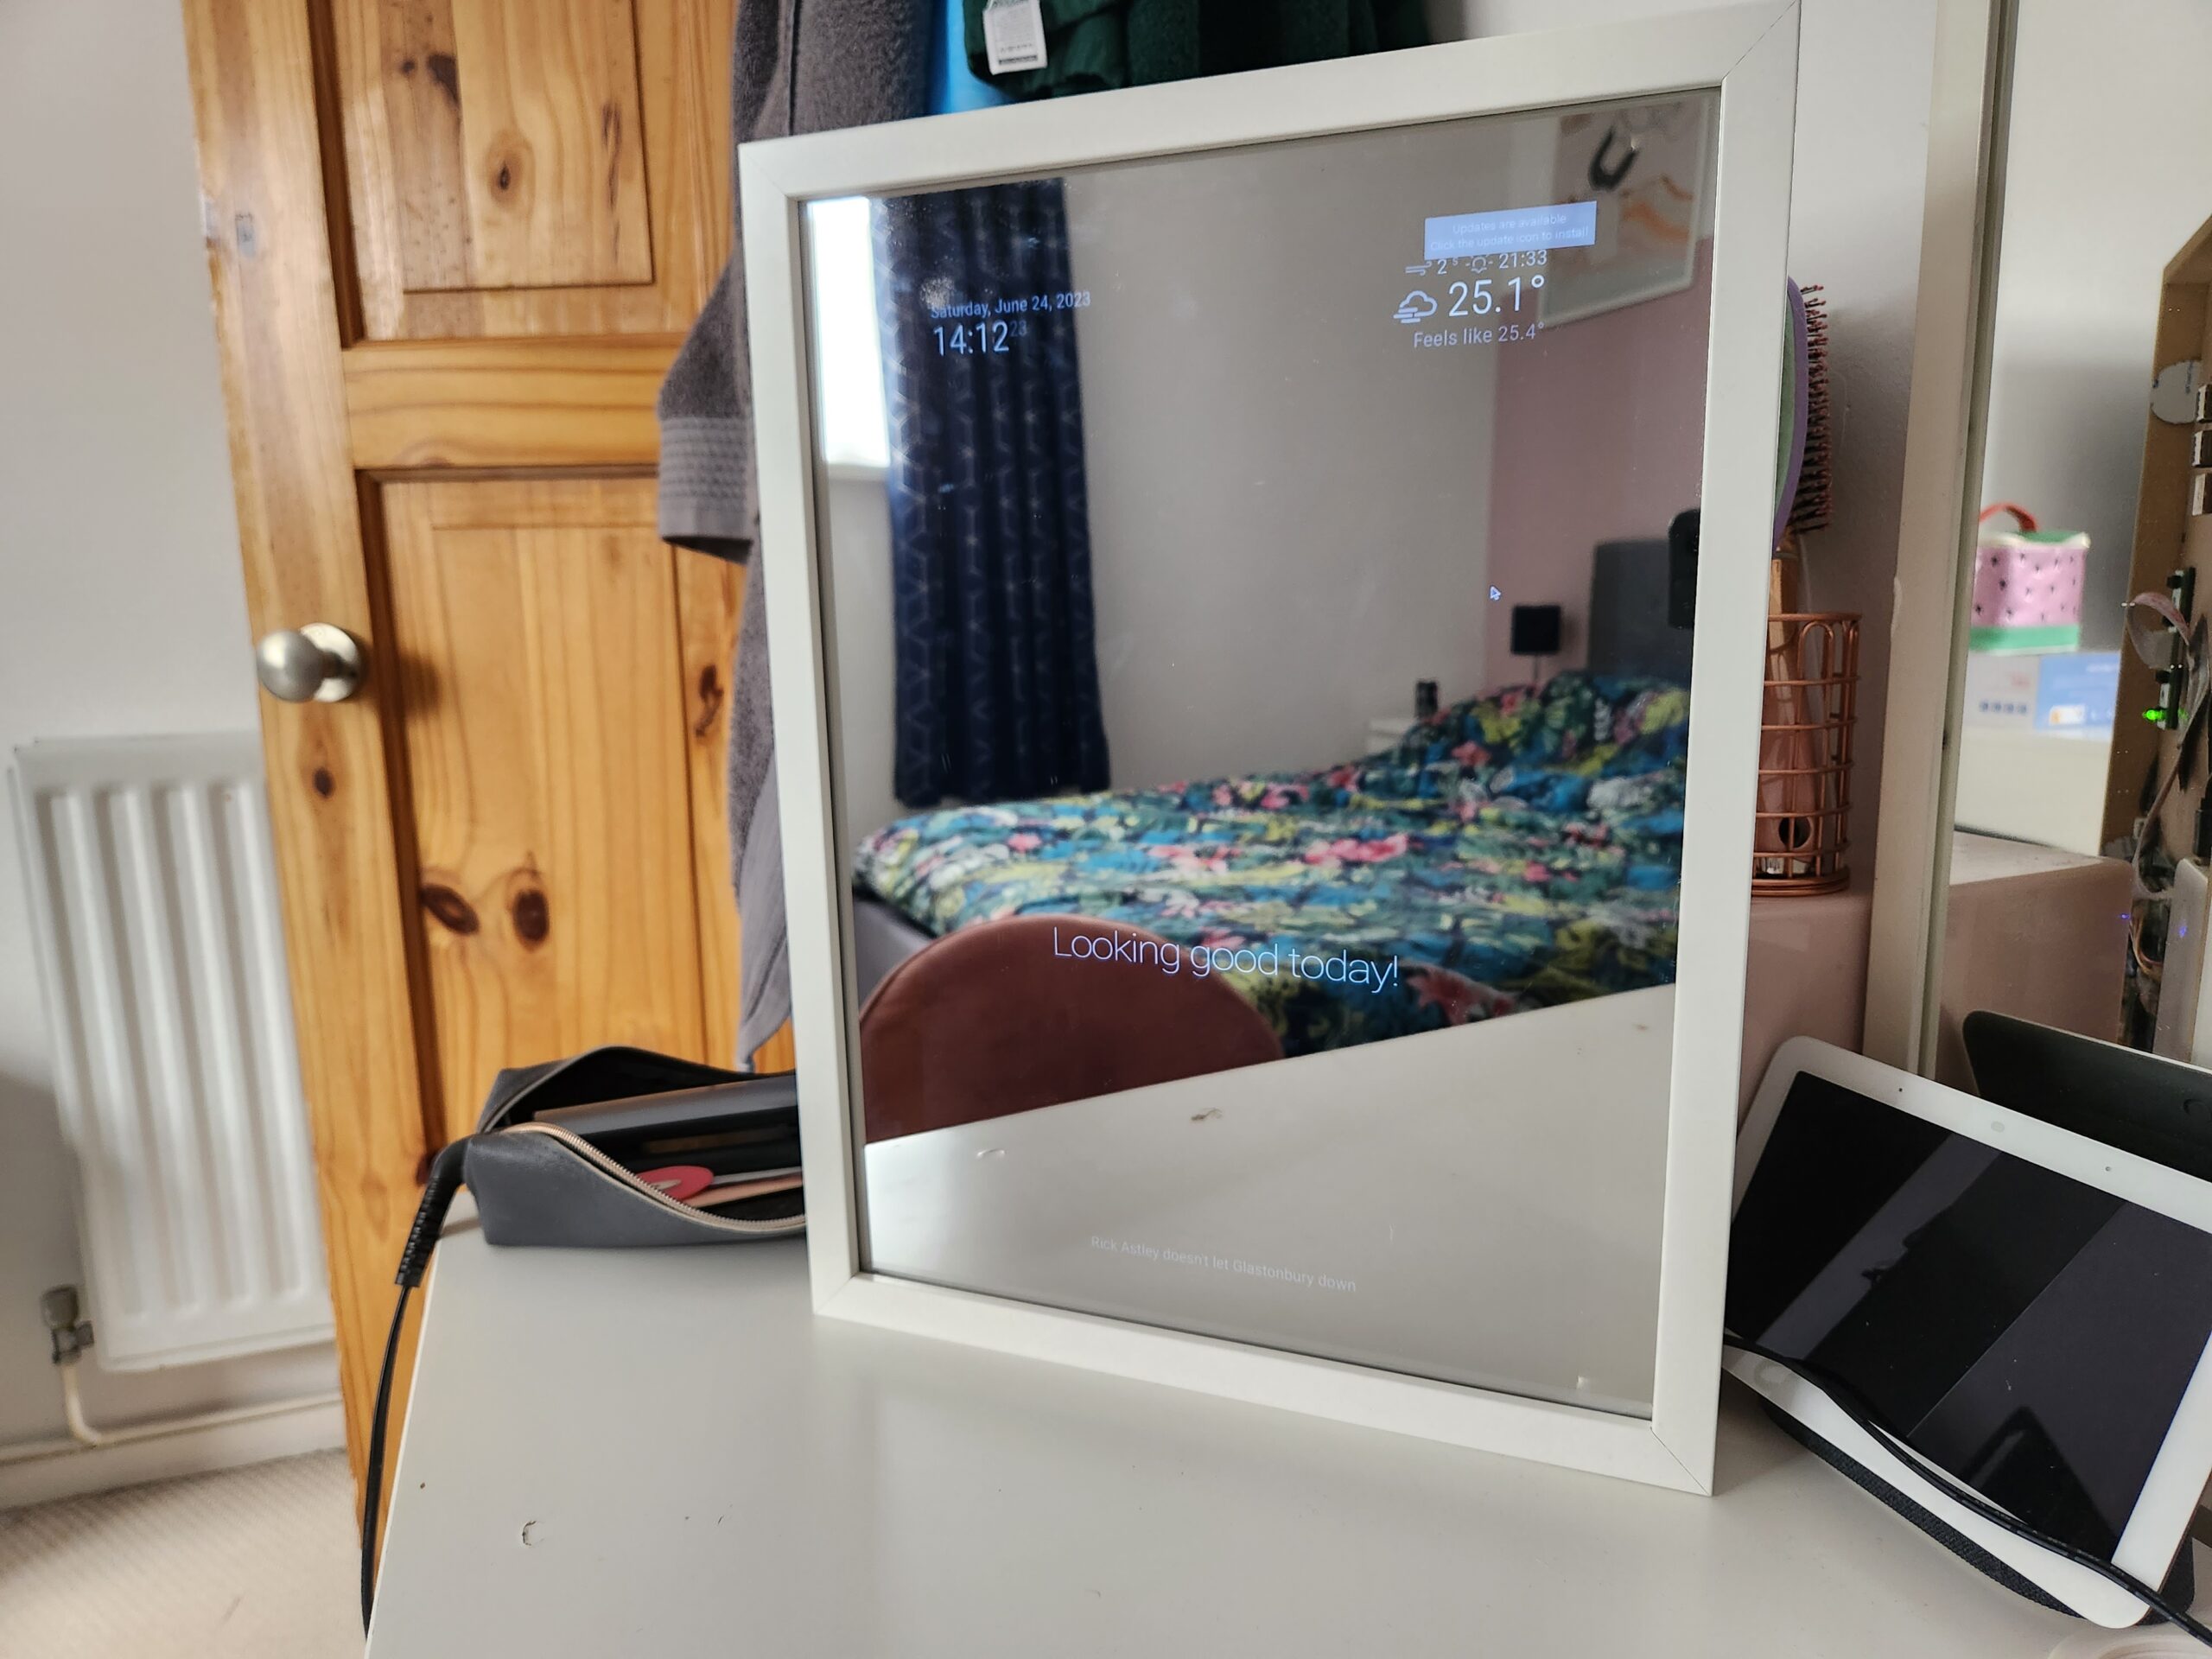
Software Updates
Check for software updates often. Updates fix bugs and improve performance. Connect the mirror to Wi-Fi to download updates automatically. Restart the mirror after updating to apply changes. Stay up to date to enjoy new features and smooth operation.
Extending Mirror Lifespan
Place the smart mirror away from direct sunlight and moisture. Avoid extreme temperatures that can harm electronic parts. Turn off the mirror when not in use to save power. Handle the mirror carefully to prevent damage. Regular maintenance helps your smart mirror last longer.
Credit: jayparry.me
Frequently Asked Questions
What Tools Are Needed To Install A Smart Mirror?
You need a screwdriver, drill, level, measuring tape, and mounting hardware. A smart mirror kit often includes some essential parts. Ensure you have all tools ready before starting installation for a smooth process.
How Do I Connect A Smart Mirror To Wi-fi?
Access the mirror’s settings menu and select Wi-Fi options. Choose your network and enter the password. Ensure your Wi-Fi signal is strong for stable connectivity and smooth performance.
Can I Install A Smart Mirror Myself?
Yes, most smart mirrors are designed for DIY installation. Follow the provided instructions carefully. Basic tools and some technical skills are helpful but not always necessary for installation.
How Do I Mount A Smart Mirror On The Wall?
Locate wall studs and mark mounting points using a level. Use appropriate anchors or screws for secure attachment. Follow the manufacturer’s guide to avoid damage and ensure stability.
Conclusion
Installing a smart mirror can improve your daily routine. Follow the steps carefully for best results. Choose a good spot with easy access to power. Connect all parts securely and test the system before final use. Enjoy the blend of technology and style in your space.
Stay patient and take your time during installation. You will feel proud of your work once it’s done. A smart mirror adds convenience and modern touch to any room. Keep maintenance simple by cleaning and updating the software regularly.