Are your LED Christmas light strings flickering or not lighting up at all? Before you toss them out and spend money on new ones, there’s a good chance you can fix them yourself.
Imagine saving time and money while bringing back the festive glow to your home. In this guide, you’ll discover simple, step-by-step ways to repair your LED lights—even if you’re not an expert. Keep reading, and by the end, you’ll have the confidence to get your holiday decorations shining bright again.
Credit: www.ifixit.com
Common Issues With Led Light Strings
LED Christmas light strings brighten homes during the holiday season. They last long but can face common issues. Knowing these problems helps fix the lights fast. This saves money and keeps your decoration shining.
Burnt Out Bulbs
Burnt out bulbs are the top cause of light string failure. Even one dead bulb can turn off the whole string. LED bulbs may burn out from age or power surges. Check bulbs carefully for dark spots or broken filaments. Replace any burnt bulbs with the right size and type.
Broken Wires And Connectors
Wires can break from bending or pulling the string. Connectors may loosen or corrode over time. These issues stop electricity flow and darken the lights. Inspect wires for cuts or damage. Tighten or clean connectors to restore good contact. Use electrical tape to cover small wire breaks.
Power Source Problems
Power problems stop lights from working. Check the plug and outlet first. Loose plugs or bad sockets cause power loss. Test the outlet with another device to be sure. Sometimes a blown fuse or tripped circuit breaker blocks power. Fix or replace faulty power sources to get lights glowing again.

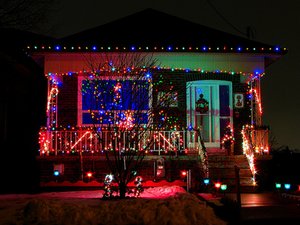
Credit: www.cranchi.com
Tools Needed For Repairs
Fixing LED Christmas light strings needs the right tools. Having these tools ready makes repair easier. It saves time and helps you avoid mistakes. This section covers the main tools you need. Follow along to prepare your repair kit.
Basic Electrical Tools
You need a few basic electrical tools. A multimeter helps check for electrical problems. Wire cutters trim damaged wires cleanly. A small screwdriver set opens light casings carefully. Needle-nose pliers hold tiny parts during repair. Electrical tape insulates exposed wires safely.
Replacement Parts
Keep some replacement parts on hand. Spare LED bulbs match your light string model. Extra fuses protect the circuit from damage. Replacement wires fix broken sections. Connectors join wires when splicing is necessary. Having these parts ready speeds up the repair.
Safety Equipment
Safety is important during repairs. Wear insulated gloves to avoid shocks. Safety glasses protect your eyes from sparks. Work in a dry area to prevent accidents. Use a non-conductive mat under your workspace. These safety steps keep you safe and confident.
Diagnosing The Problem
Before fixing your LED Christmas light strings, find out what causes the problem. Diagnosing helps save time and effort. It points out the exact issue. Follow simple steps to check the lights carefully.
Visual Inspection
Look at the light string closely. Check for broken or missing bulbs. See if wires are frayed or damaged. Notice any dark spots or burn marks. These signs show where the problem may be. Clean dirt or dust from bulbs and sockets. This can improve the connection.
Testing Bulbs And Fuses
Test each bulb to find the faulty one. Replace bulbs that look dull or do not light up. Use a bulb tester if you have one. Check the fuse inside the plug or control box. If the fuse is blown, replace it with the same type. A bad fuse stops the whole string from working.
Checking The Power Supply
Make sure the power source is working well. Plug the lights into a different outlet. Try another device in the same outlet to test it. Check the plug and cord for damage. A loose or broken connection can stop the lights. Fix or replace any faulty parts to restore power.

Credit: www.youtube.com
Fixing Burnt Out Or Broken Bulbs
Fixing burnt out or broken bulbs is a common task for LED Christmas light strings. These bulbs often stop working due to damage or electrical issues. Repairing them can save money and reduce waste. It also keeps your decorations bright and festive. The process involves finding the faulty bulbs and replacing them carefully. This section explains how to do it step-by-step.
Identifying Faulty Bulbs
Start by unplugging the light string for safety. Check each bulb closely for signs of damage. Look for dark spots or broken glass. A burnt-out bulb may appear dull or blackened. Some LED strings have a test feature to spot bad bulbs. If the whole string is out, one bad bulb might be the cause. Remove bulbs one by one until the faulty one is found.
Replacing Individual Bulbs
Use the right replacement bulbs for your light string. Match the size, voltage, and color exactly. Gently pull out the old bulb without twisting hard. Insert the new bulb firmly but carefully. Make sure it fits snugly in the socket. After replacement, plug the string in to test the new bulb. Replace bulbs in small sections to avoid confusion.
Using Replacement Kits
Many LED Christmas lights come with a replacement kit. These kits include spare bulbs and a tool for removal. Follow the instructions inside the kit for best results. Use the tool to avoid damaging the sockets. Kits save time and effort during repairs. Keep the kit handy for quick fixes each season.
Repairing Damaged Wires And Connectors
Repairing damaged wires and connectors is key to fixing LED Christmas light strings. Small breaks or loose connectors stop the lights from glowing. Fixing these parts saves money and keeps your decorations bright. This section shows easy ways to find and fix wire problems. You need simple tools and a bit of patience.
Locating Wire Breaks
First, check the entire wire for damage. Look for cuts, frays, or worn spots. Bend the wire gently to see if lights flicker. Flickering shows a break nearby. Use a multimeter to test wire sections for electricity. The meter tells if current flows through each part. Mark broken spots with tape or a marker. This makes repairs easier and faster.
Soldering And Reconnecting Wires
Cut away damaged wire parts with scissors or wire cutters. Strip about half an inch of insulation from both wire ends. Twist the wire strands tightly to prepare for soldering. Heat the soldering iron and apply solder to join wires. The solder melts and connects the wires firmly. Let the solder cool before moving the wire. This creates a strong, lasting connection.
Using Electrical Tape And Heat Shrink Tubing
Cover soldered wires with electrical tape to protect them. Wrap tape tightly so no metal shows. Heat shrink tubing fits over wires for extra safety. Slide tubing over the soldered area before soldering. After soldering, move tubing back over the joint. Use a heat gun or hair dryer to shrink the tubing. This seals and insulates the connection well.
Addressing Power Supply Issues
Power supply issues often cause LED Christmas light strings to stop working. Checking the power source is the first step to fix the problem. Small faults in plugs, fuses, or transformers can stop the lights from turning on. Troubleshooting these parts can bring the lights back to life quickly.
Testing The Plug And Outlet
Start by examining the plug for damage or loose connections. Look for bent or broken prongs. Try the plug in a different outlet to see if the lights work there. Use a voltage tester to check if the outlet supplies power. No power means the outlet or circuit breaker might be the issue.
Replacing Fuses
Many LED light strings have small fuses inside the plug. These fuses protect the lights from power surges. Open the fuse compartment carefully. Remove the old fuse and check if the wire inside is broken. Replace it with a fuse of the same type and rating. Test the lights again after replacing the fuse.
Handling Transformer Problems
Some LED strings use a transformer to change voltage. A faulty transformer can stop lights from working. Check the transformer for signs of damage or overheating. Use a multimeter to test its output voltage. Replace the transformer if the voltage is too low or missing. This can restore power to the entire string.
Preventive Tips For Longevity
Taking care of LED Christmas light strings helps them last longer and work better. Small habits can prevent damage and save you time and money. Follow these tips to keep your lights bright season after season.
Proper Storage Techniques
Store lights in a cool, dry place to avoid moisture damage. Use a spool or a reel to wrap the strings neatly. Avoid tight knots or sharp bends that can break wires. Keep lights away from heavy items that may crush them.
Regular Maintenance Checks
Check lights before each use for broken bulbs or frayed wires. Replace damaged bulbs quickly to avoid short circuits. Test the entire string to find any flickering or dim sections. Clean the lights with a soft cloth to remove dust and dirt.
Avoiding Overloading Circuits
Do not connect too many light strings to one outlet. Overloading can cause overheating and damage the lights. Use power strips with built-in circuit breakers for safety. Follow manufacturer limits for the number of connected strings.
Frequently Asked Questions
How Do I Identify Faulty Bulbs In Led Christmas Lights?
Check for bulbs that are dim, broken, or missing. Use a bulb tester or replace suspected bulbs one by one. Faulty bulbs often cause sections to go dark, so finding and replacing them restores the entire string’s function effectively.
What Tools Are Needed To Repair Led Light Strings?
Common tools include a multimeter, needle-nose pliers, replacement bulbs, and electrical tape. These tools help test electrical continuity, remove damaged bulbs, and secure repairs safely, ensuring your LED Christmas lights work properly again.
Can I Fix Led Light Strings With Broken Wires?
Yes, carefully strip the wire ends, twist them together, and insulate with electrical tape. Ensure connections are tight and secure to prevent shorts. Proper wire repair restores power flow and lights your LED string efficiently.
Why Do Some Led Christmas Lights Not Light Up?
This often happens due to blown bulbs, broken wires, or faulty fuses. Inspect bulbs and wiring carefully. Replace any damaged parts and check the fuse to restore power and functionality to your LED light string.
Conclusion
Repairing LED Christmas light strings saves money and reduces waste. Small fixes can bring lights back to life quickly. Checking bulbs and connections helps find the problem fast. Always work carefully to avoid damage or electric shock. With patience, your lights can shine bright again this season.
Enjoy decorating without buying new strings every year. Simple steps make holiday lighting stress-free and fun. Keep these tips handy for future repairs too. Brighten your home with glowing, fixed LED lights tonight.